Your Microsoft 365 tenant can leak data silently - no malware, no alerts. Learn how simple misconfigurations enable ongoing email and data exfiltration.
Managing devices can feel overwhelming.
Most organizations support company laptops, personal phones, and shared tablets.
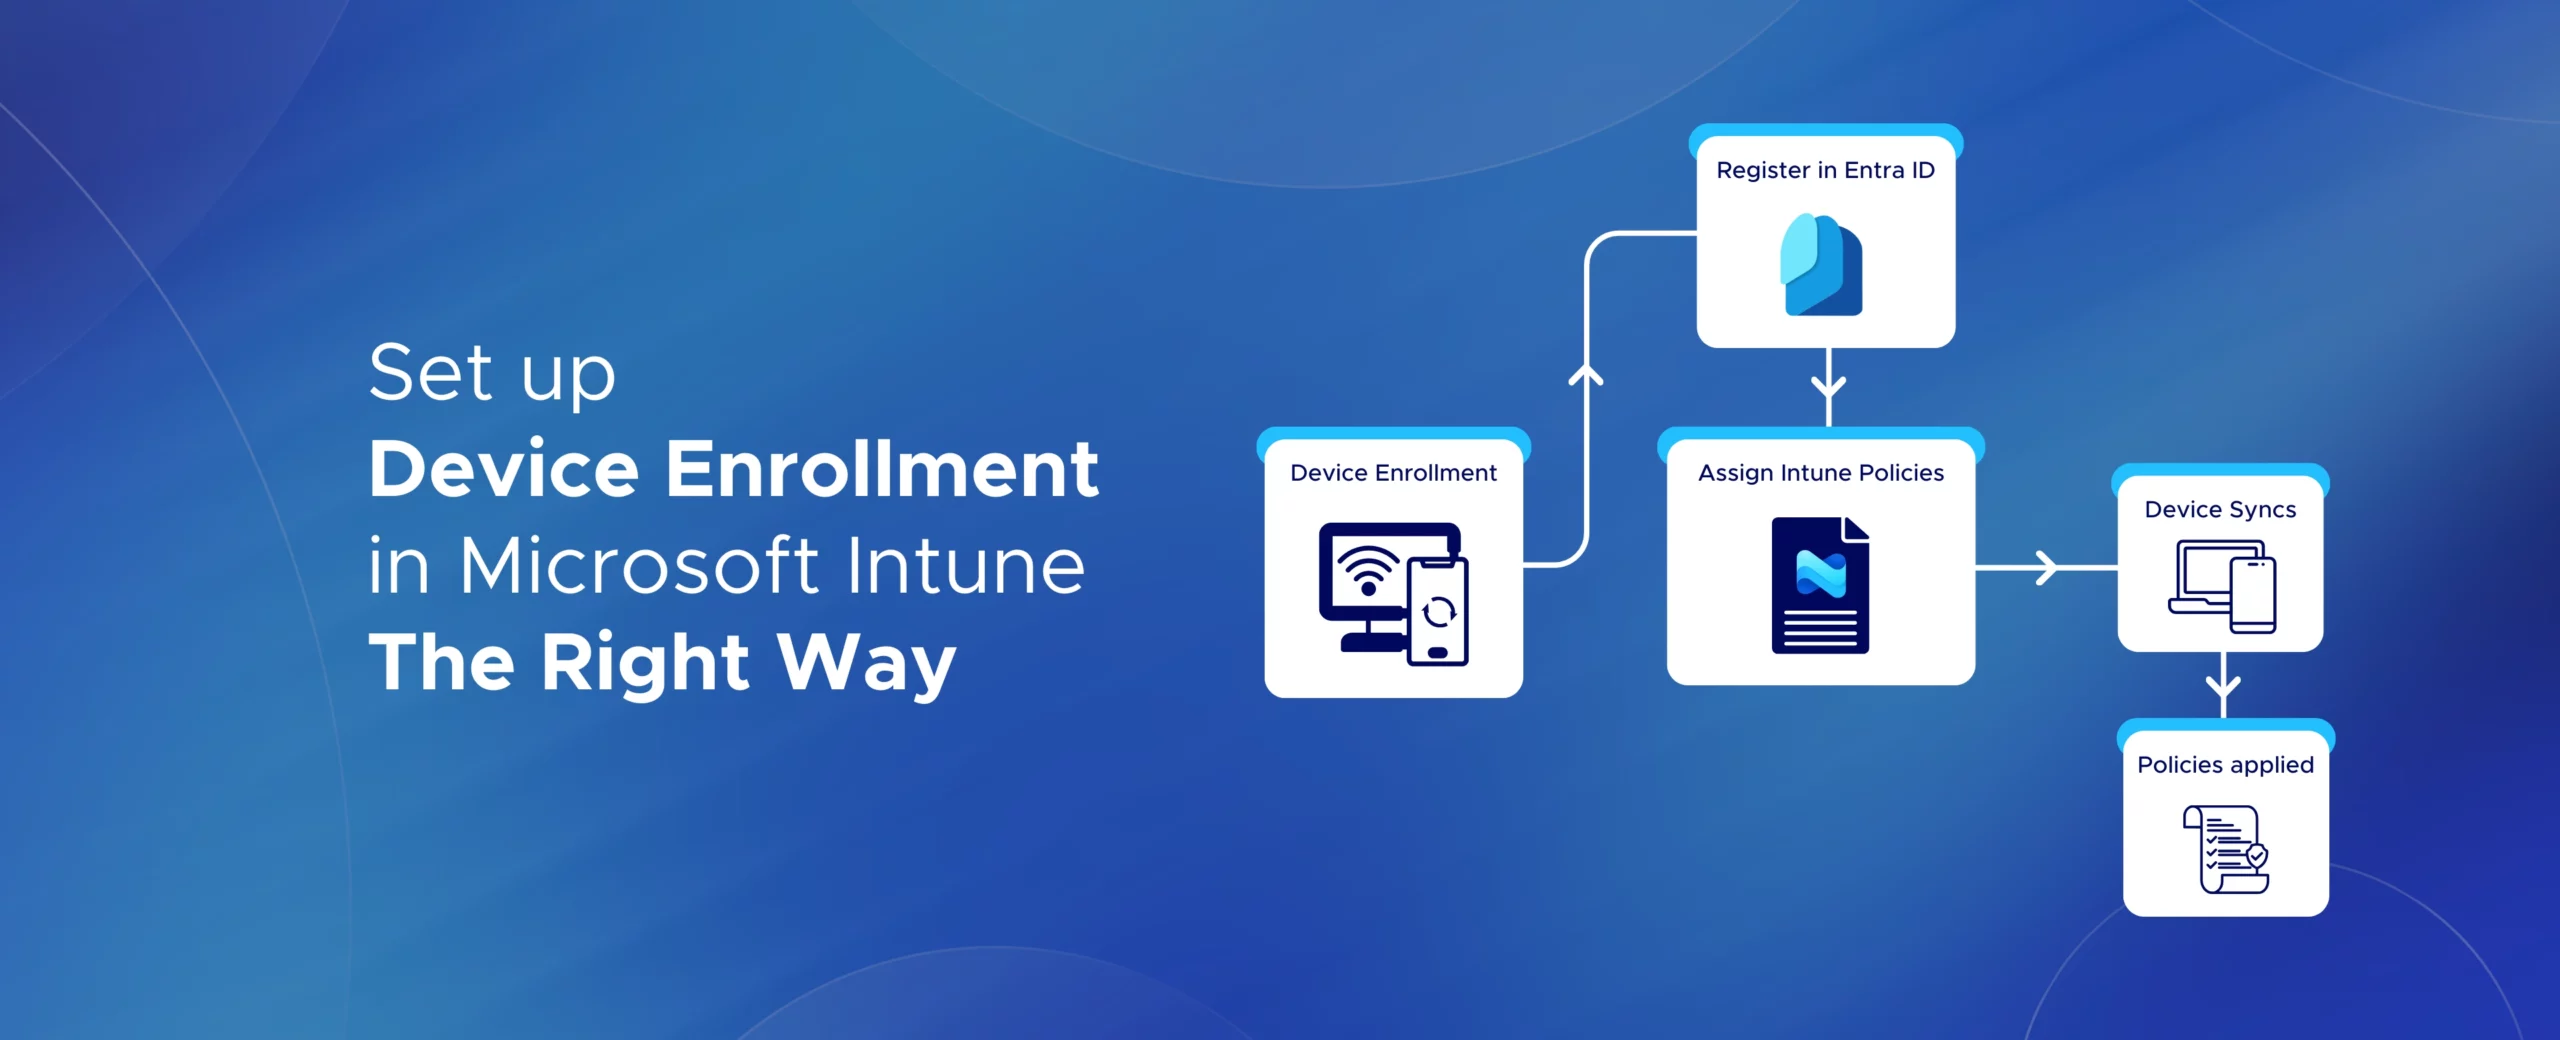
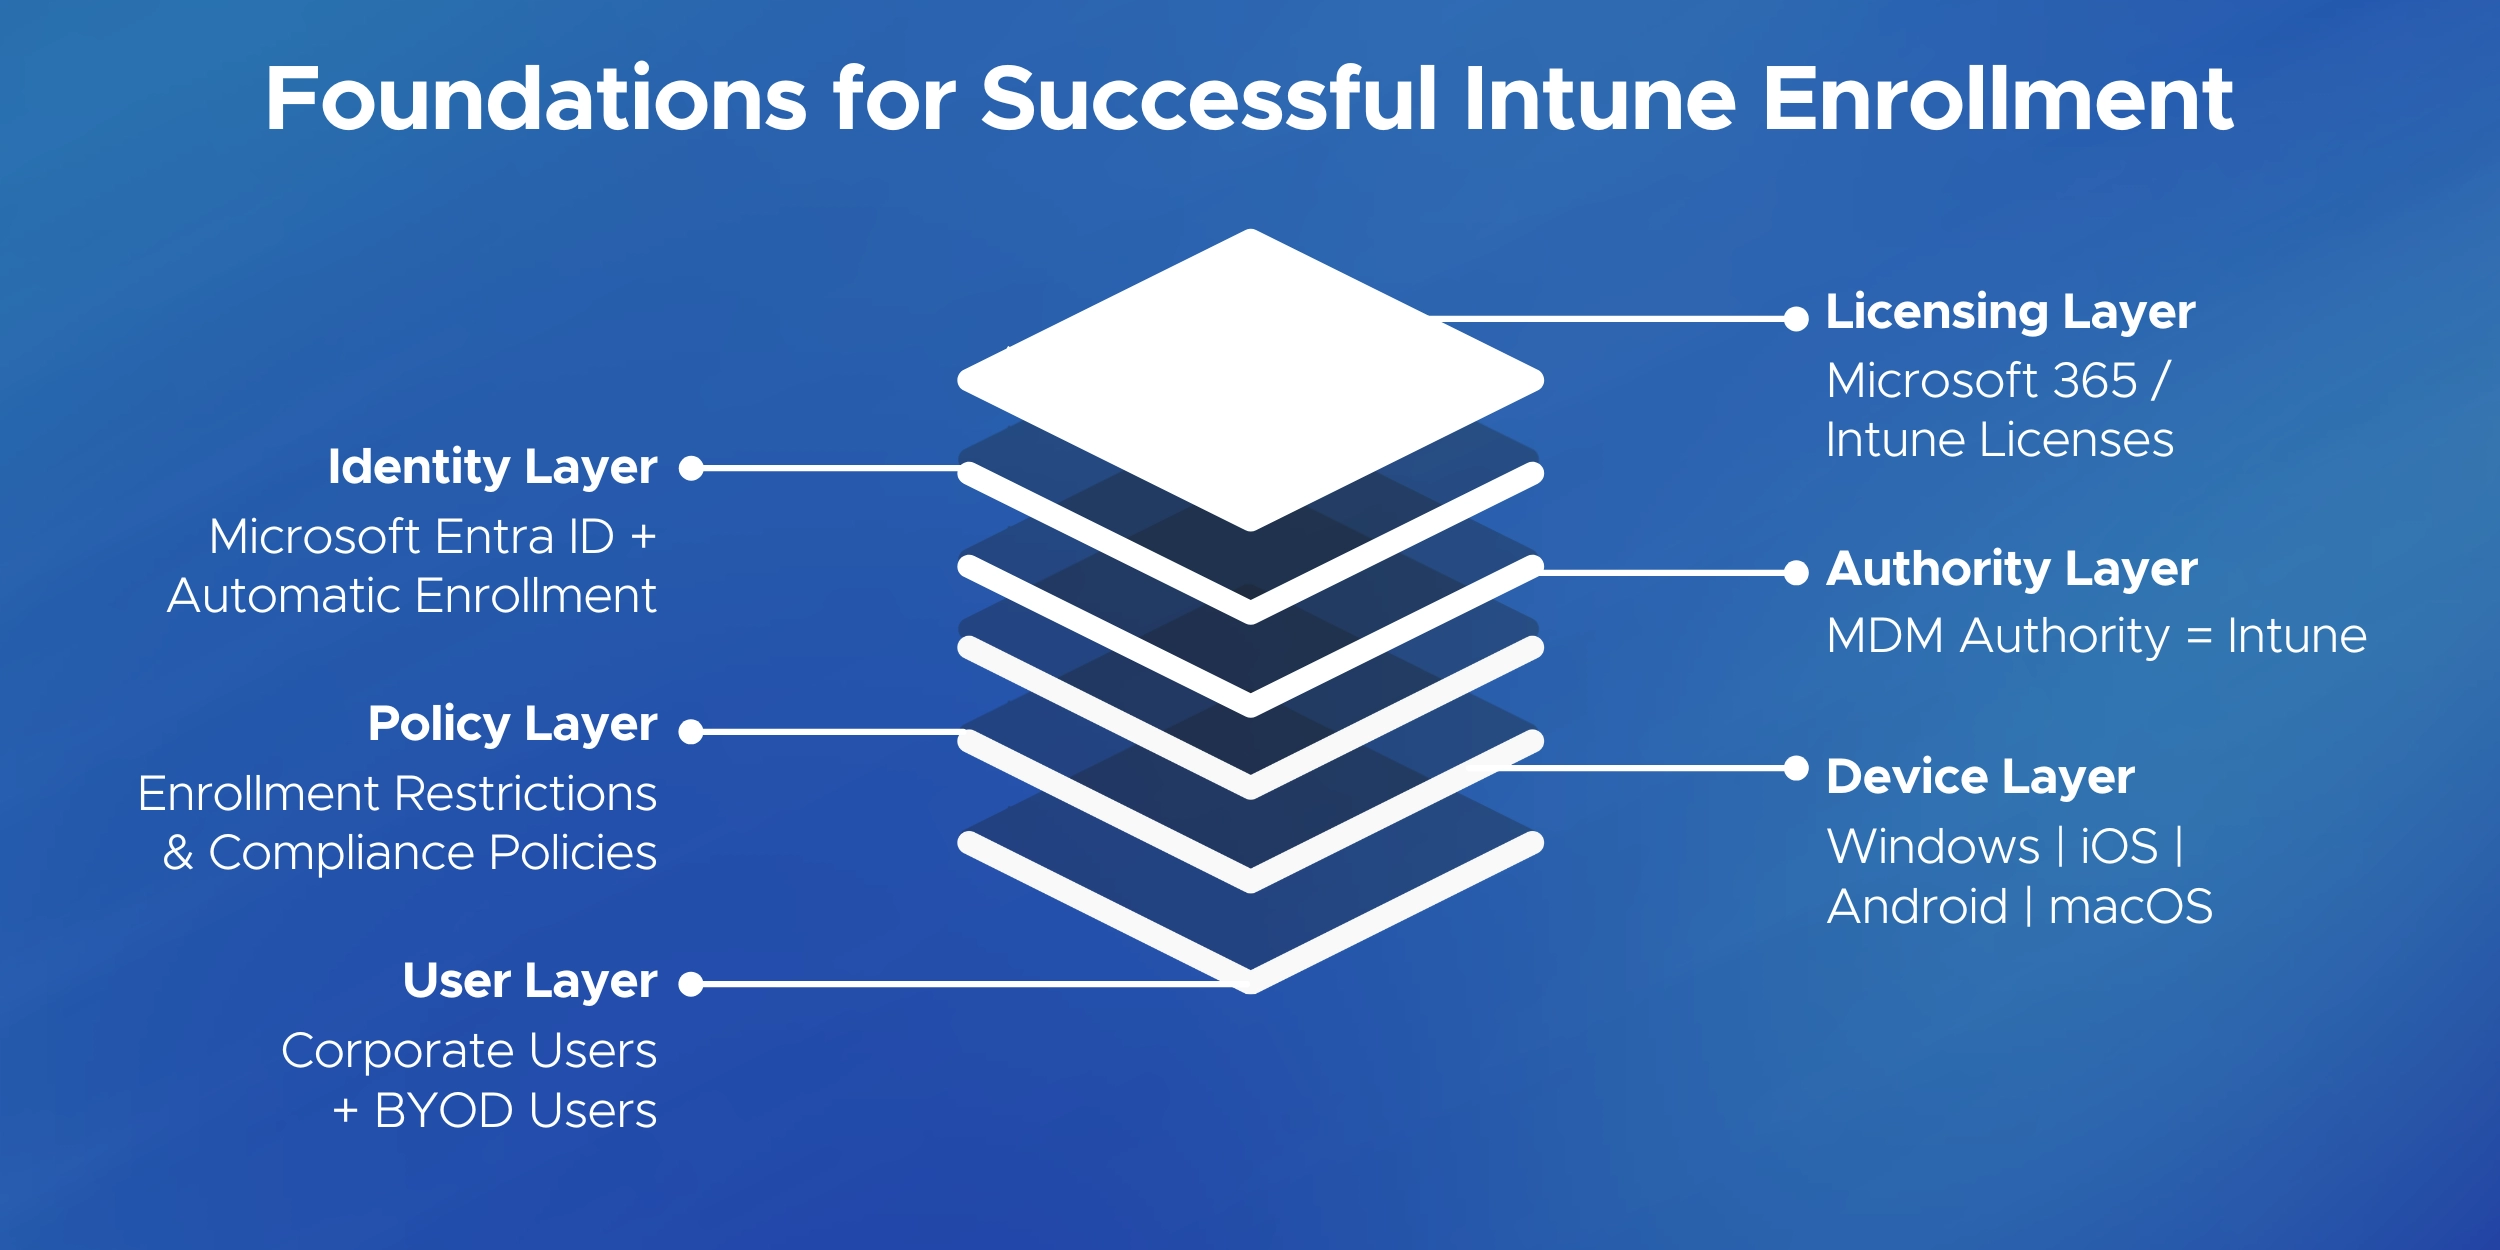
Microsoft Intune device enrollment makes this manageable, but only when the Intune enrollment setup is done correctly.
A poor setup often leads to user frustration and security gaps.
In this guide, you’ll learn how to enroll devices in Intune step by step.
We’ll cover Windows, iOS, Android, and macOS in clear, simple language.
You’ll also learn how to choose the right enrollment method for different scenarios.
This includes corporate-owned devices and BYOD (Bring Your Own Device).
Before enrolling devices in Microsoft Intune, make sure your environment is ready. A few quick checks can prevent common enrollment errors.
Once these basics are configured, you’re ready to start enrolling devices.
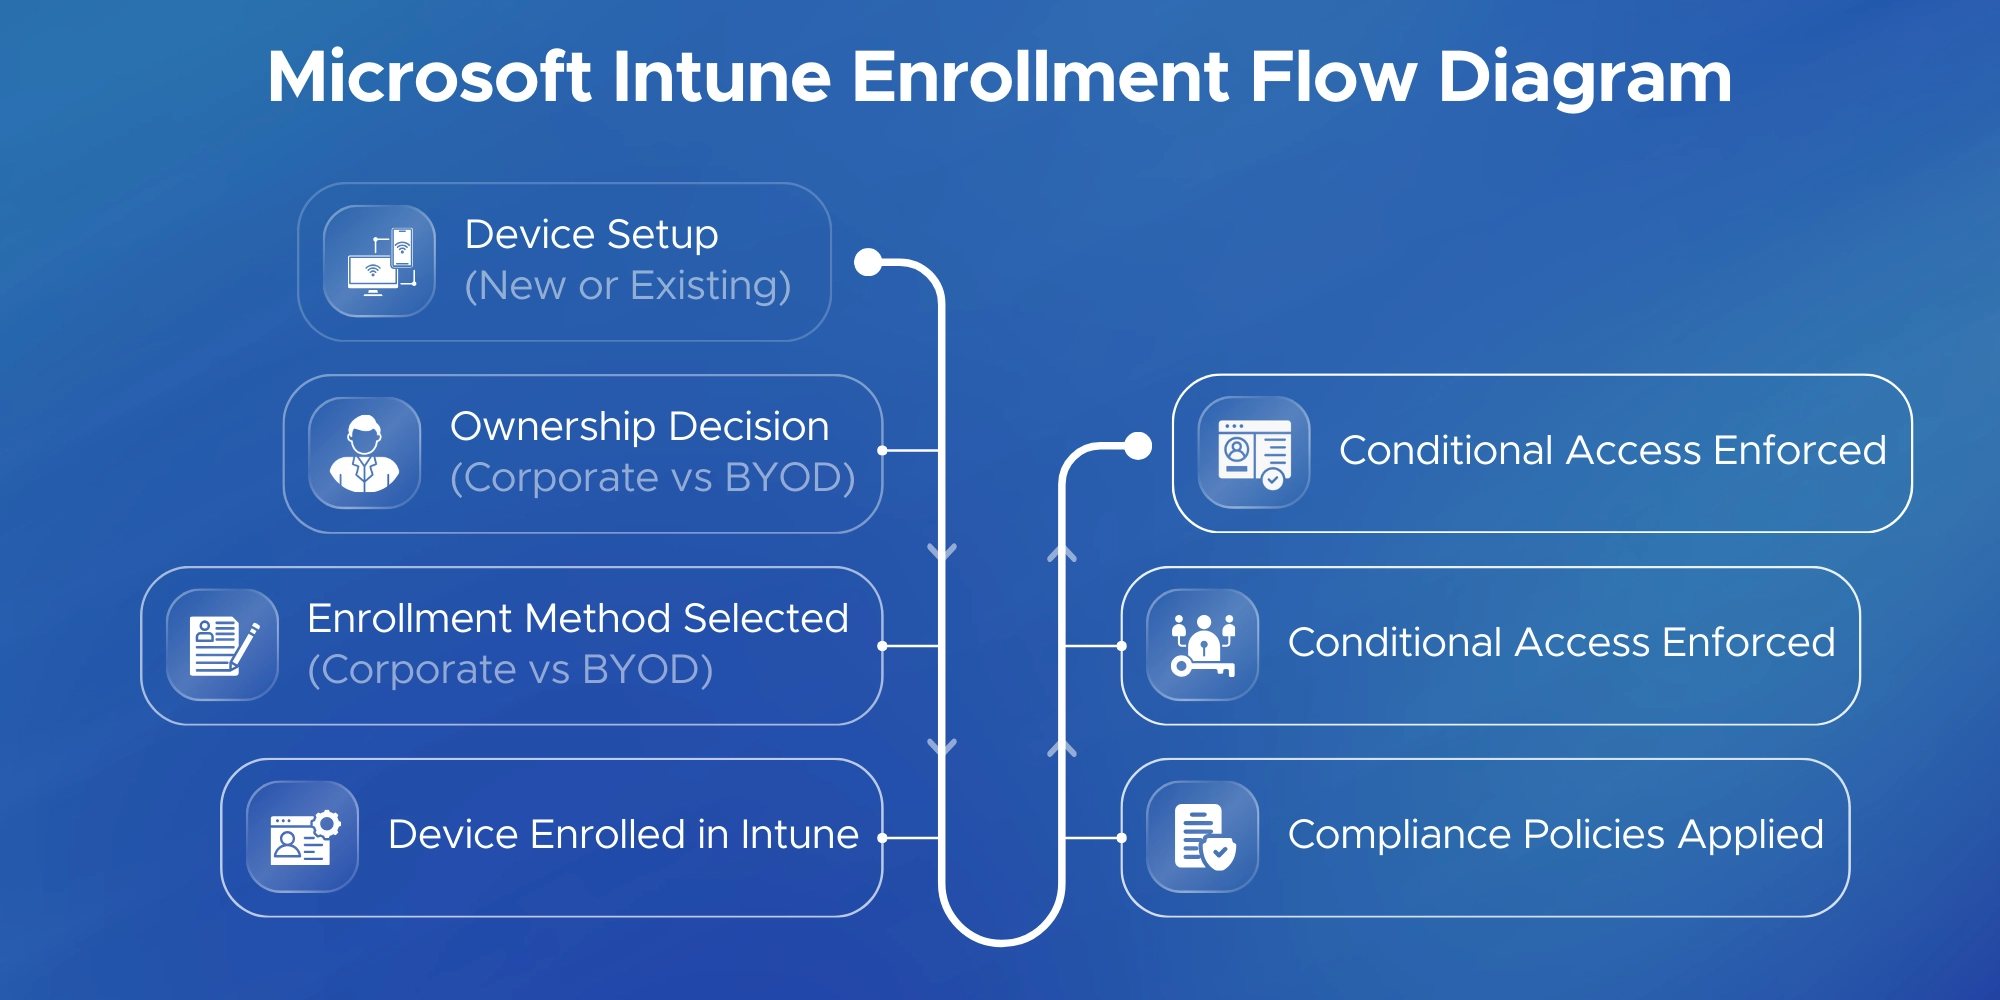
Microsoft Intune supports multiple enrollment methods.
Each method is designed for a specific device type and ownership model.
This overview provides a quick guide to Intune enrollment methods.
Detailed steps for each option are covered in the sections that follow.
Use these methods for company-owned devices.
Use these methods for personal devices.
Corporate-owned devices give IT full control.
These enrollment methods are best when the organization owns the hardware.
This is the primary method for enrolling corporate Windows devices.
Use it for new laptops or when re-setting up an existing one.
New Device (Out-of-Box Experience)
Verify Enrollment
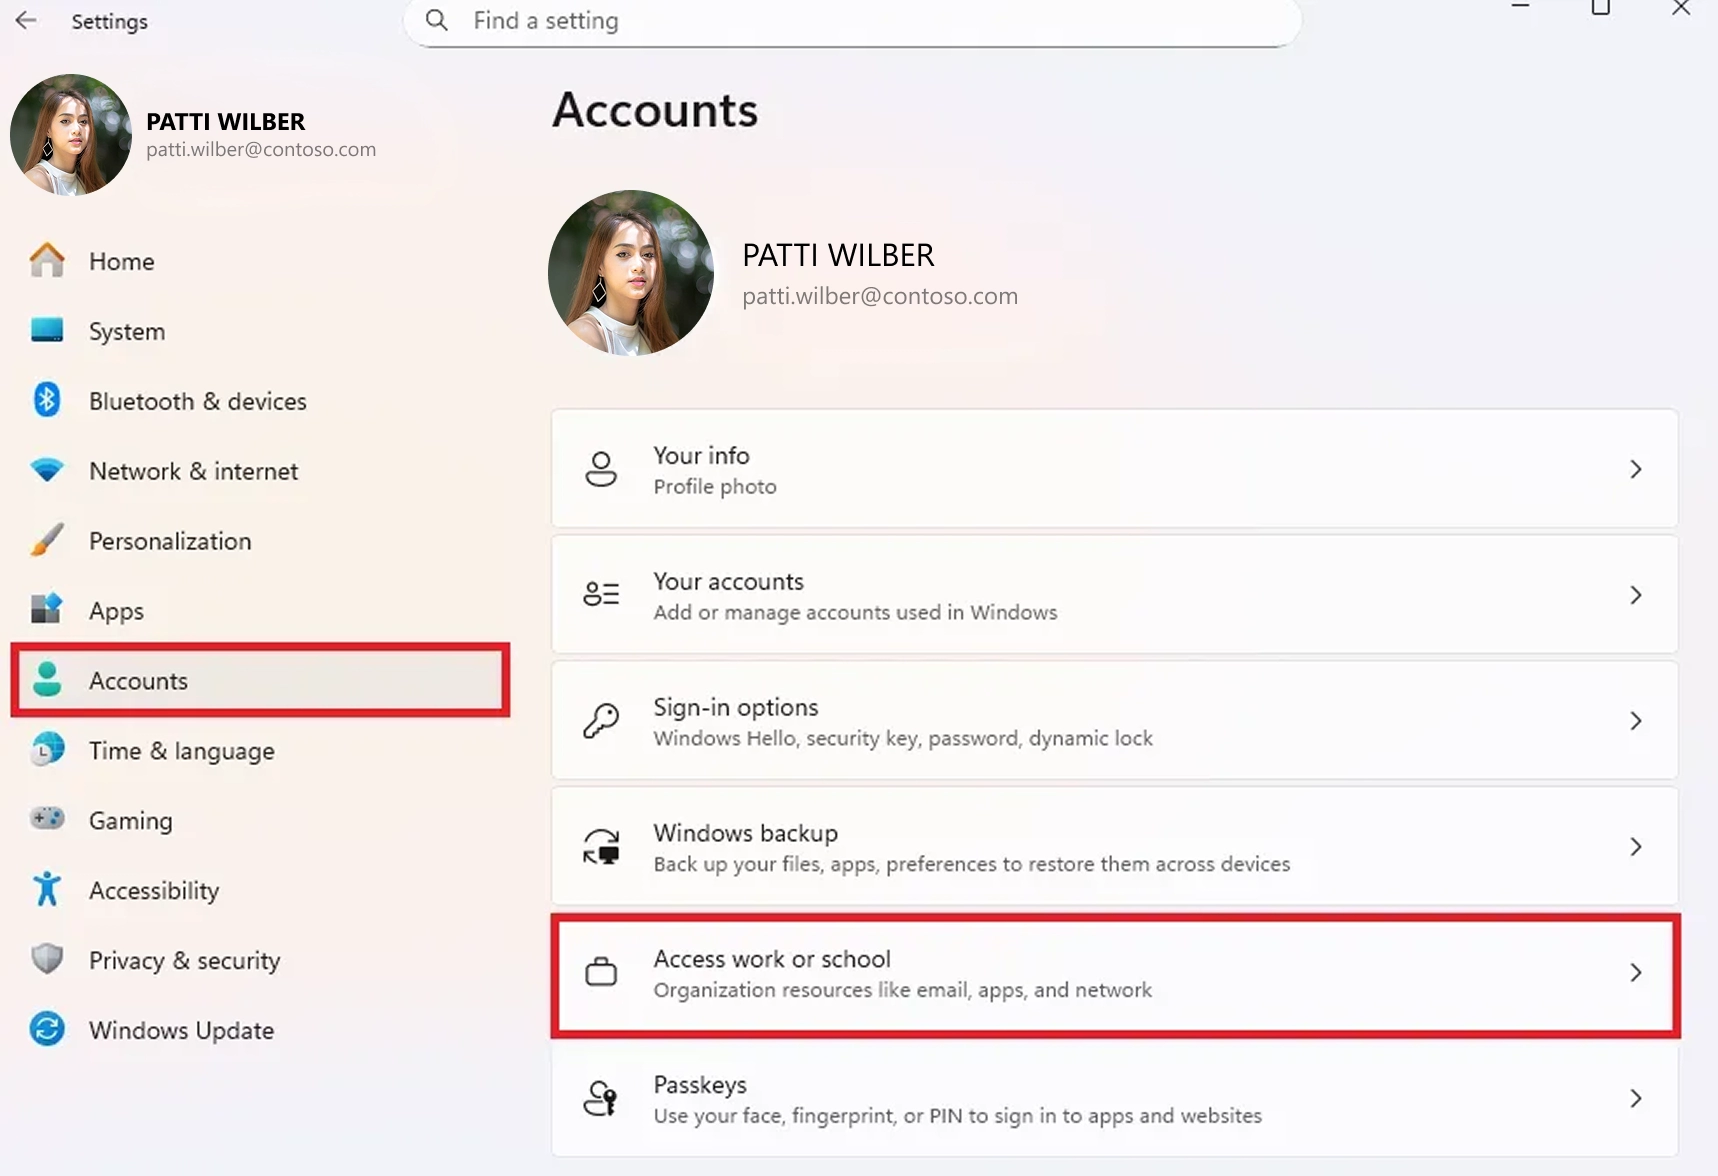
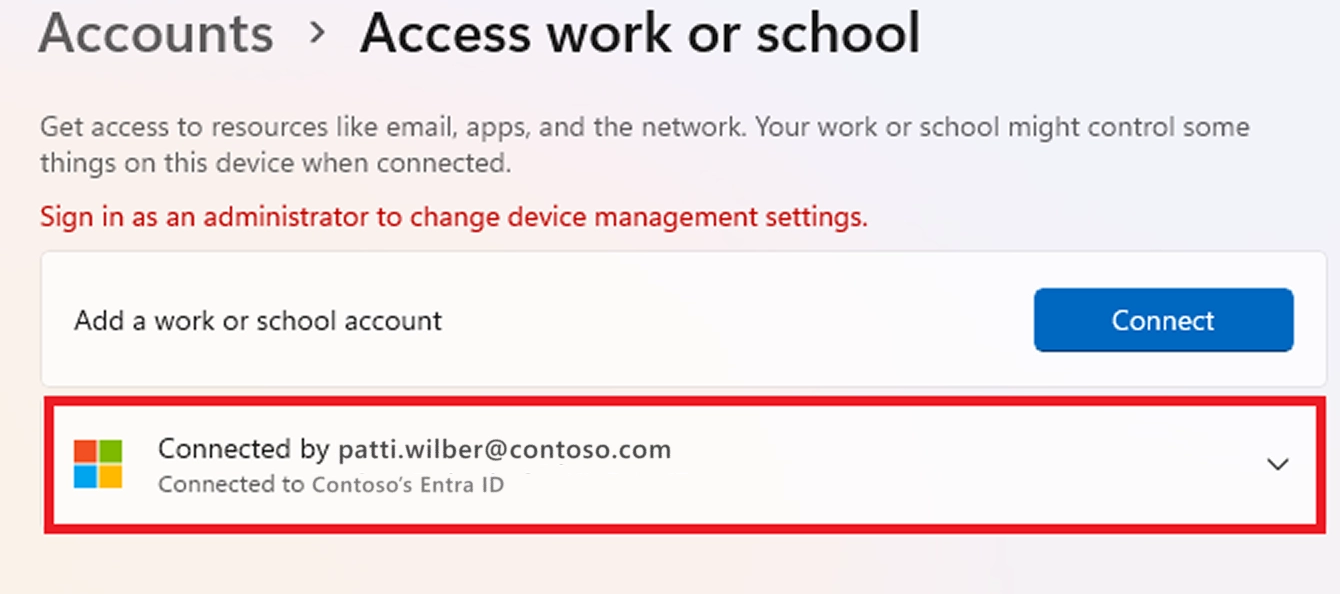
Once enrolled, the device is marked corporate-owned.
Users cannot remove management without admin permissions.
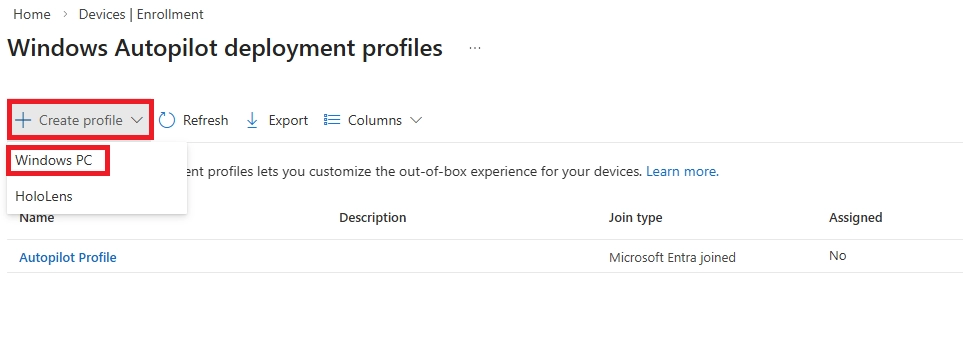
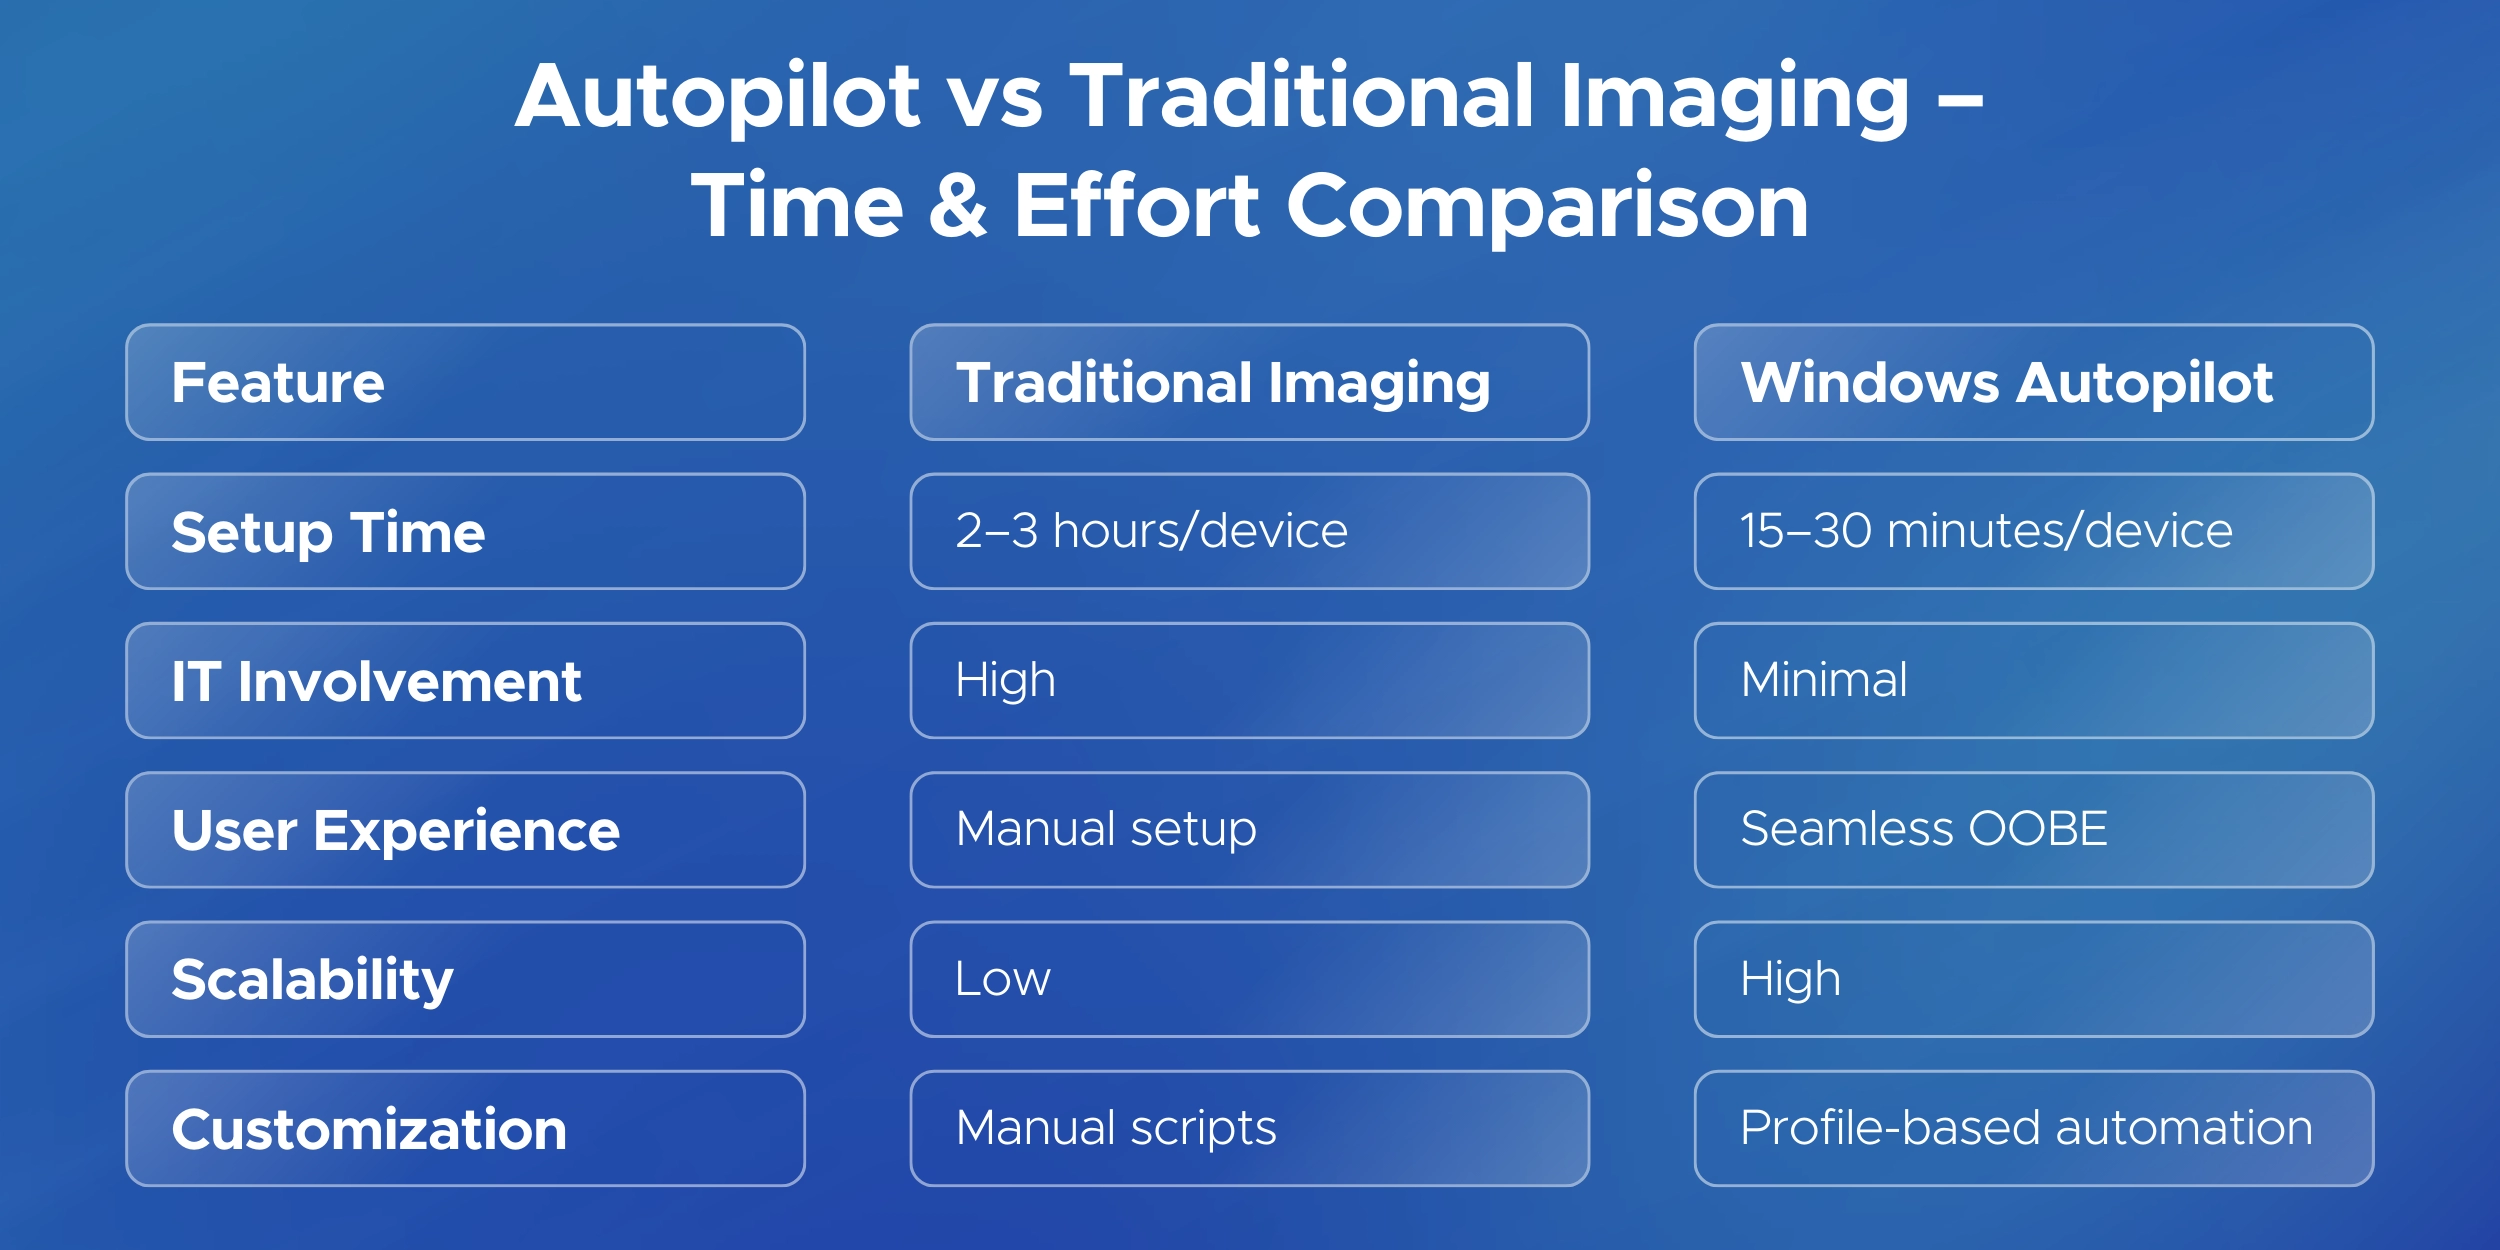
Windows Autopilot builds on Entra ID join with full automation.
It’s ideal for large-scale or remote deployments.
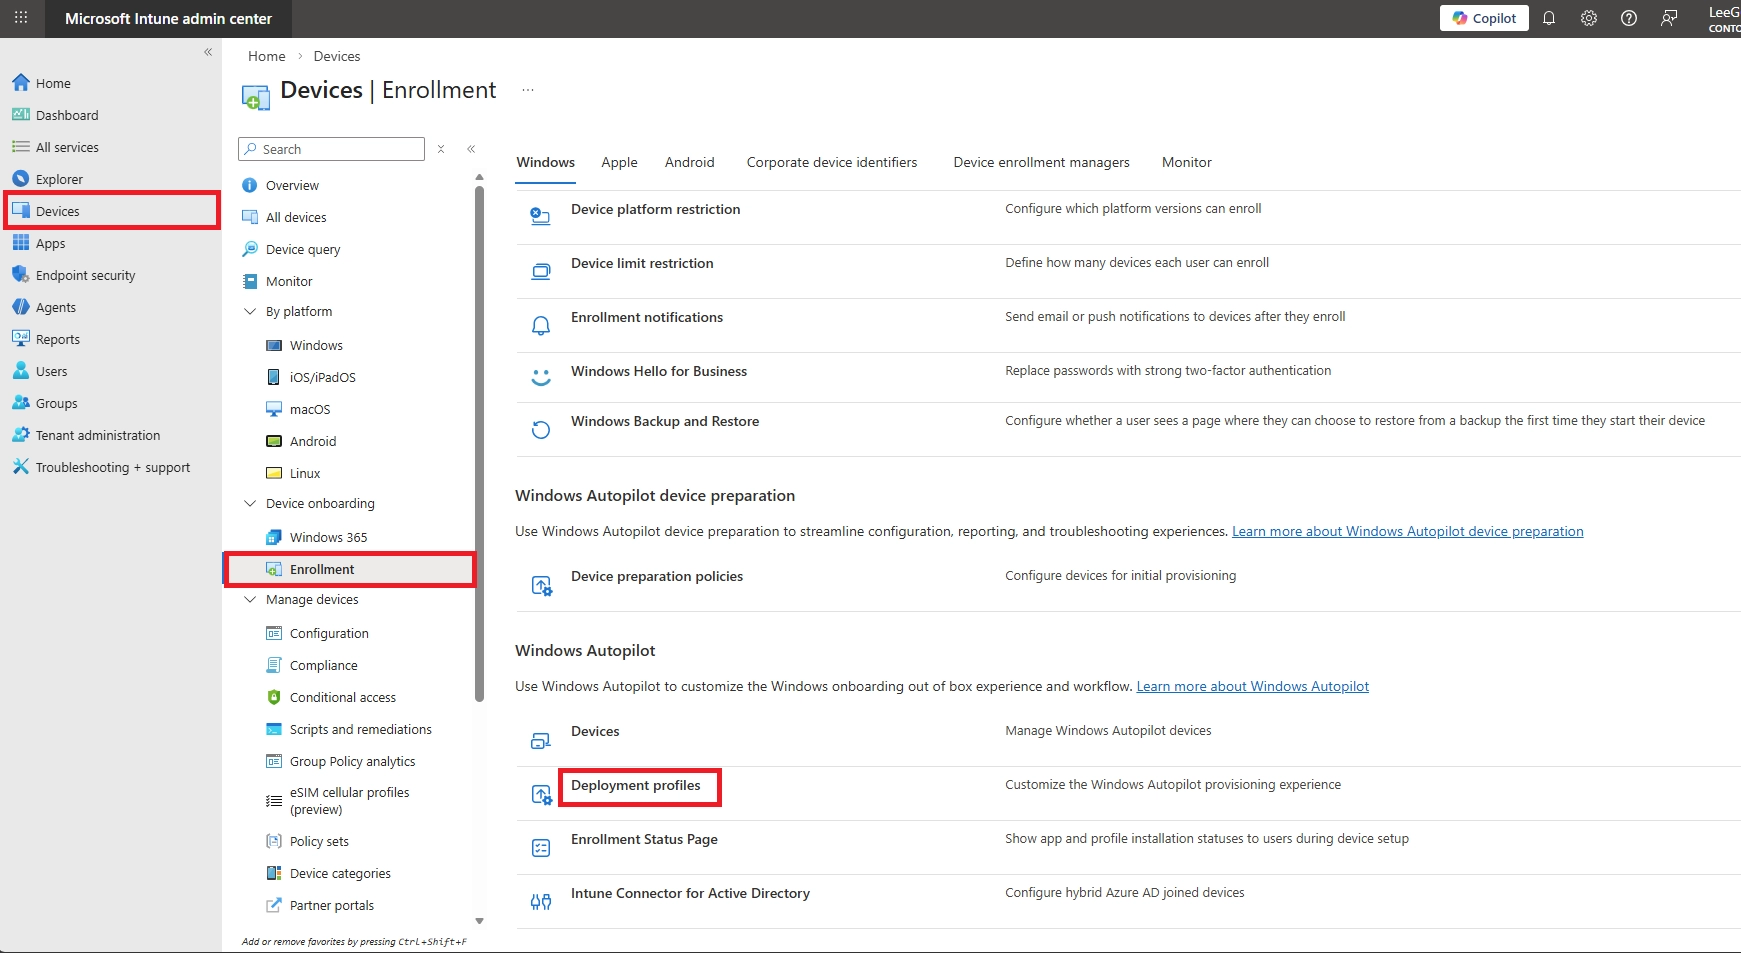
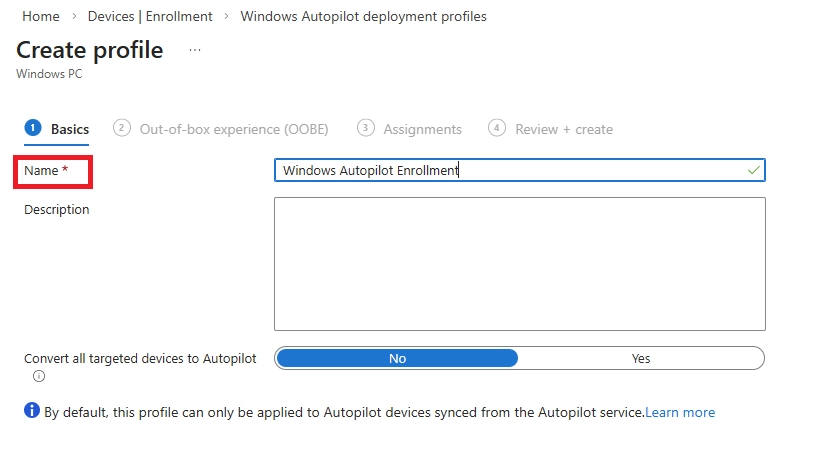
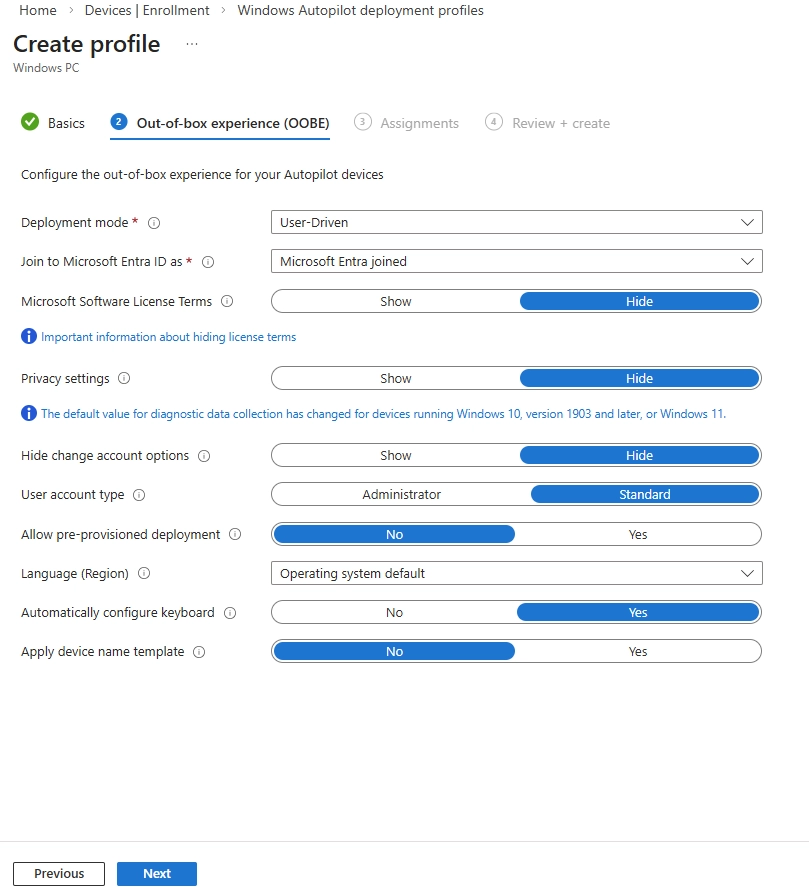
Setup (IT Side)
For Windows Autopilot enrollment, each device must be registered in Intune using its hardware hash. This hash is typically collected after the device has completed Windows Setup (OOBE).
Method 1: Save the hardware hash locally on a device as a CSV file
[Net.ServicePointManager]::SecurityProtocol = [Net.SecurityProtocolType]::Tls12
New-Item -Type Directory -Path "C:\HWID"
Set-Location -Path "C:\HWID"
$env:Path += ";C:\Program Files\WindowsPowerShell\Scripts"
Set-ExecutionPolicy -Scope Process -ExecutionPolicy RemoteSigned
Install-Script -Name Get-WindowsAutopilotInfo
Get-WindowsAutopilotInfo -OutputFile AutopilotHWID.csv
Reference: Manually register devices with Windows Autopilot | Microsoft Learn
Note: On first run, the Get-WindowsAutopilotInfo.ps1 script prompts to approve the required app registration permissions.
The hardware hash is saved locally on the device in the directory C:\HWID with the filename AutopilotHWID.csv. The CSV file can then be used to import the device into an MDM service such as Intune.
For Bulk devices
In environments using third-party management tools such as Active Directory (on-prem AD) or tools like ManageEngine, you can deploy the Get-WindowsAutopilotInfo.ps1 script remotely to multiple devices using a startup script, GPO, or remote execution feature. Each device can save its hardware hash to a centralized network share (for example, \\Server\Autopilot\HWID\%ComputerName%.csv).
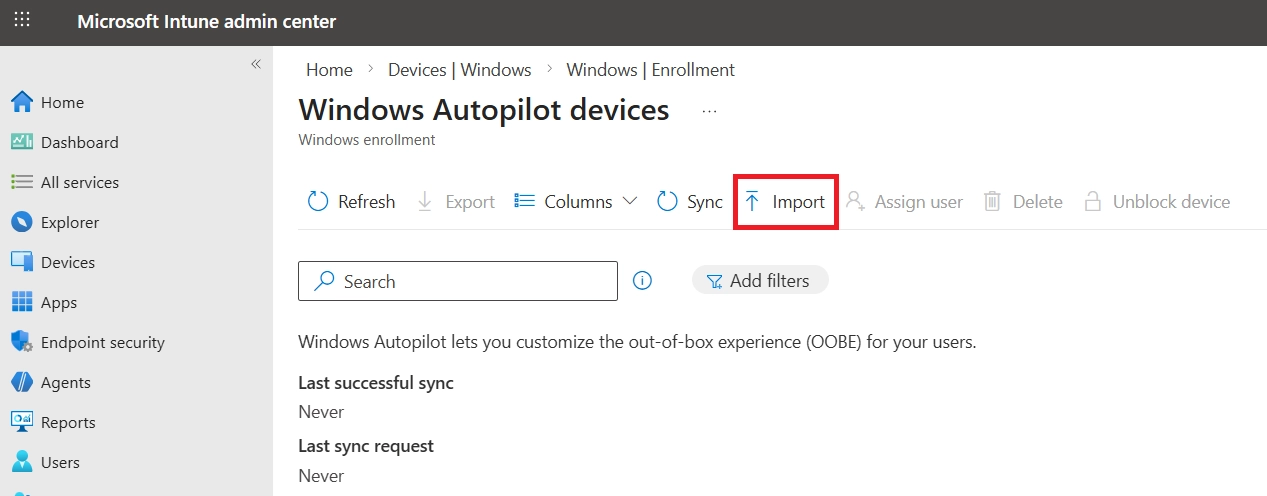
All collected hashes can then be consolidated into a single CSV file and uploaded in bulk via:
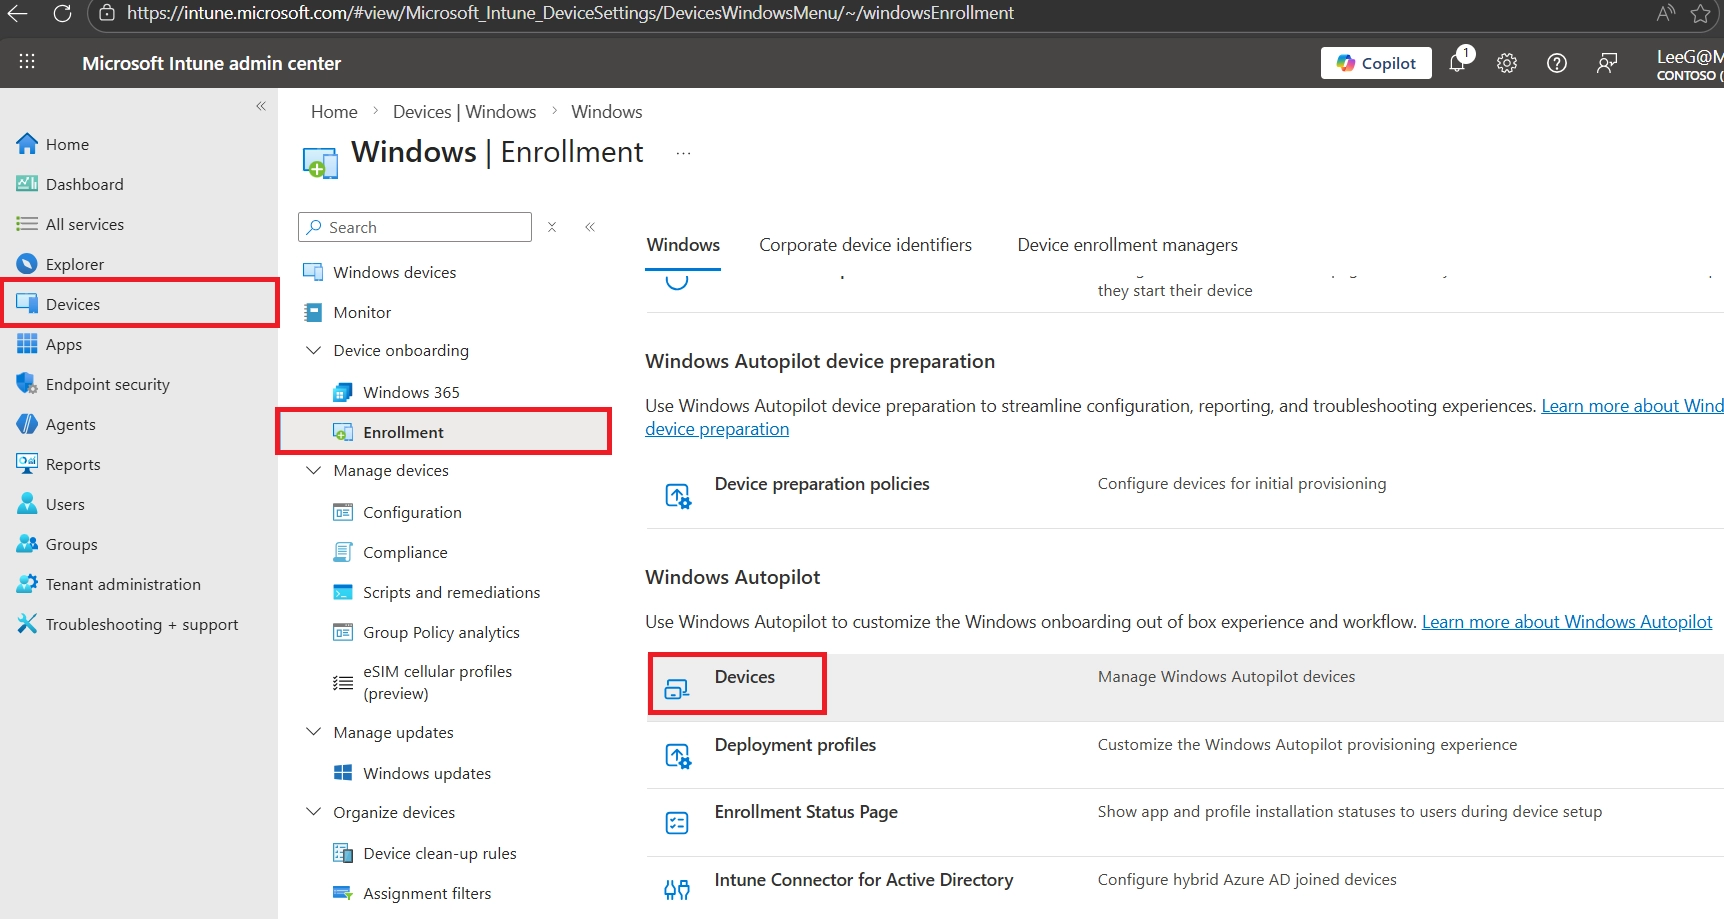
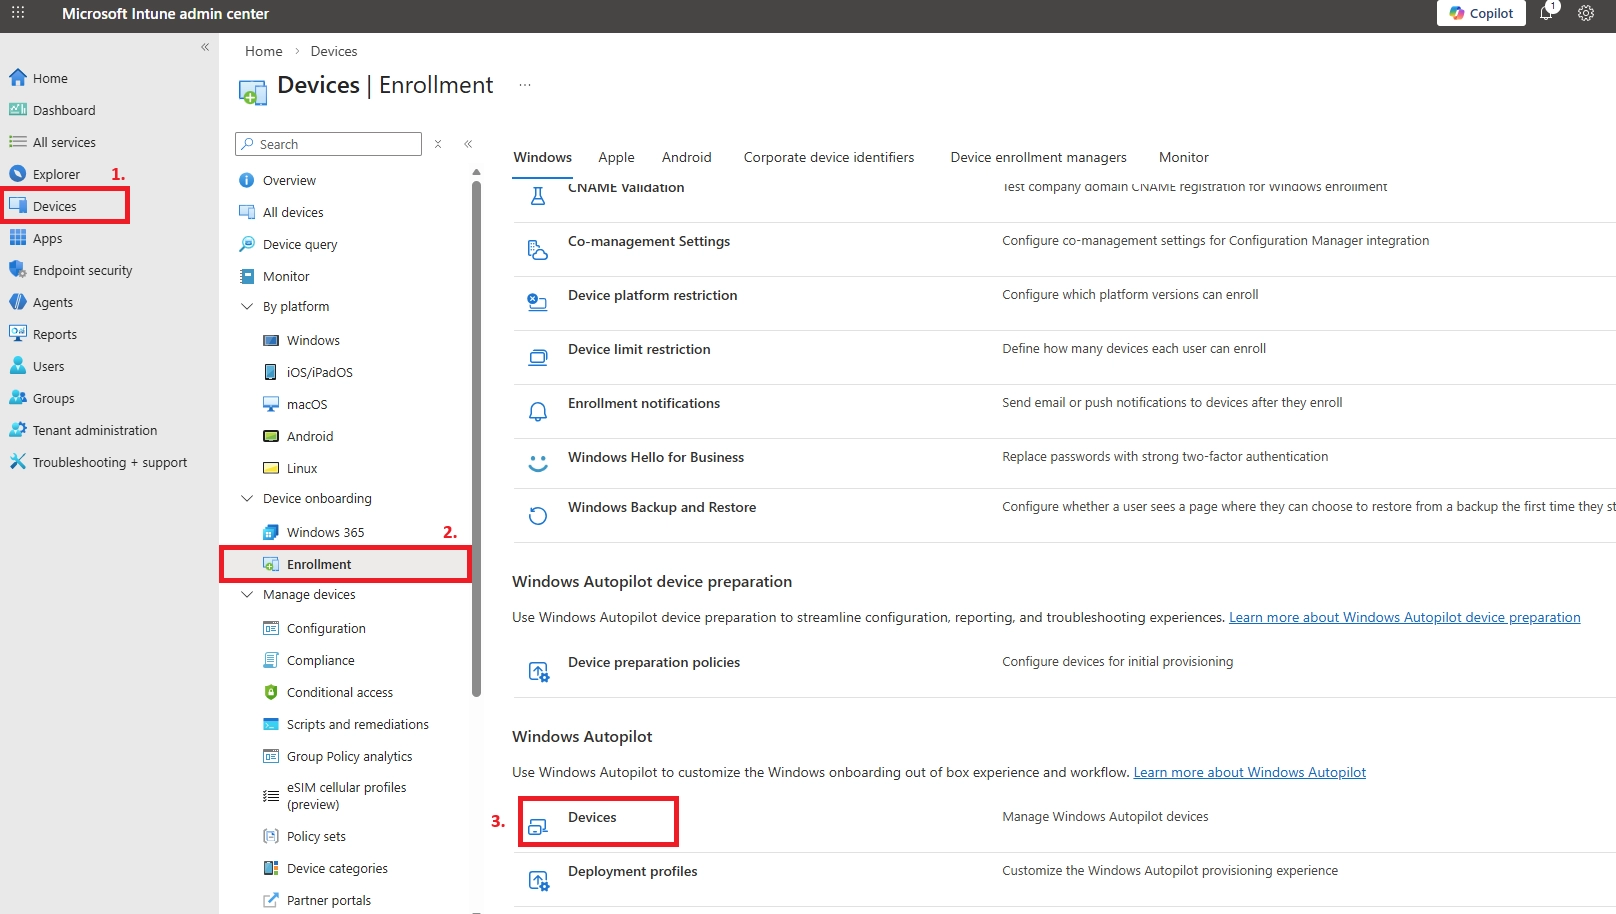
Microsoft Intune Admin Center → Devices → Windows → Windows enrollment → Devices → Import
Method 2: Directly upload the hardware hash to an MDM service
Instead of saving the hardware hash as a CSV file, you can upload it directly to Microsoft Intune using PowerShell. This works for both new devices in OOBE and existing devices, and is especially useful during initial setup.
Sign into the device.
Open an elevated Windows PowerShell prompt.
[Net.ServicePointManager]::SecurityProtocol = [Net.SecurityProtocolType]::Tls12
Set-ExecutionPolicy -Scope Process -ExecutionPolicy RemoteSigned
Install-Script -Name Get-WindowsAutopilotInfo -Force
Get-WindowsAutopilotInfo -Online
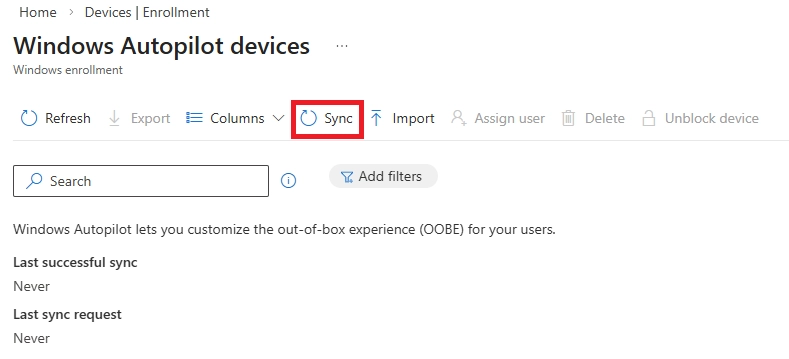
To confirm the hardware hash for the device was uploaded into Intune and that the device shows as a Windows Autopilot device:
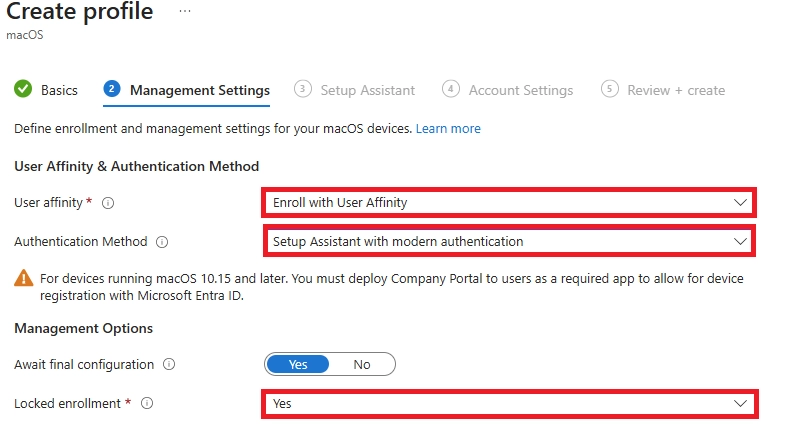
Apple Device Enrollment (ADE) is the recommended enrollment method for company‑owned Apple devices. It provides a zero‑touch, secure, and non‑removable enrollment experience by integrating Microsoft Intune with Apple Business Manager (ABM).
ADE ensures devices are automatically enrolled into Intune during first boot and placed into Supervised mode, giving IT full control from day one.
Setup Requirements
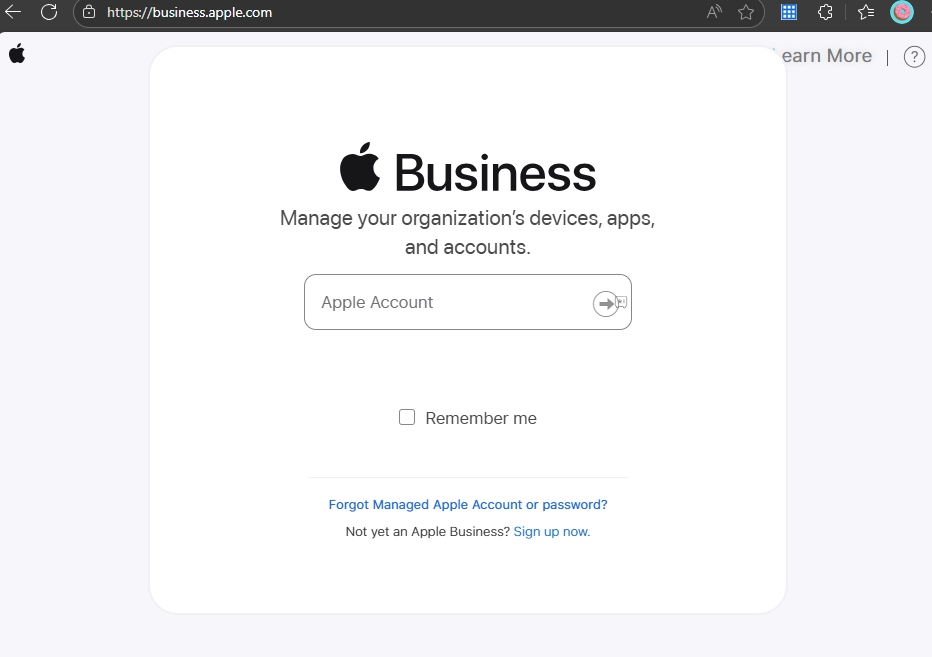
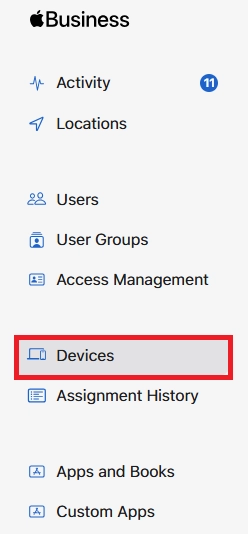
Step 1: Create an Apple Business Manager Account
To create an Apple Business Manager (ABM) account, by visiting business.apple.com and signing in with a company-owned Apple ID.
Verify your organization details, complete the enrollment process, and assign an Administrator to start managing devices and Apple services.
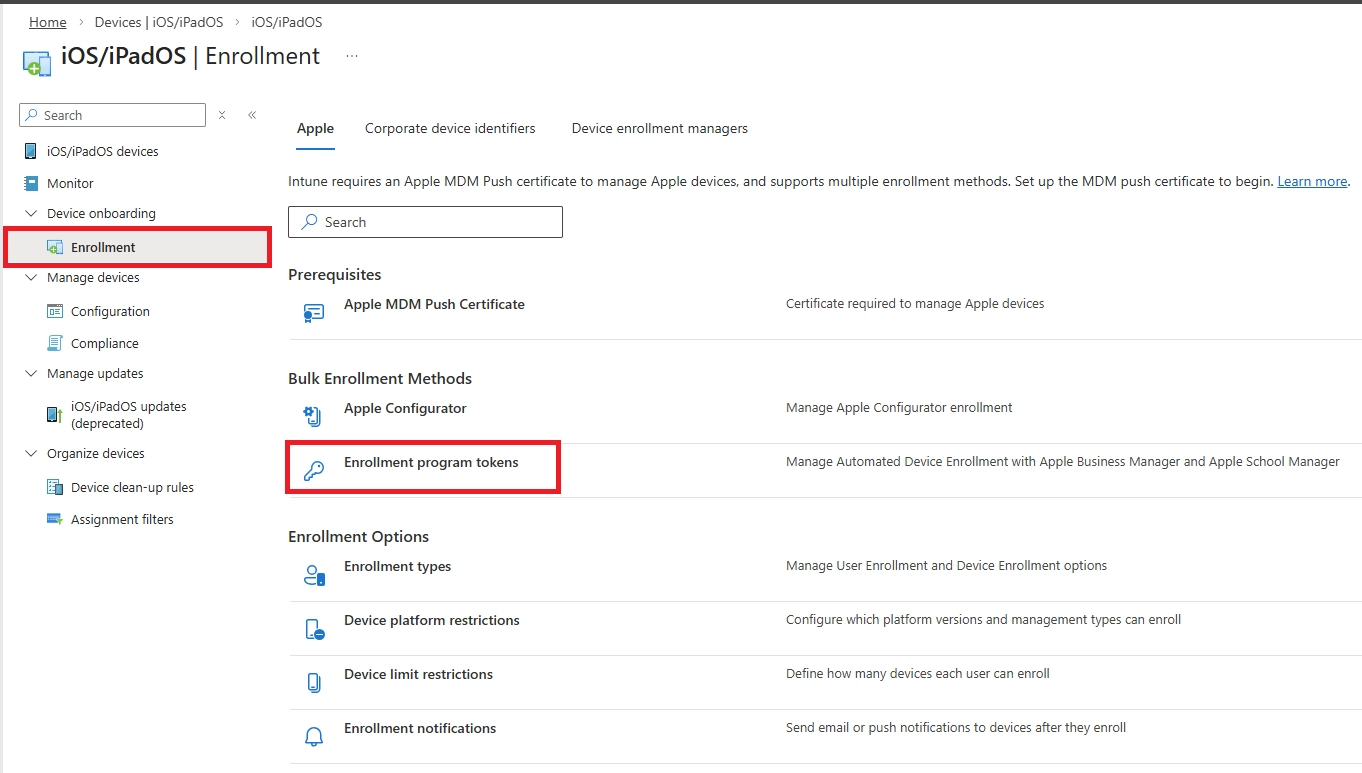
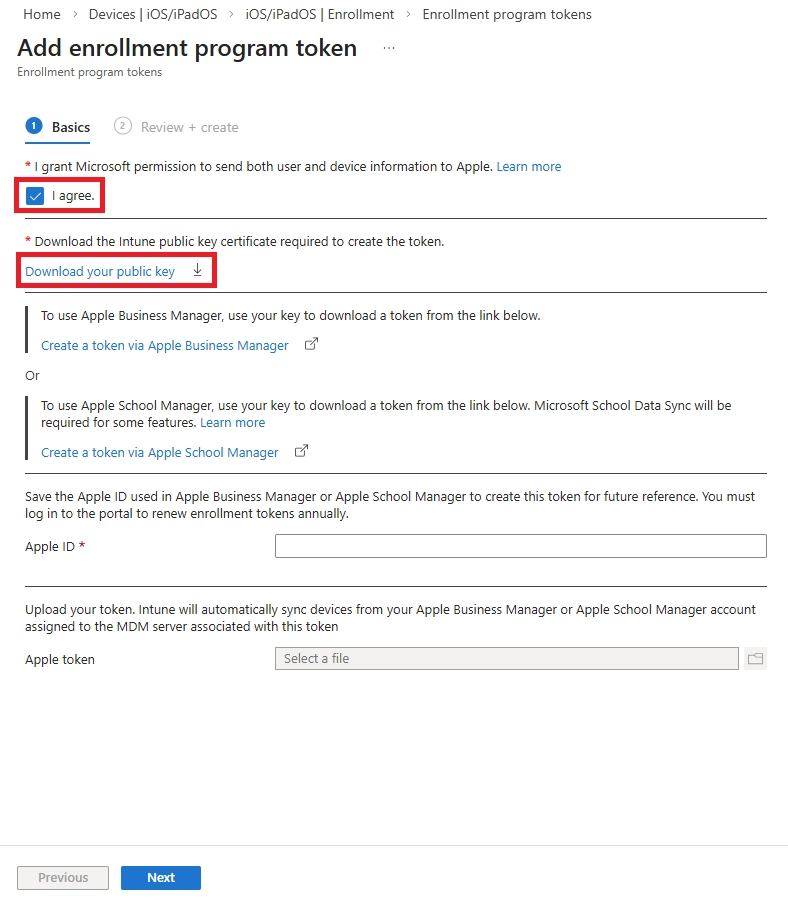
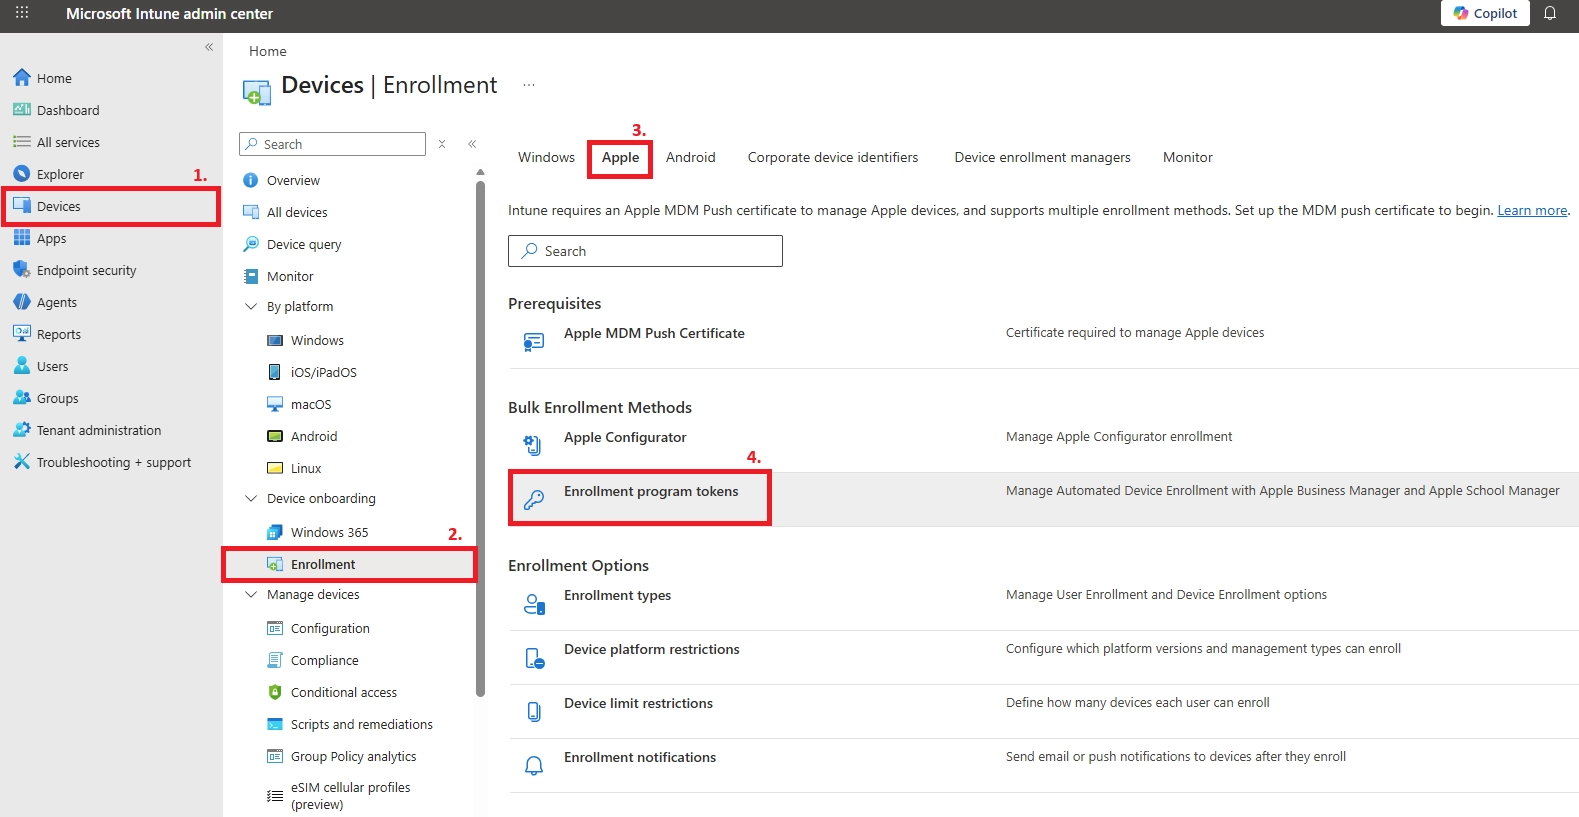
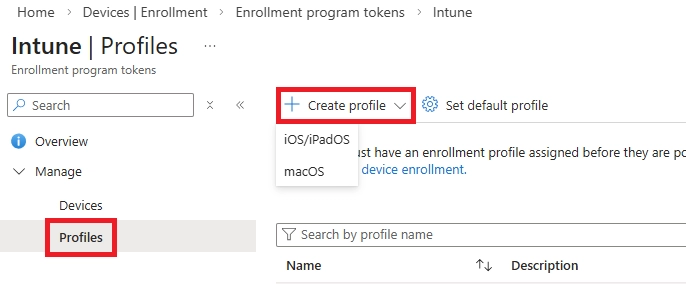
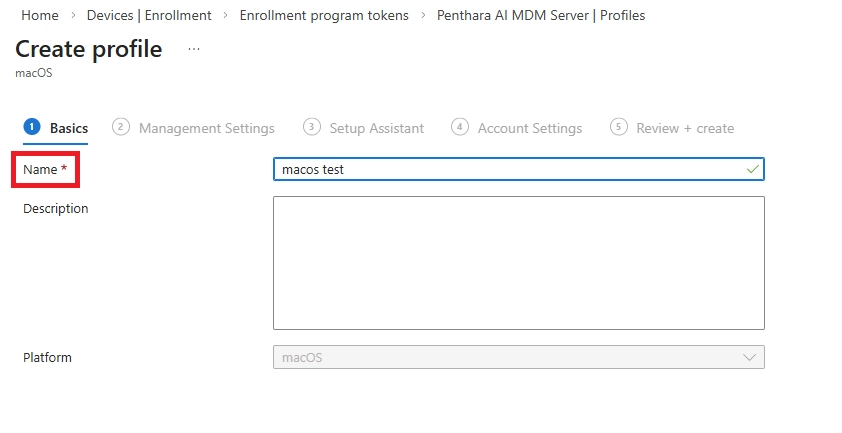
Step 2: Create an MDM Server in Intune (Public Key Generation)

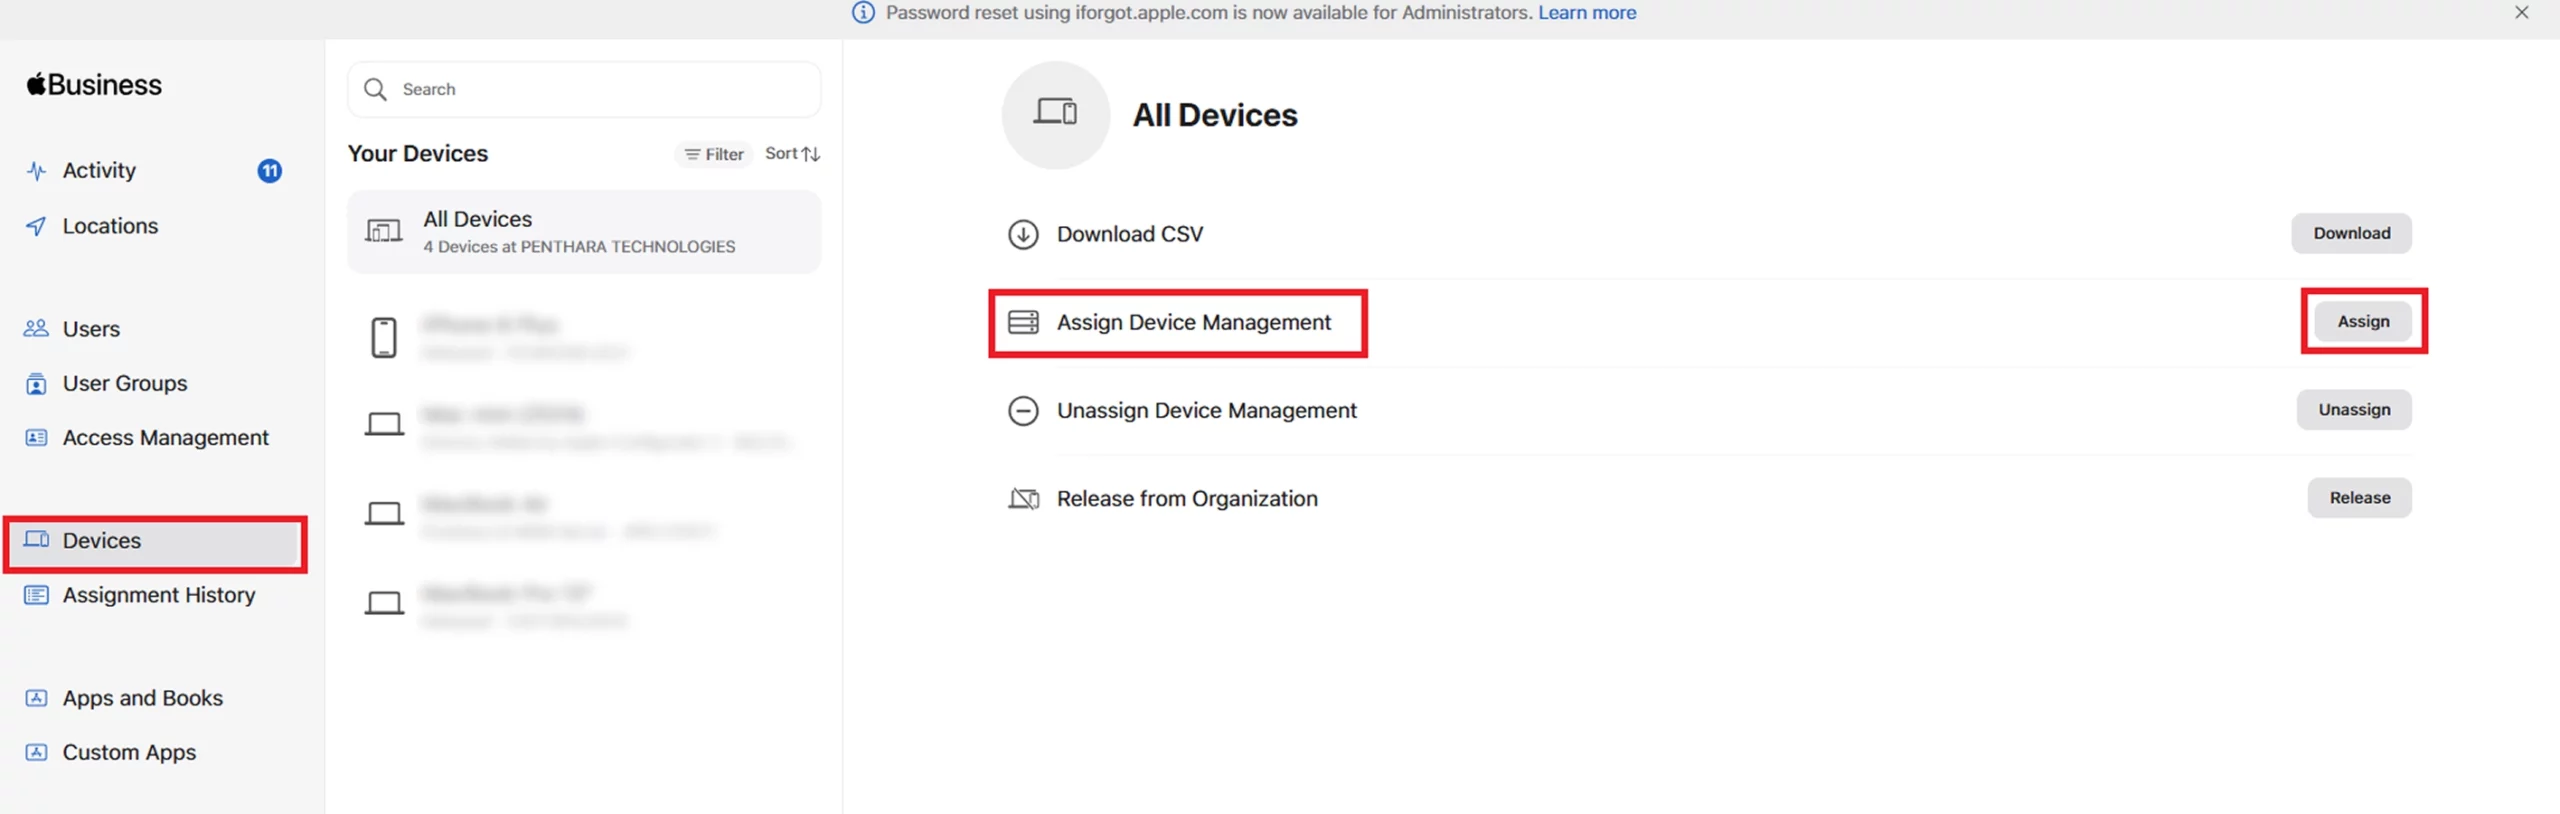
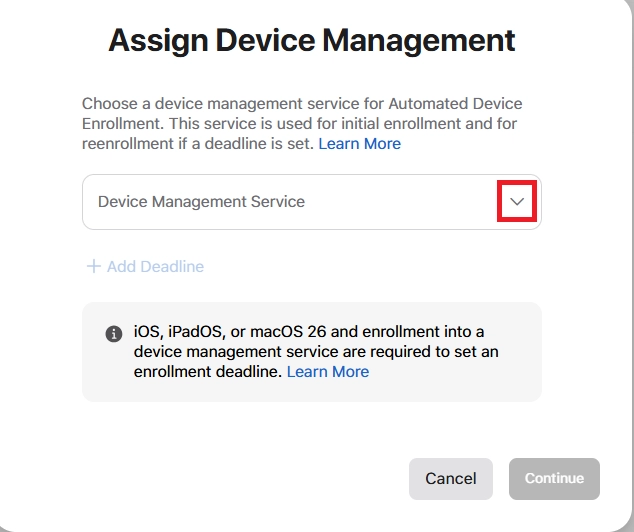
Step 4: Assign devices to the ADE profile in Apple Business Manager
Assign devices to the Intune MDM server in ABM
Verify devices appear in Intune
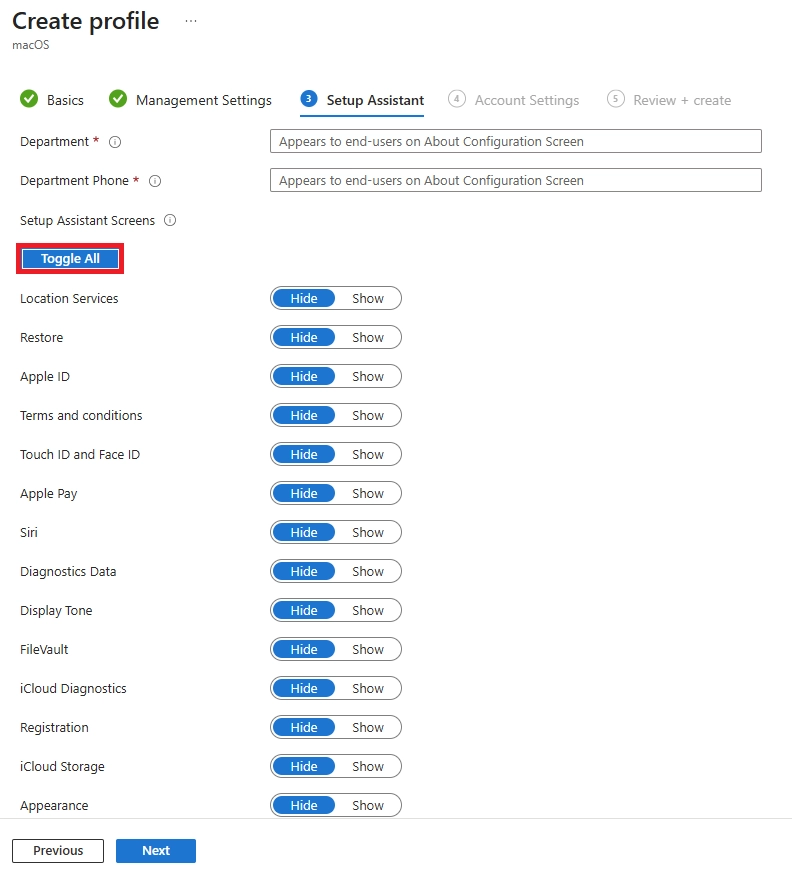
Assign the ADE enrollment profile (Intune side)
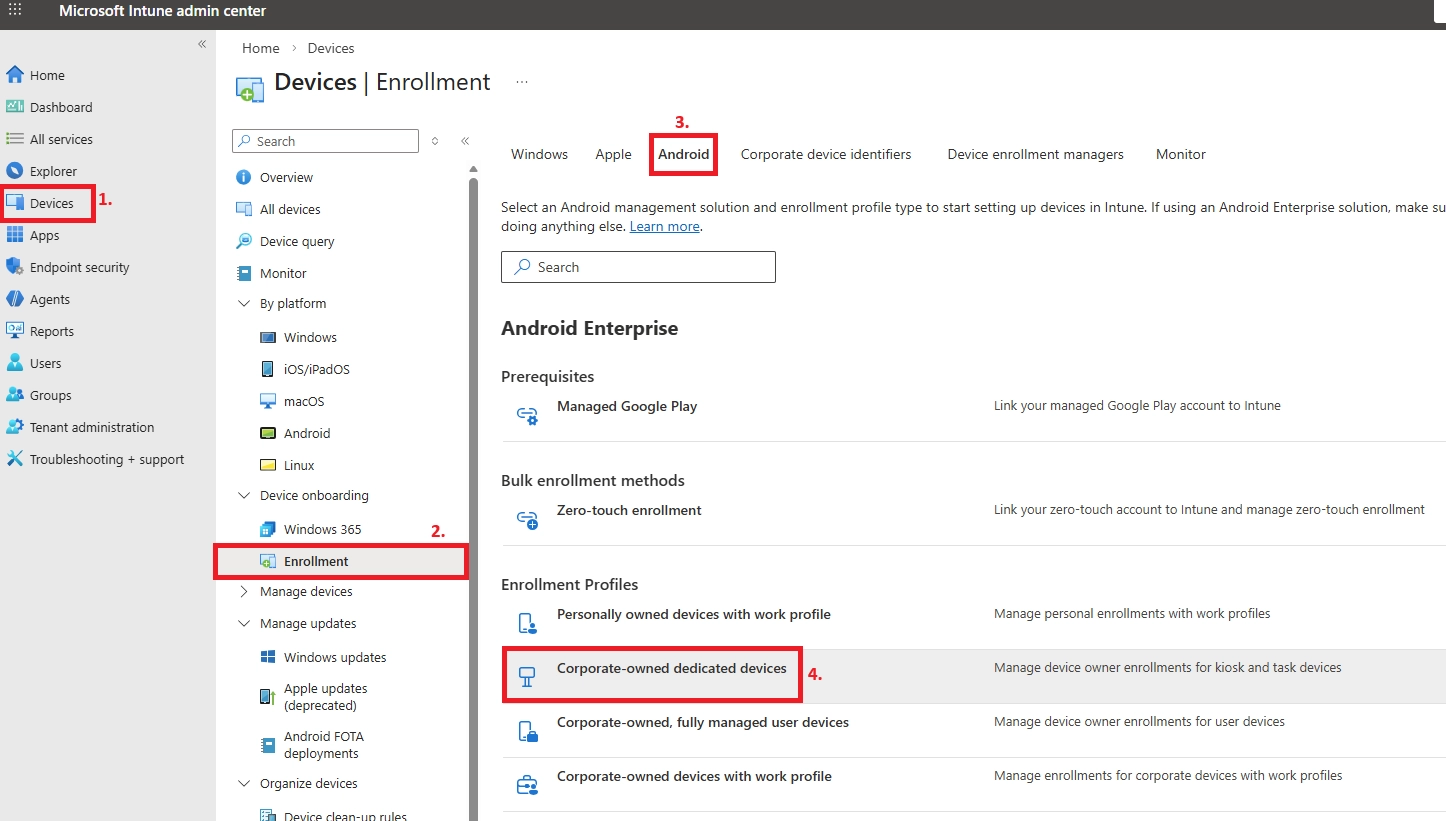
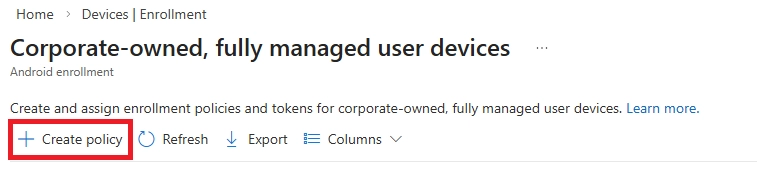
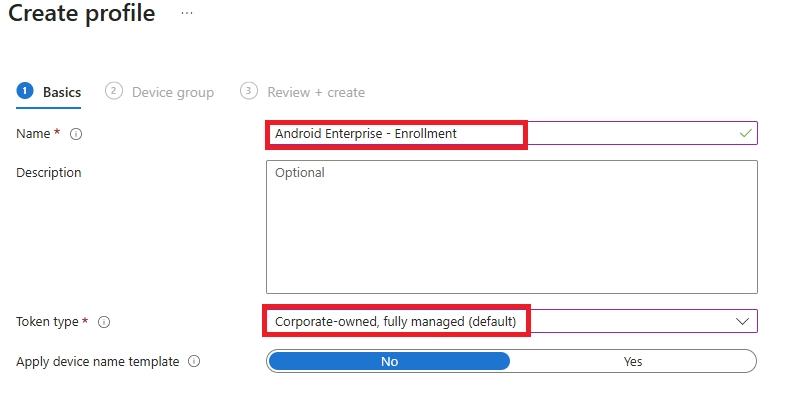
Android Enterprise is the recommended method for corporate Android devices.
Fully Managed (Work-Only Devices)
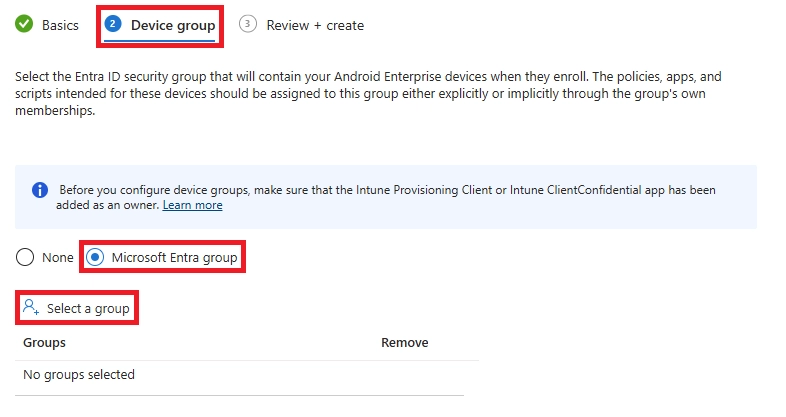
Tip: Be sure to select a device group, not a user group.
Get the Enrollment Token
Prepare the Android Device
Complete Device Enrollment
Verify Device in Intune
BYOD (Bring Your Own Device) enrollment allows employees to use their personal devices for work - without giving IT full control over the device.
The goal is simple:
Microsoft Intune supports privacy-focused BYOD enrollment across Windows, iOS, and Android.
The core process is similar across platforms.
Step 1: Install Company Portal
Users install the Microsoft Intune Company Portal app from:
Step 2: Sign In with Work Account
Users sign in using their Microsoft 365 work credentials.
Step 3: Approve Device Enrollment
The device is registered with Microsoft Entra ID and enrolled into Intune.
Step 4: Work Boundary Is Created
Depending on the platform:
At this point:
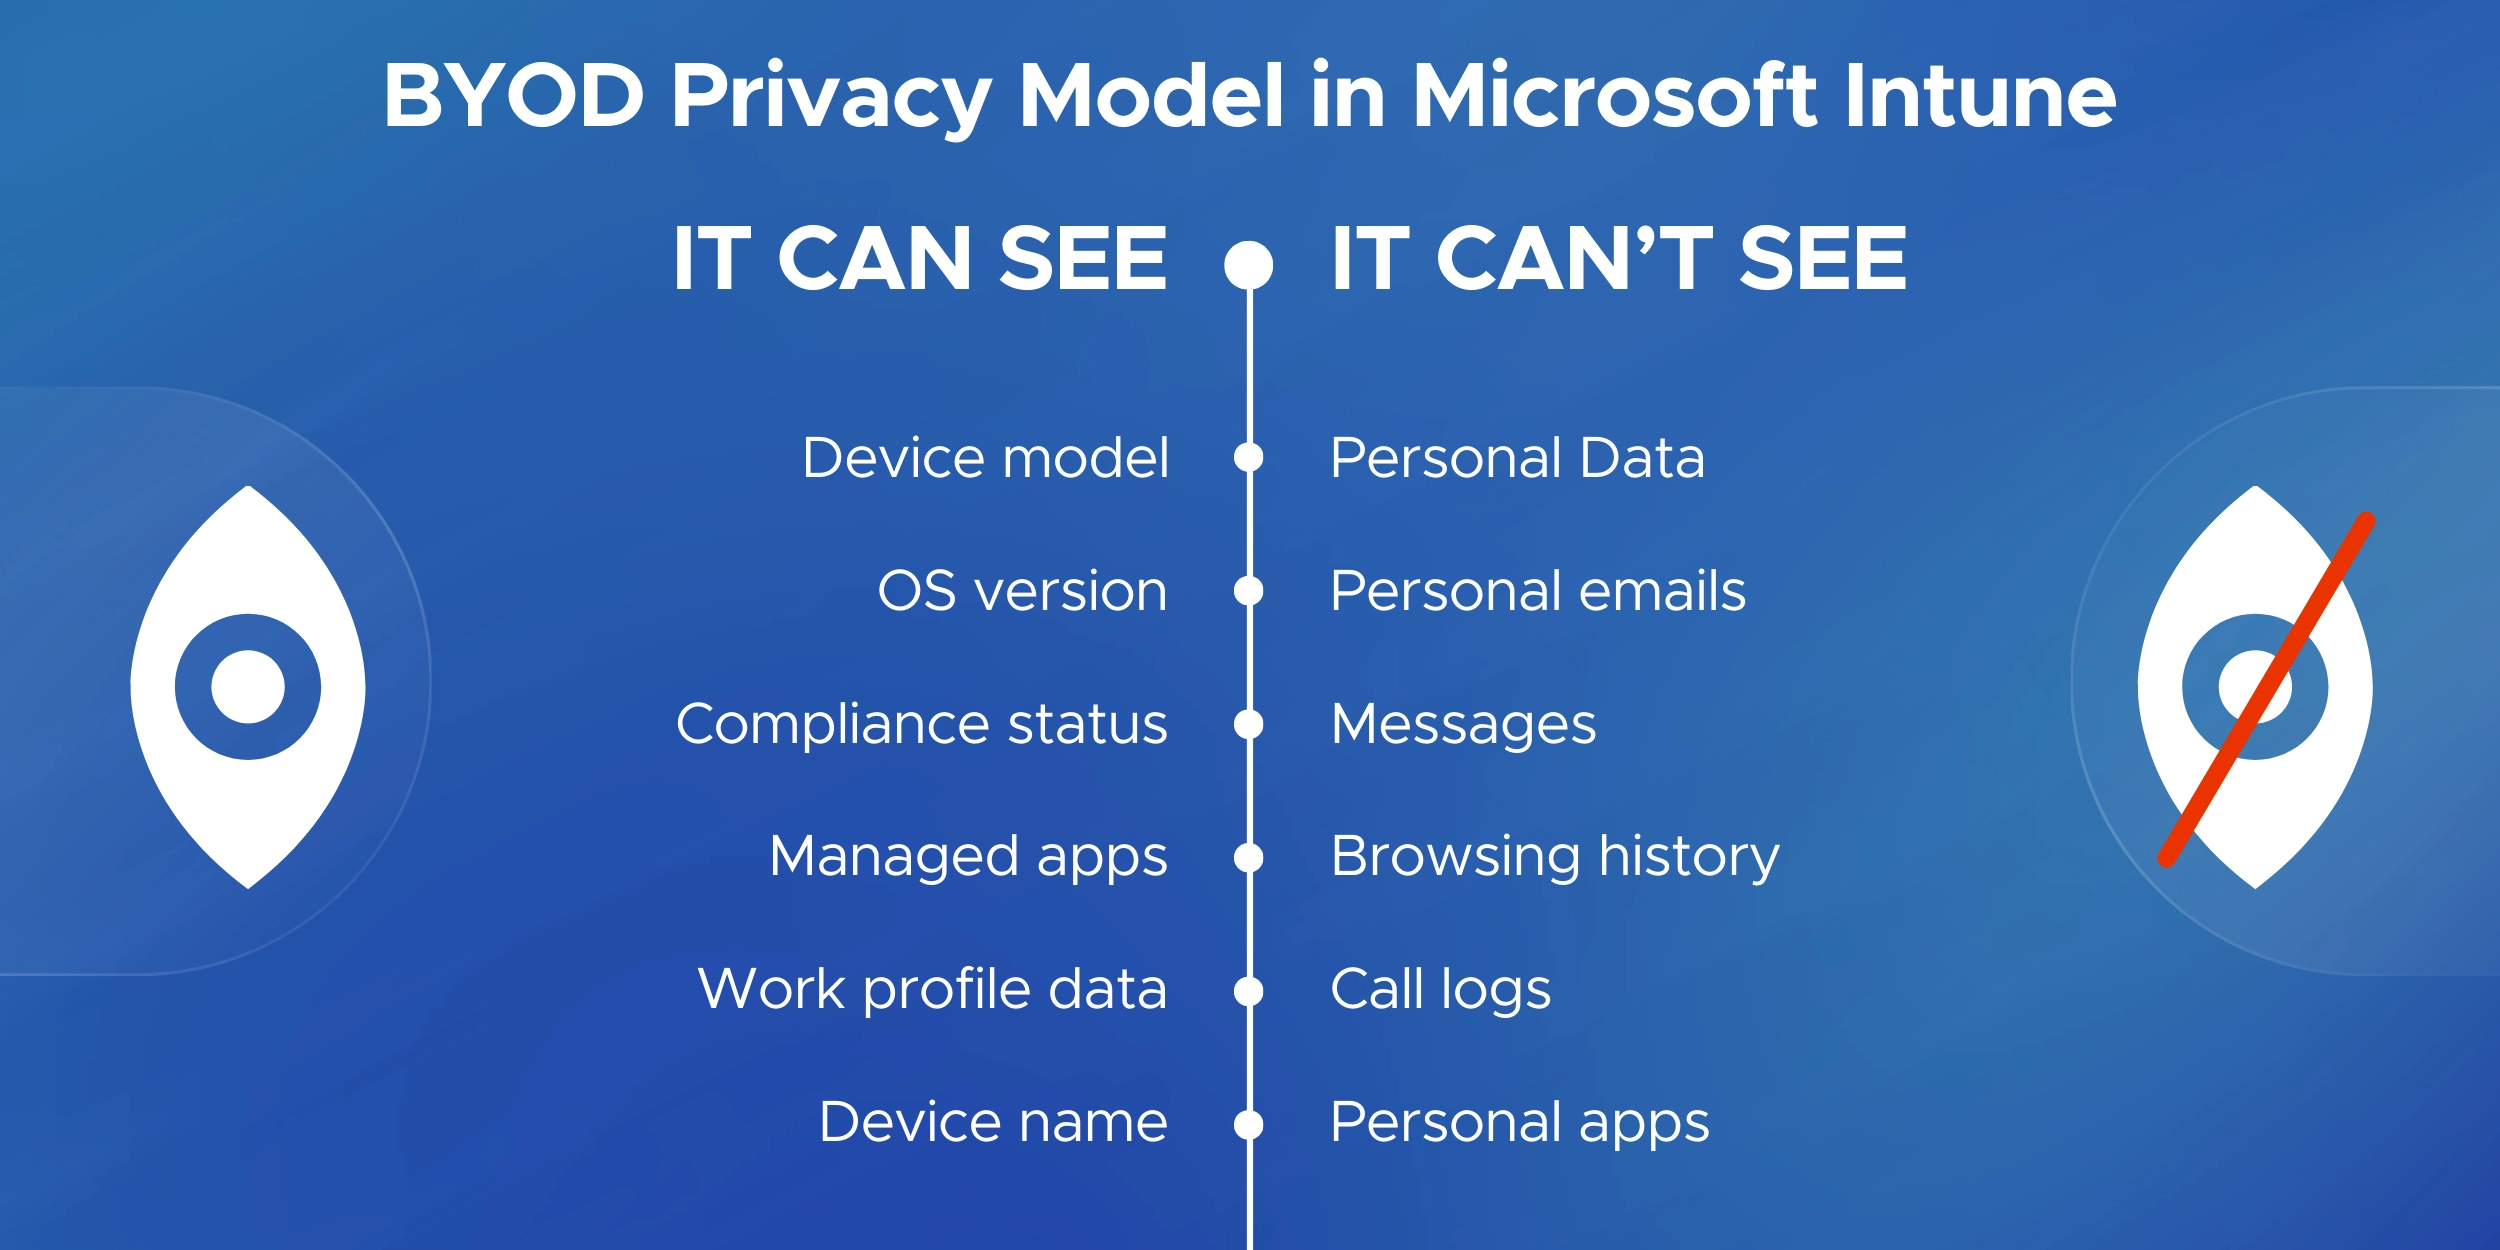
Intune collects only what it needs to secure work data.
Intune can see:
Intune cannot see:
When a user unenrolls or leaves:
This balance makes BYOD secure without invading privacy.
A well-planned enrollment strategy reduces errors, improves compliance, and minimizes user friction.
Start with a pilot group before enrolling the entire organization.
Validate policies, apps, and licensing before expanding to departments or regions.
Organize devices using Microsoft Entra ID groups.
Separate corporate and BYOD devices to ensure policies and apps apply correctly from day one.
Configure:
This prevents unsupported or risky devices from enrolling.
Enrollment alone is not enough.
Require compliant devices for access to Microsoft 365, email, and Teams.
Use Enrollment Status Page (Windows) or automatic app deployment (mobile) to ensure devices are ready immediately after setup.
Regularly review:
Once a device is enrolled, IT admins also decide how corporate data is removed when a device is lost, stolen, or an employee leaves - and the choice between a full wipe vs selective wipe in Intune has very different consequences.
If parts of your workforce are still on personal devices outside Intune, you'll want to enforce MFA specifically for unmanaged devices - a step that works hand-in-hand with your enrollment strategy.
Once devices are enrolled, the next step is controlling removable media access - here’s how to block USB devices in Microsoft 365 to reduce data theft and malware risks.
Maintain a clear enroll → manage → retire lifecycle.
Implementing Microsoft Intune the right way requires more than just enabling policies. It requires a structured enrollment strategy aligned with security, compliance, and user experience.
Intune & Endpoint Specialists
We design and implement scalable enrollment strategies across Windows, macOS, iOS, and Android - including Autopilot, Apple ADE, Android Enterprise, and BYOD models.
Security-First Approach
Enrollment is aligned with compliance policies, Conditional Access, encryption standards, and governance requirements such as ISO, SOC 2, HIPAA, and GDPR.
Structured Rollout Methodology
From pilot deployments to phased rollouts, the focus is on reducing enrollment failures, minimizing user friction, and lowering support overhead.
Corporate & BYOD Balance
Enrollment models are built to secure corporate-owned devices while respecting employee privacy on personal devices.
Ongoing Optimization
Enrollment is only the beginning. Continuous monitoring of compliance health, device lifecycle, and policy effectiveness ensures long-term stability.
If you're planning a new rollout or optimizing an existing Intune environment, building a strong enrollment foundation makes a measurable difference.
Schedule a consultation to design the right Microsoft Intune enrollment strategy for your organization.
Enrollment usually works smoothly, but issues can still occur.
Below are the most common questions admins and users ask during enrollment.
Device enrollment is the process of registering a device with Microsoft Intune so it can be managed and secured.
Intune applies security policies, compliance rules, and work apps.
For BYOD devices, only work data is managed.
Yes. Each user enrolling a device must have an Intune license assigned.
Most devices are enrolled using the Intune Company Portal app by signing in with a work account and following the steps.
Common reasons include:
Syncing from Company Portal usually fixes this.
Yes. Most BYOD and existing devices can be enrolled without a reset.
Wiping is only required for Autopilot, Apple ADE, or fully managed Android.
Yes, but there is a limit.
Admins can restrict how many devices each user can enroll.
This usually happens due to:
Yes. Intune supports BYOD using privacy-focused methods like:
No.
Intune cannot see personal photos, messages, emails, or browsing history.
Intune can see:
Unenroll the device first, then enroll again using Company Portal or the original enrollment method.
Admins can retire or wipe devices from the Intune portal.
Users can remove their own BYOD devices via Company Portal.
Yes.
Intune App Protection Policies can secure apps like Outlook without full device enrollment.
Only for corporate-owned devices.
BYOD enrollment provides limited, work-only control.
Check:
It depends on company policy.
Some organizations require enrollment or compliance to access email and Teams.

Monthly updates, news & events from Microsoft to help your business grow.

CEO at Penthara Technologies


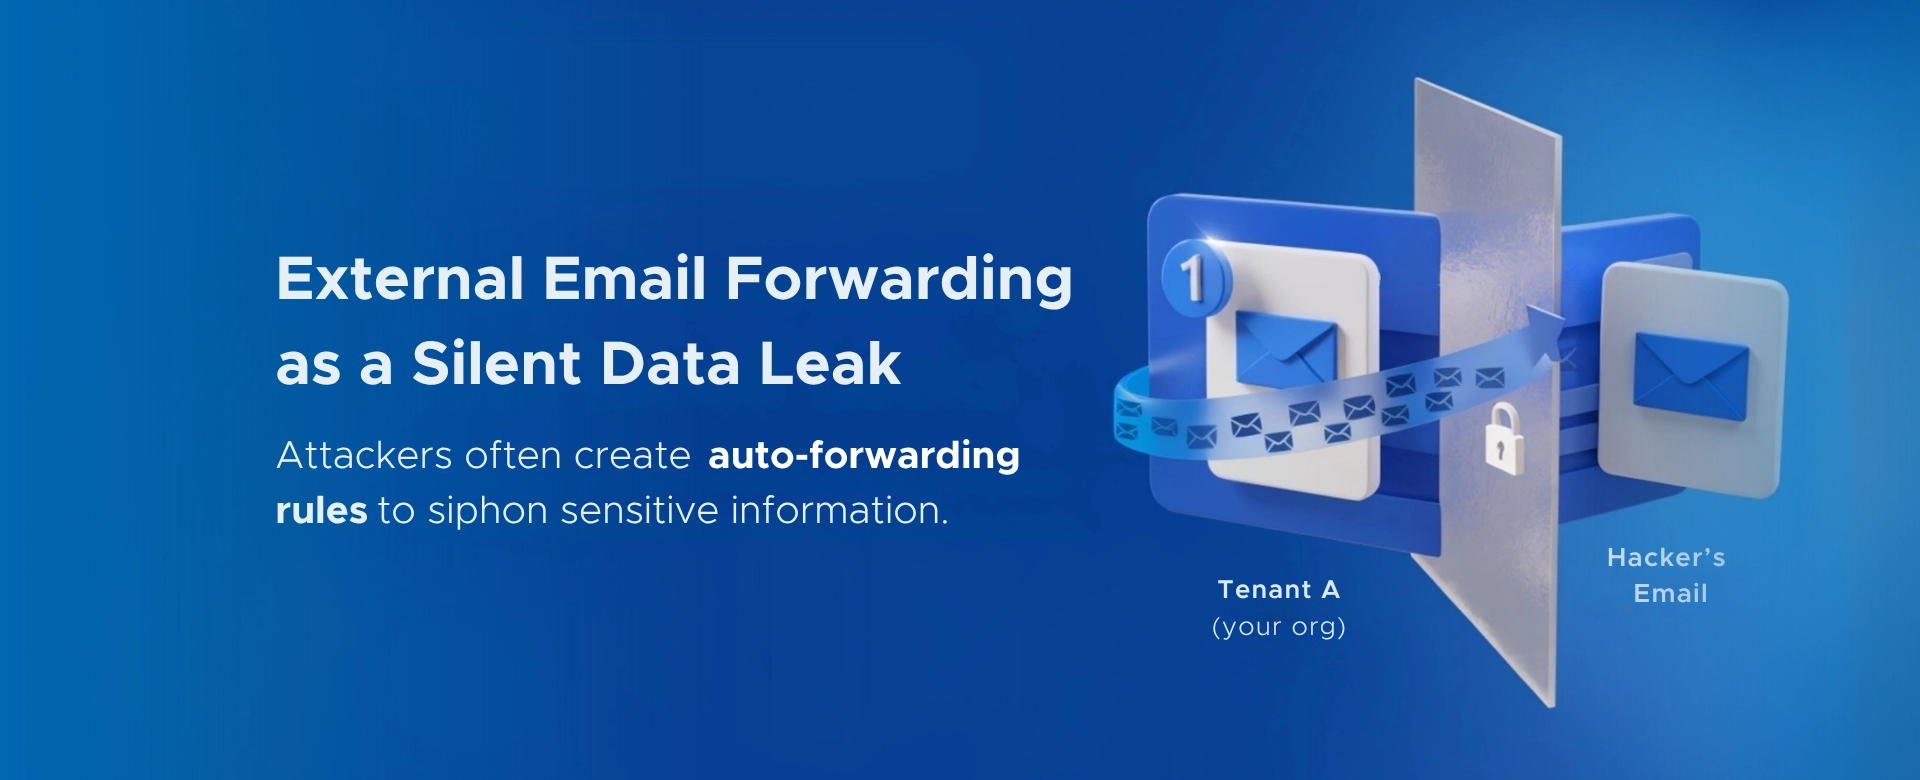 Your Microsoft 365 Tenant Has a Silent Data Leak. It Requires No Malware.
Your Microsoft 365 tenant can leak data silently - no malware, no alerts. Learn how simple misconfigurations enable ongoing email and data exfiltration.
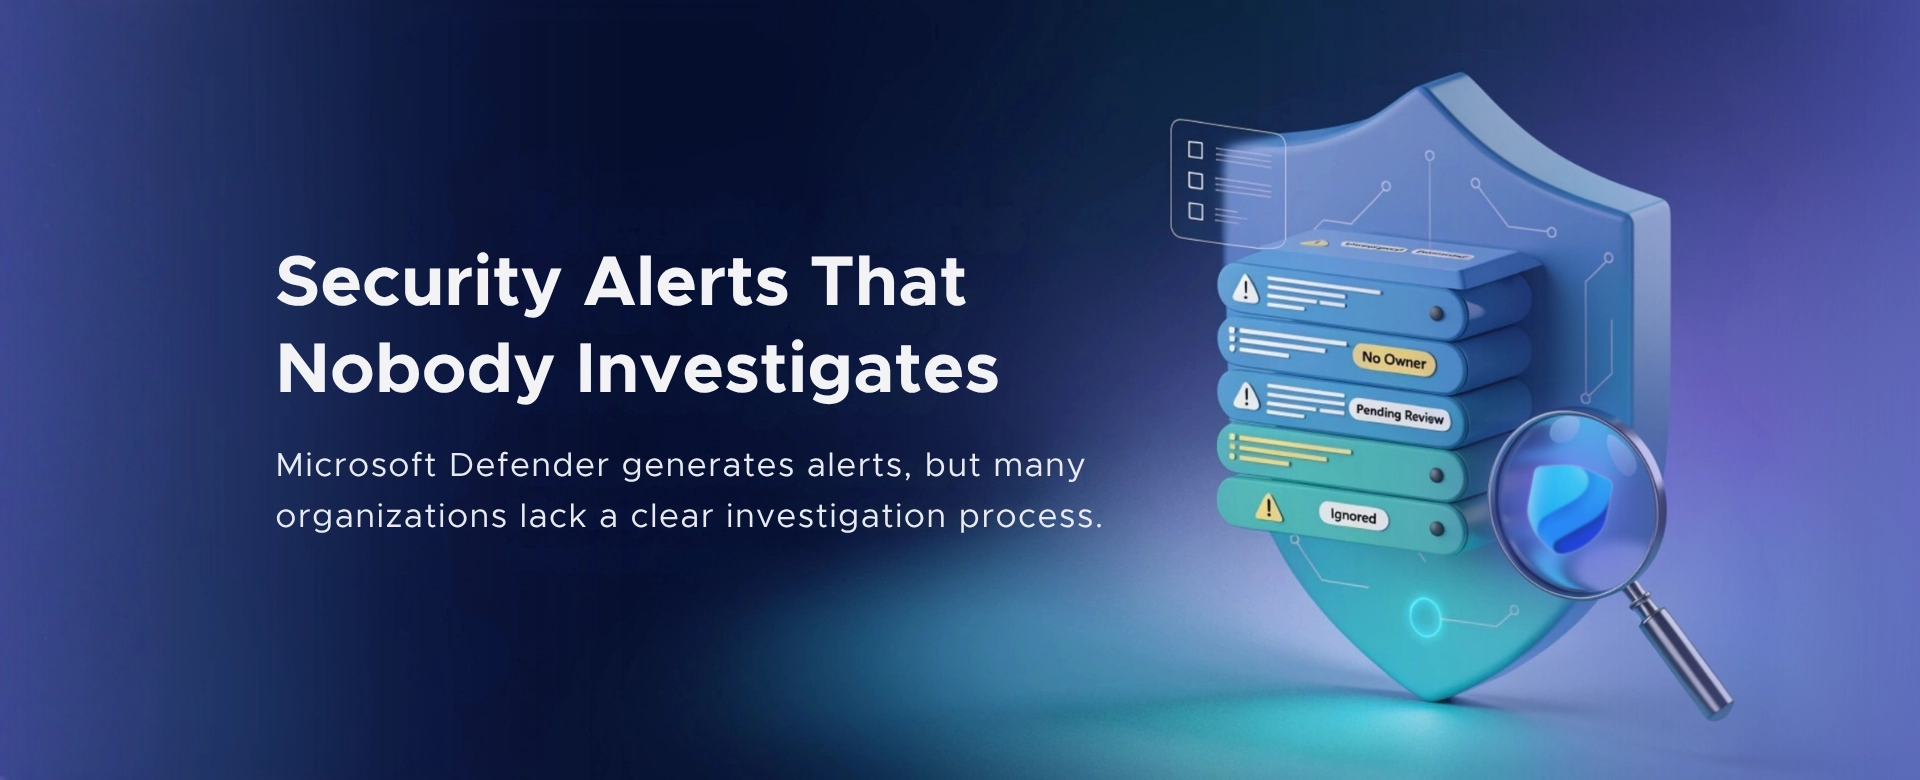 Security Alerts That Nobody Investigates - And Why That’s More Dangerous Than Having None
Security alerts mean nothing if no one investigates them. Ignored alerts create false confidence - and give attackers the time they need to cause real damage.
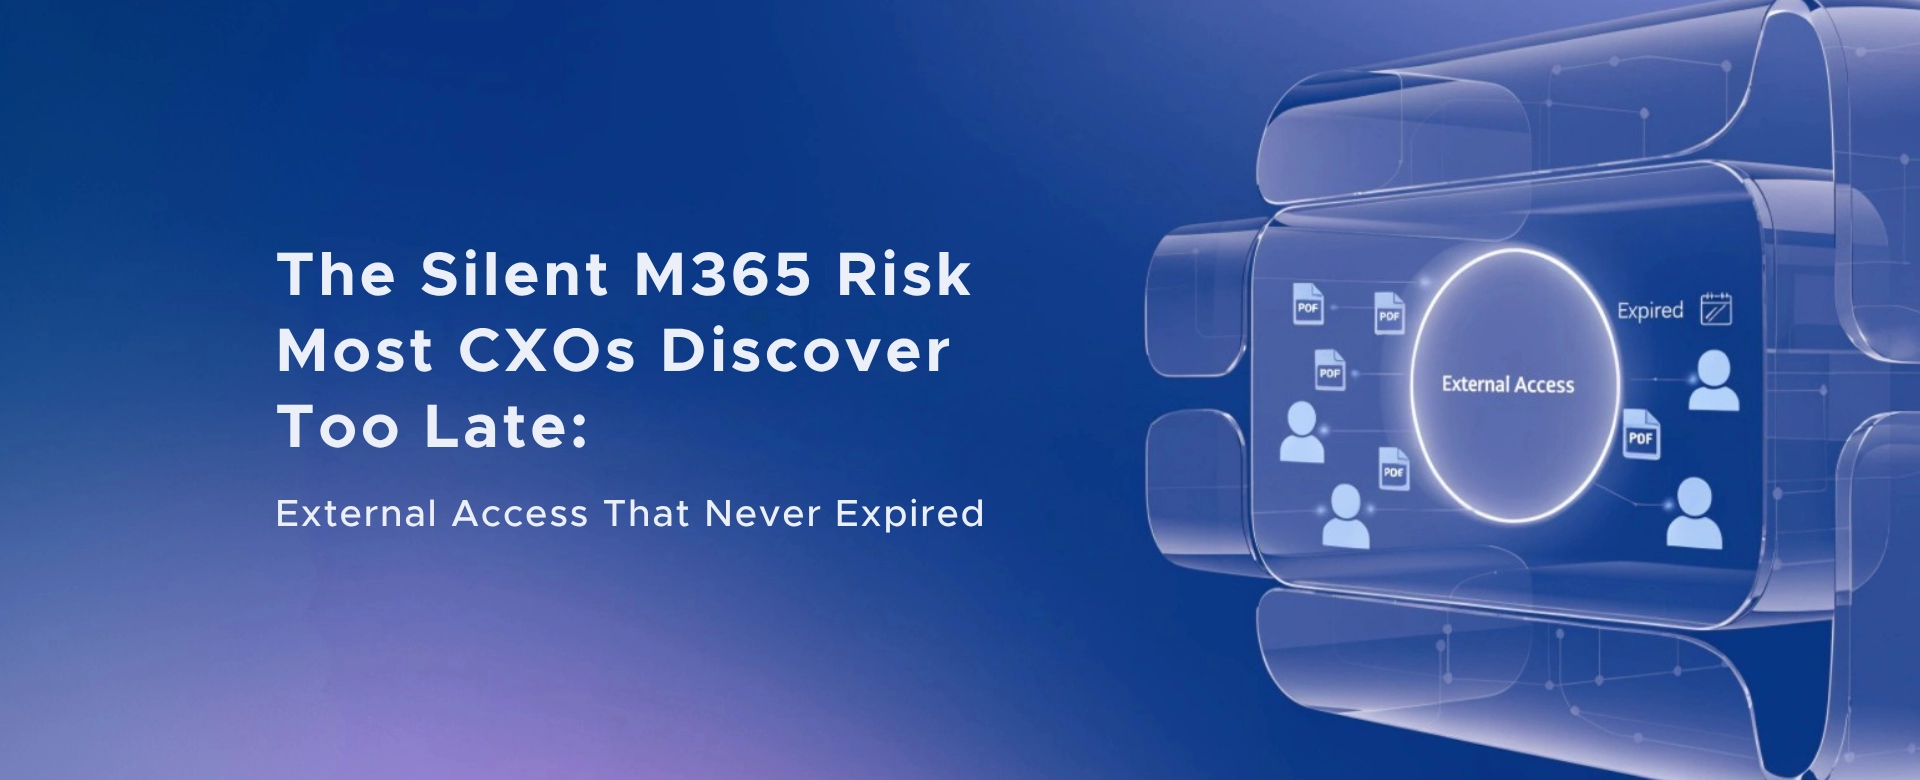 The Silent M365 Risk Most CXOs Discover Too Late: External Access That Never Expired
A hidden Microsoft 365 risk many CXOs overlook - expired external access that quietly breaks Zero Trust and exposes organizations to serious security gaps.