Enrollment usually works smoothly, but issues can still occur.
Below are the most common questions admins and users ask during enrollment.
- What is device enrollment in Intune?
Device enrollment is the process of registering a device with Microsoft Intune so it can be managed and secured.
- What happens when a device is enrolled in Intune?
Intune applies security policies, compliance rules, and work apps.
For BYOD devices, only work data is managed.
- Do I need an Intune license to enroll a device?
Yes. Each user enrolling a device must have an Intune license assigned.
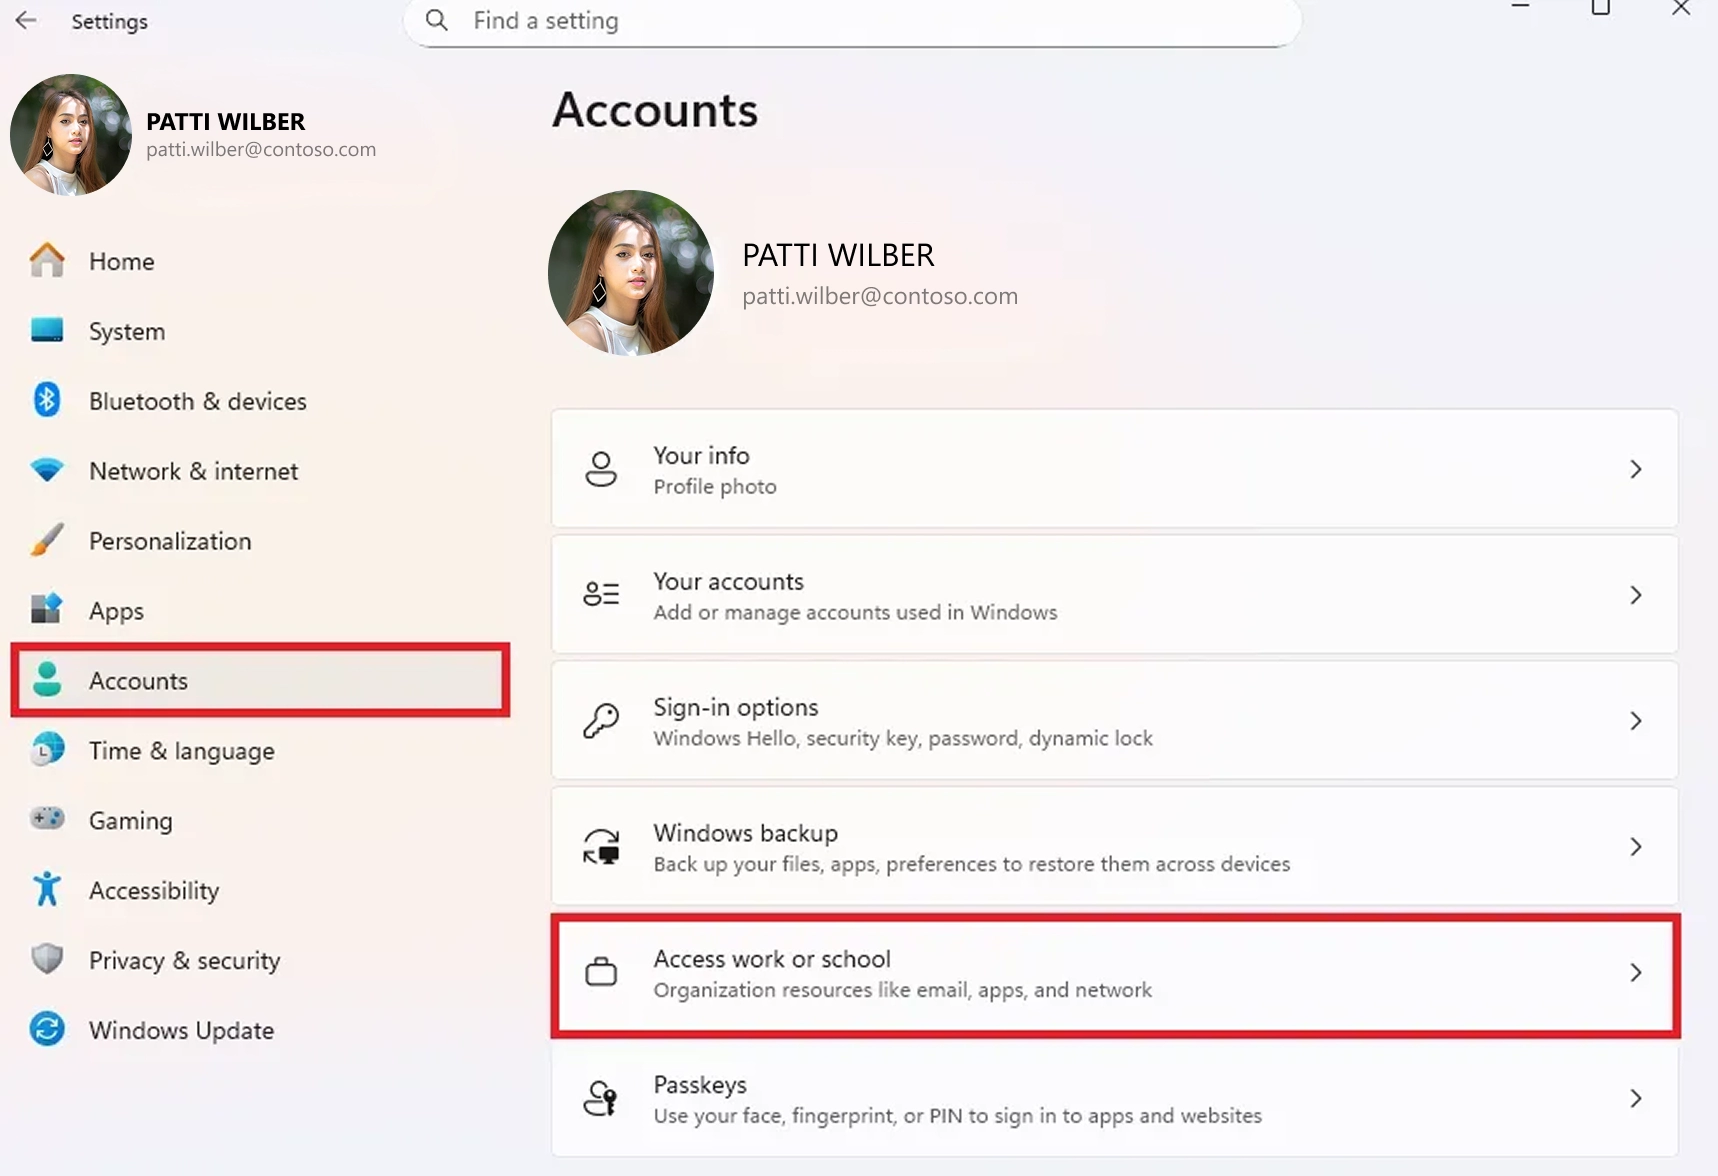
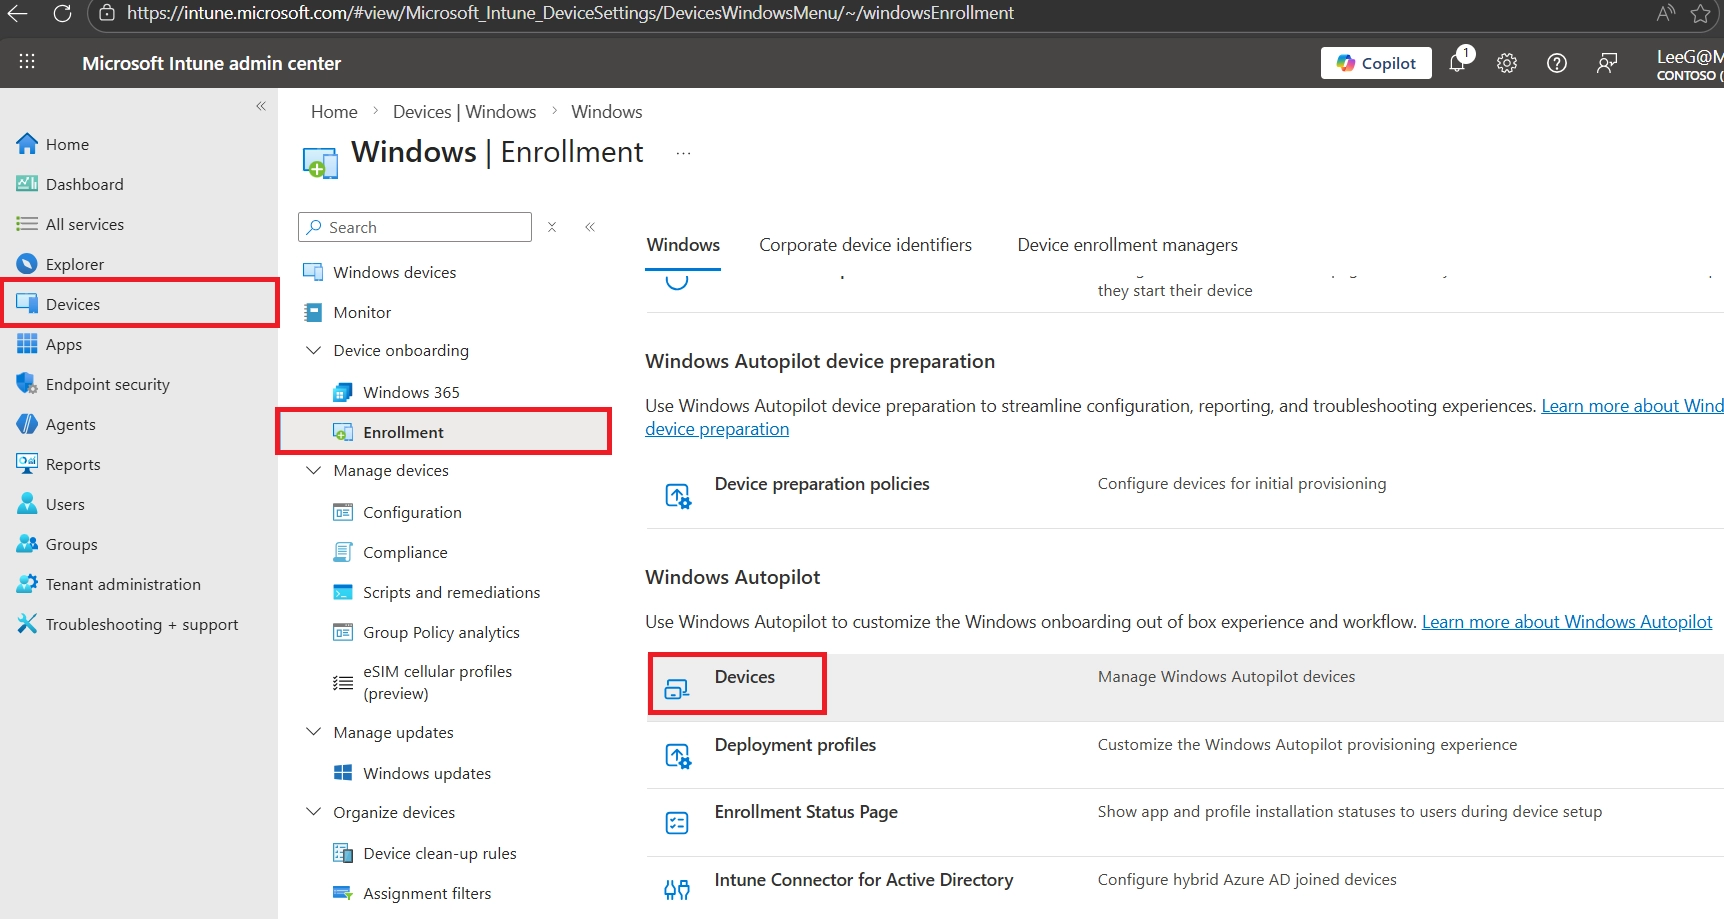
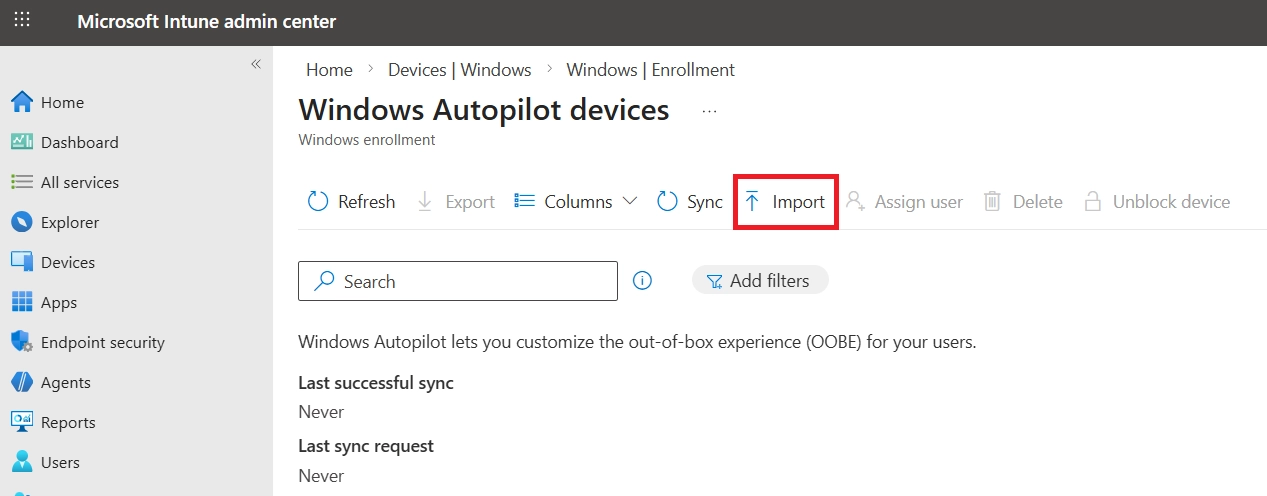
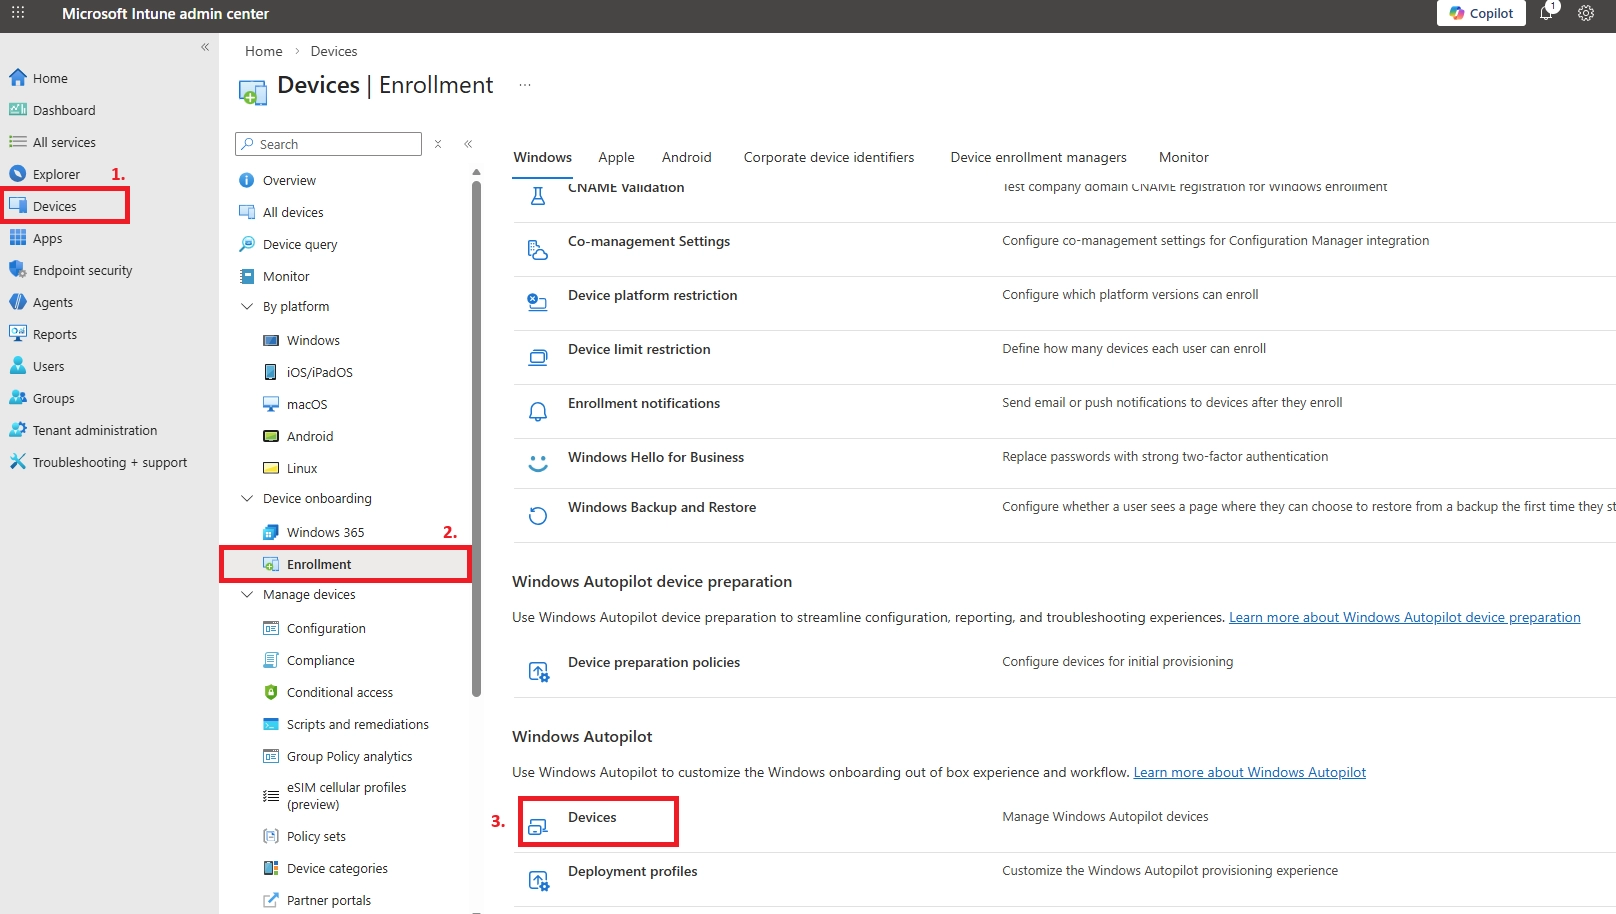
- How do I manually enroll a device in Intune?
Most devices are enrolled using the Intune Company Portal app by signing in with a work account and following the steps.
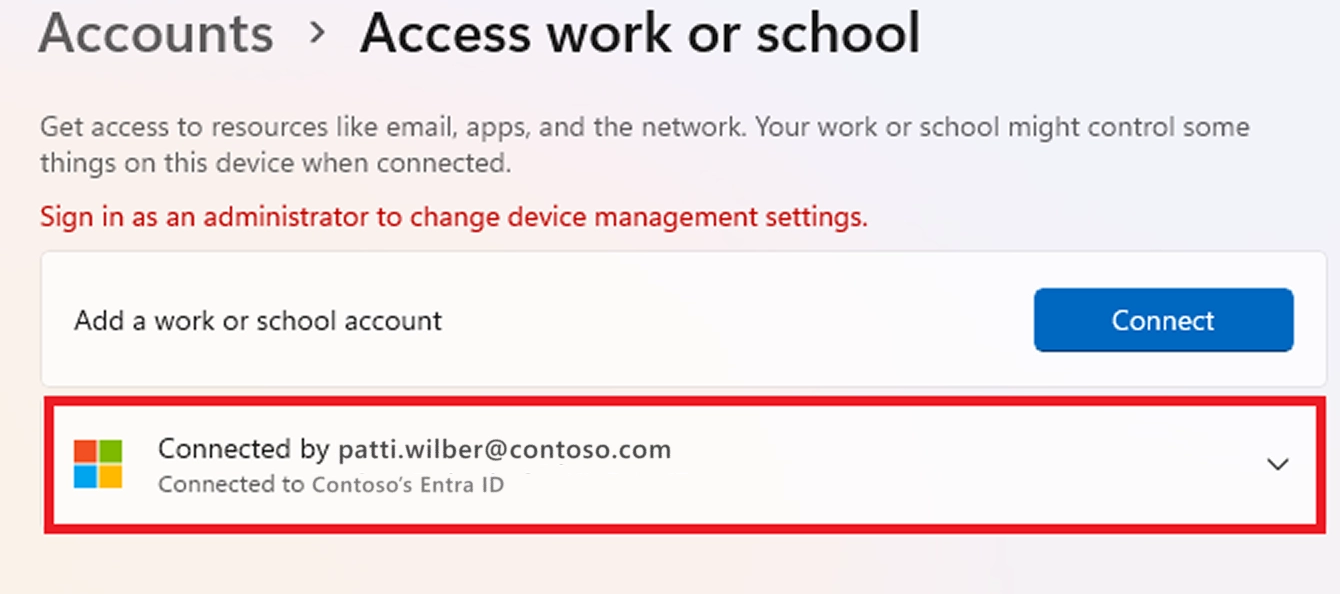
- Why doesn’t my device appear in Intune after enrollment?
Common reasons include:
- Enrollment steps not completed
- Missing Intune license
- Enrollment blocked by policy
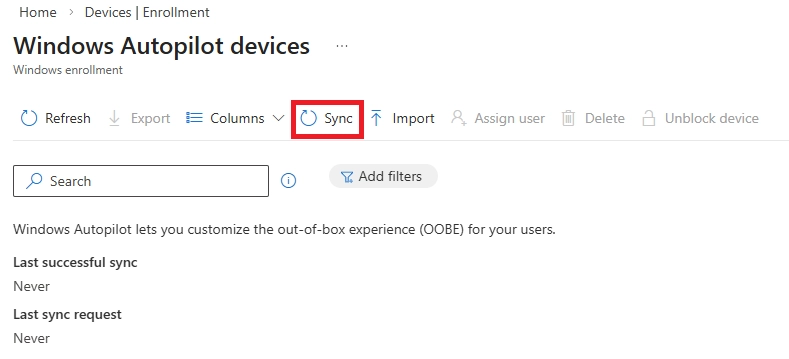
Syncing from Company Portal usually fixes this.
- Can I enroll a device without wiping it?
Yes. Most BYOD and existing devices can be enrolled without a reset.
Wiping is only required for Autopilot, Apple ADE, or fully managed Android.
- What is the difference between Entra ID joined and registered devices?
- Joined: Fully corporate-managed device
- Registered: Personal device with limited management
- Can a user enroll multiple devices in Intune?
Yes, but there is a limit.
Admins can restrict how many devices each user can enroll.
- Why is enrollment blocked with an error message?
This usually happens due to:
- Enrollment restrictions
- User not in MDM scope
- Device type not allowed
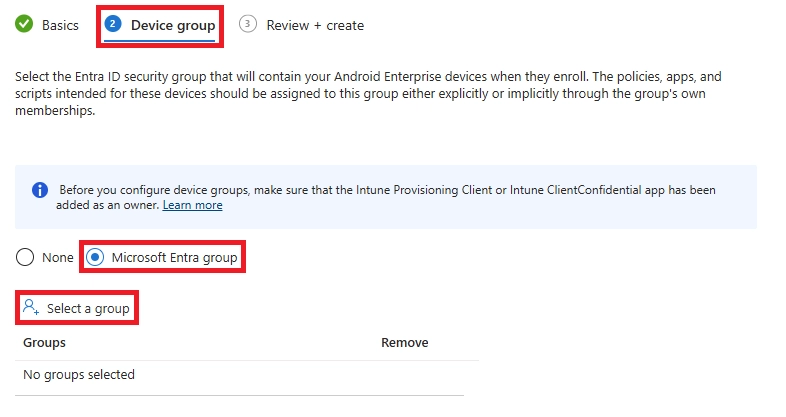
- Can Intune manage personal devices (BYOD)?
Yes. Intune supports BYOD using privacy-focused methods like:
- iOS User Enrollment
- Android Work Profile
- Windows personal enrollment
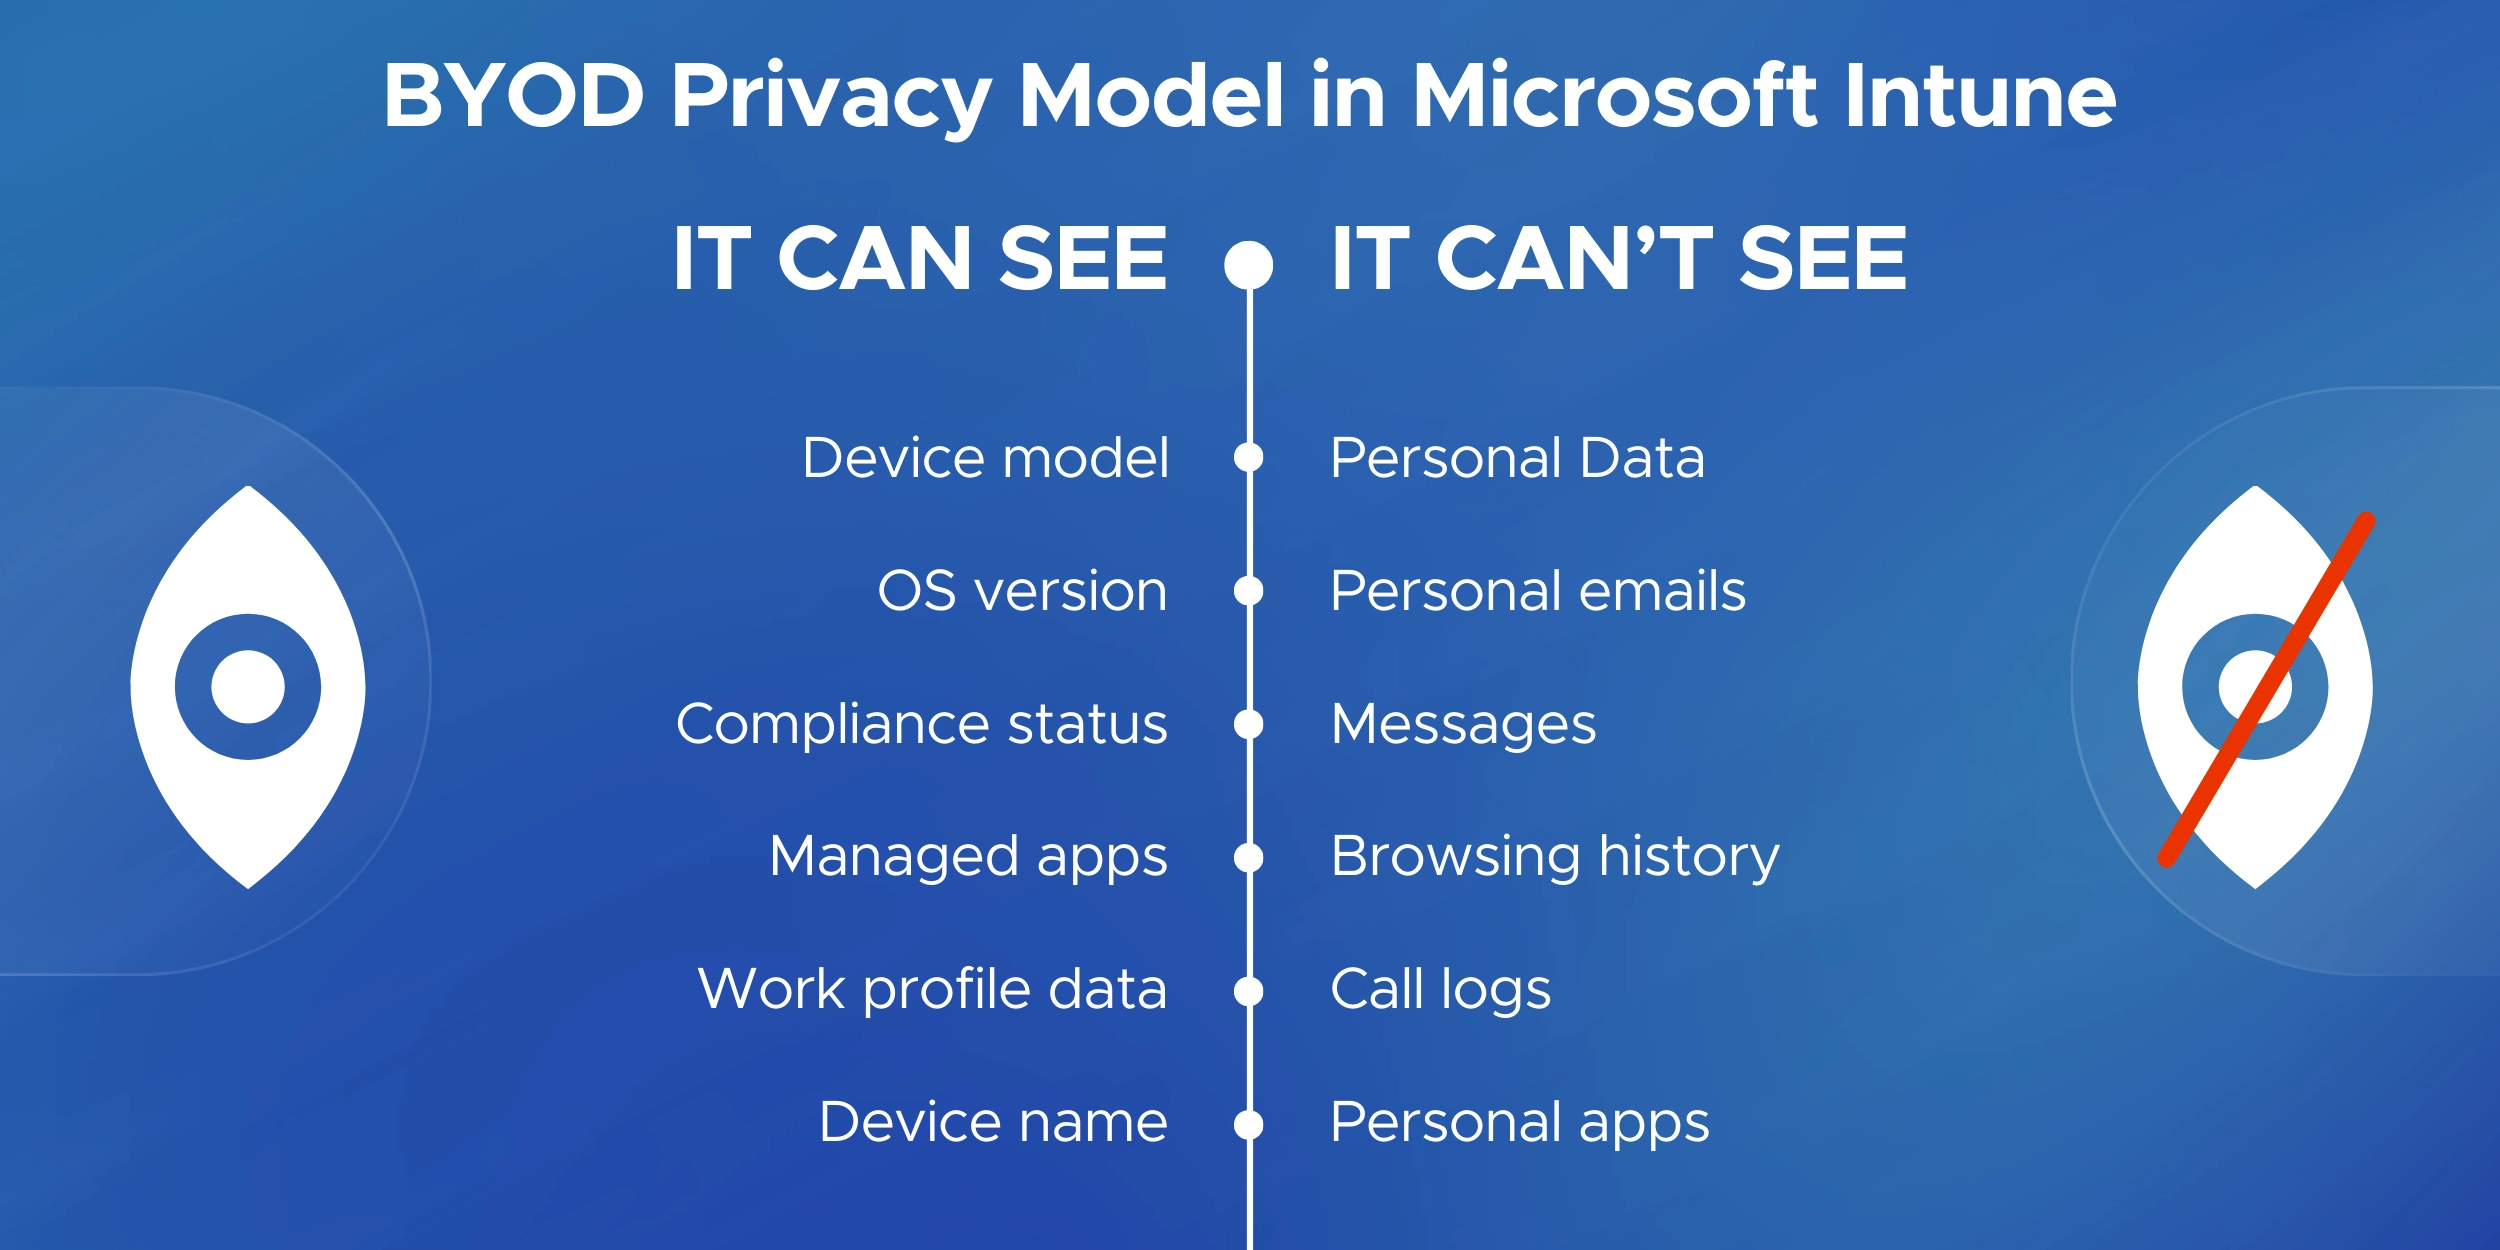
- Can Intune see personal data on BYOD devices?
No.
Intune cannot see personal photos, messages, emails, or browsing history.
- What data can Intune see on an enrolled device?
Intune can see:
- Device model and OS version
- Compliance status
- Managed work apps
- How do I re-enroll a device in Intune?
Unenroll the device first, then enroll again using Company Portal or the original enrollment method.
- How do I remove a device from Intune?
Admins can retire or wipe devices from the Intune portal.
Users can remove their own BYOD devices via Company Portal.
- Can I protect company data without enrolling the device?
Yes.
Intune App Protection Policies can secure apps like Outlook without full device enrollment.
- Does Intune enrollment give IT full control of my device?
Only for corporate-owned devices.
BYOD enrollment provides limited, work-only control.
- What should I do if enrollment keeps failing?
Check:
- License assignment
- Enrollment restrictions
- Network connectivity
Then retry from Company Portal.
- Is device enrollment mandatory to access Microsoft 365 apps?
It depends on company policy.
Some organizations require enrollment or compliance to access email and Teams.