

Your Microsoft 365 tenant can leak data silently - no malware, no alerts. Learn how simple misconfigurations enable ongoing email and data exfiltration.
Impersonation phishing has become one of the biggest risks in Microsoft 365 environments.
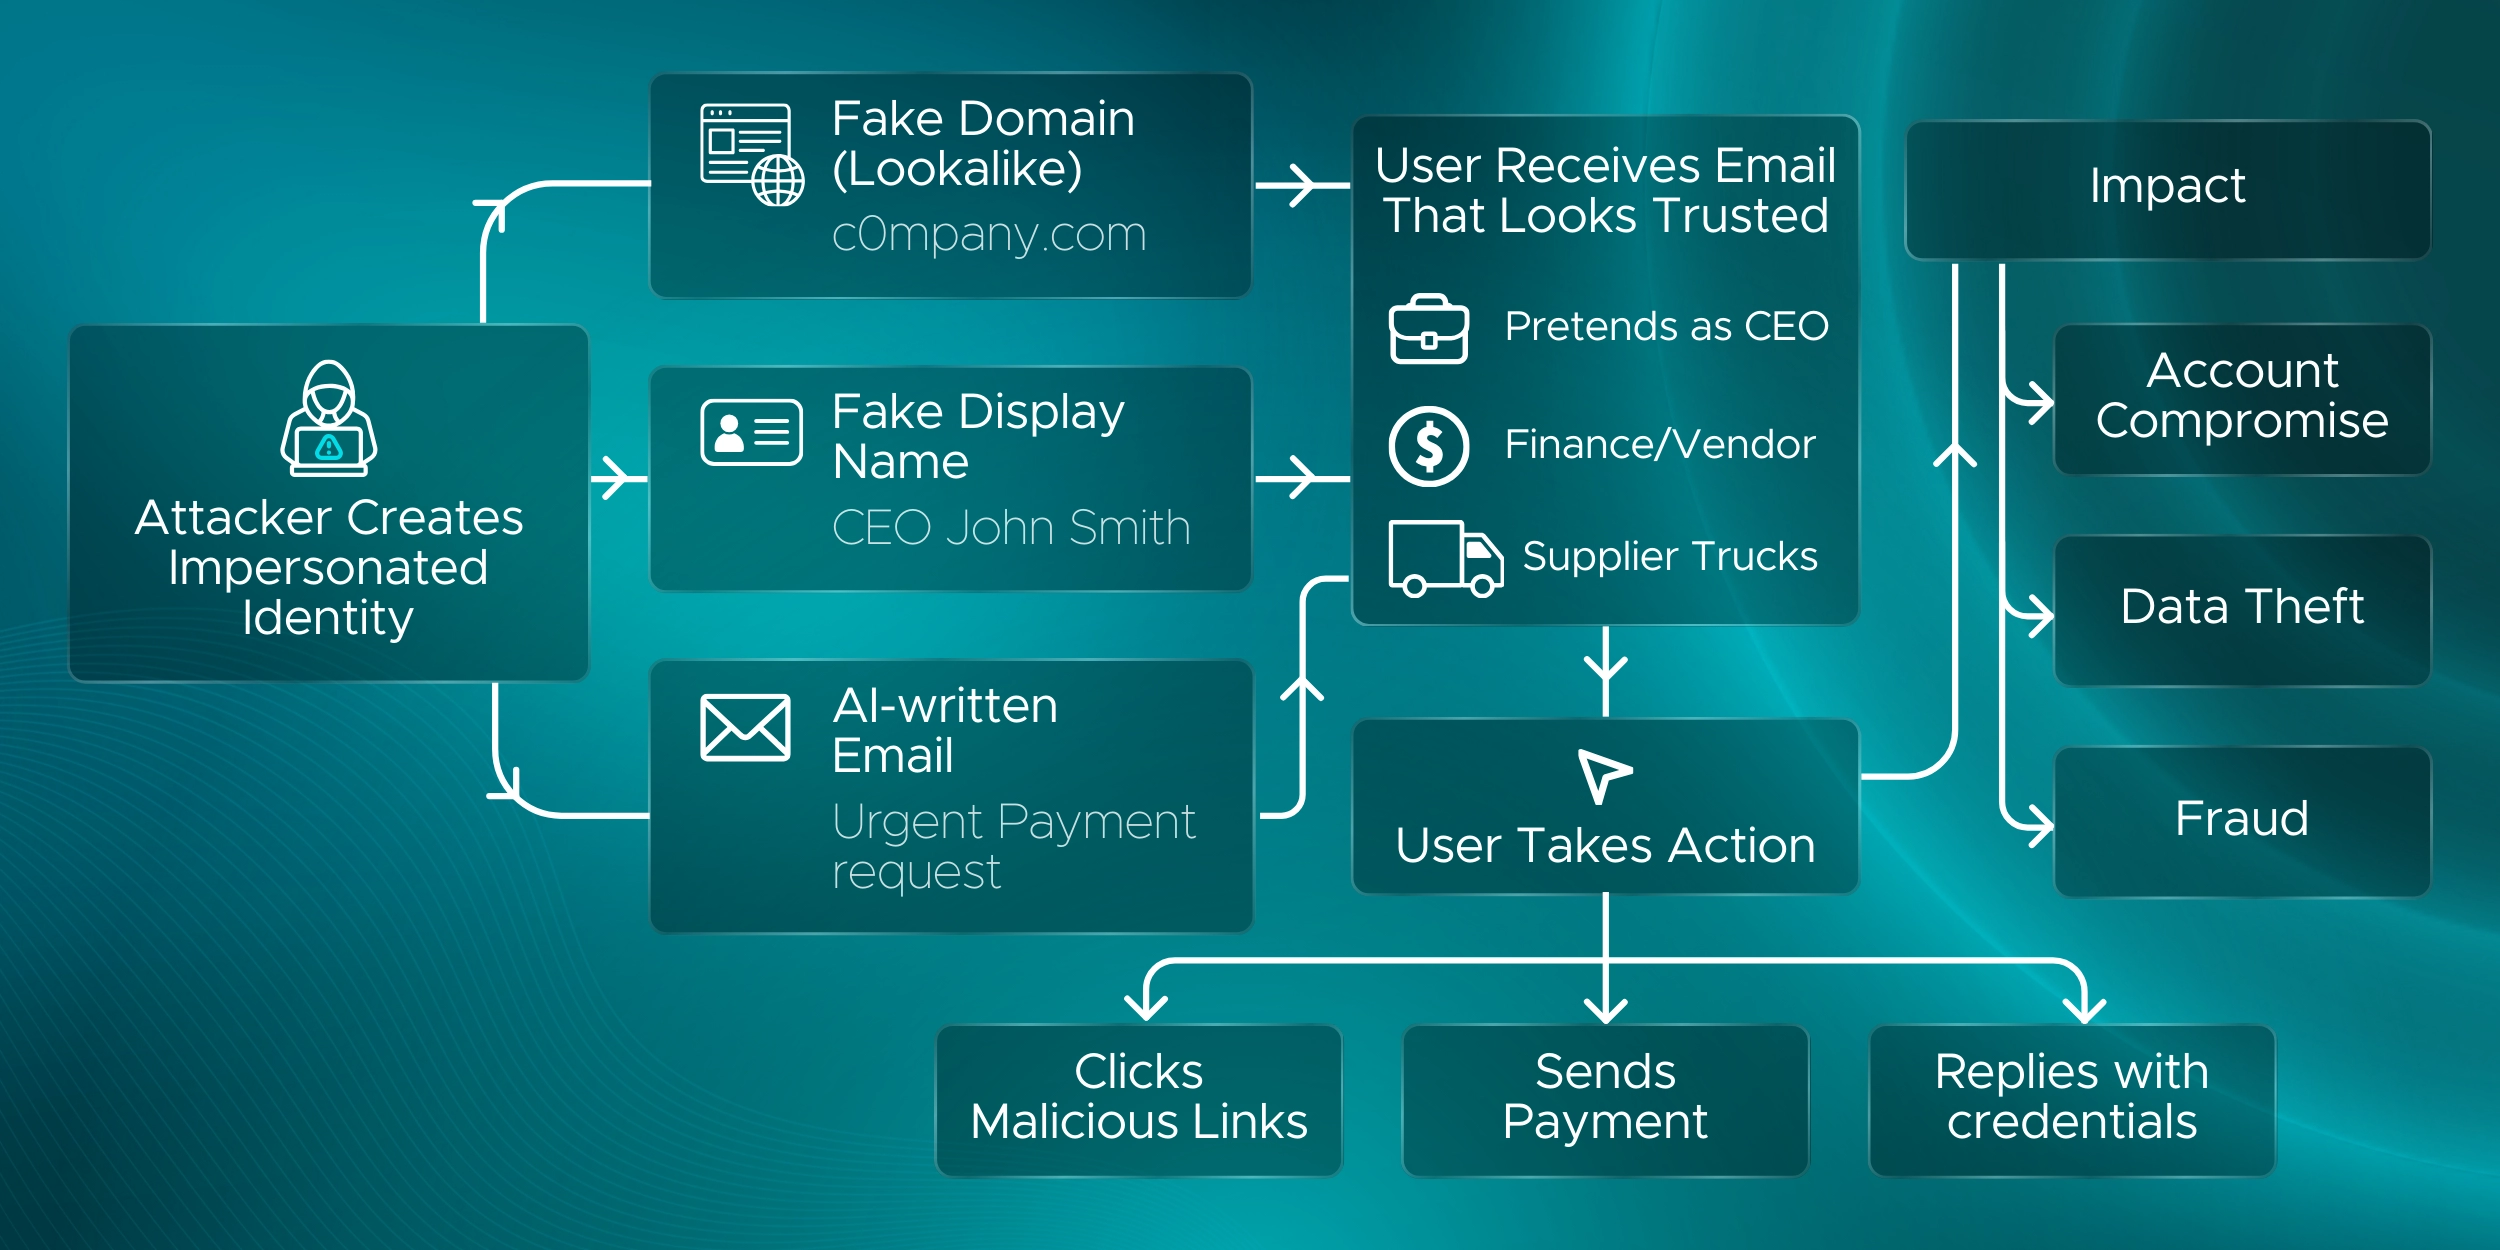
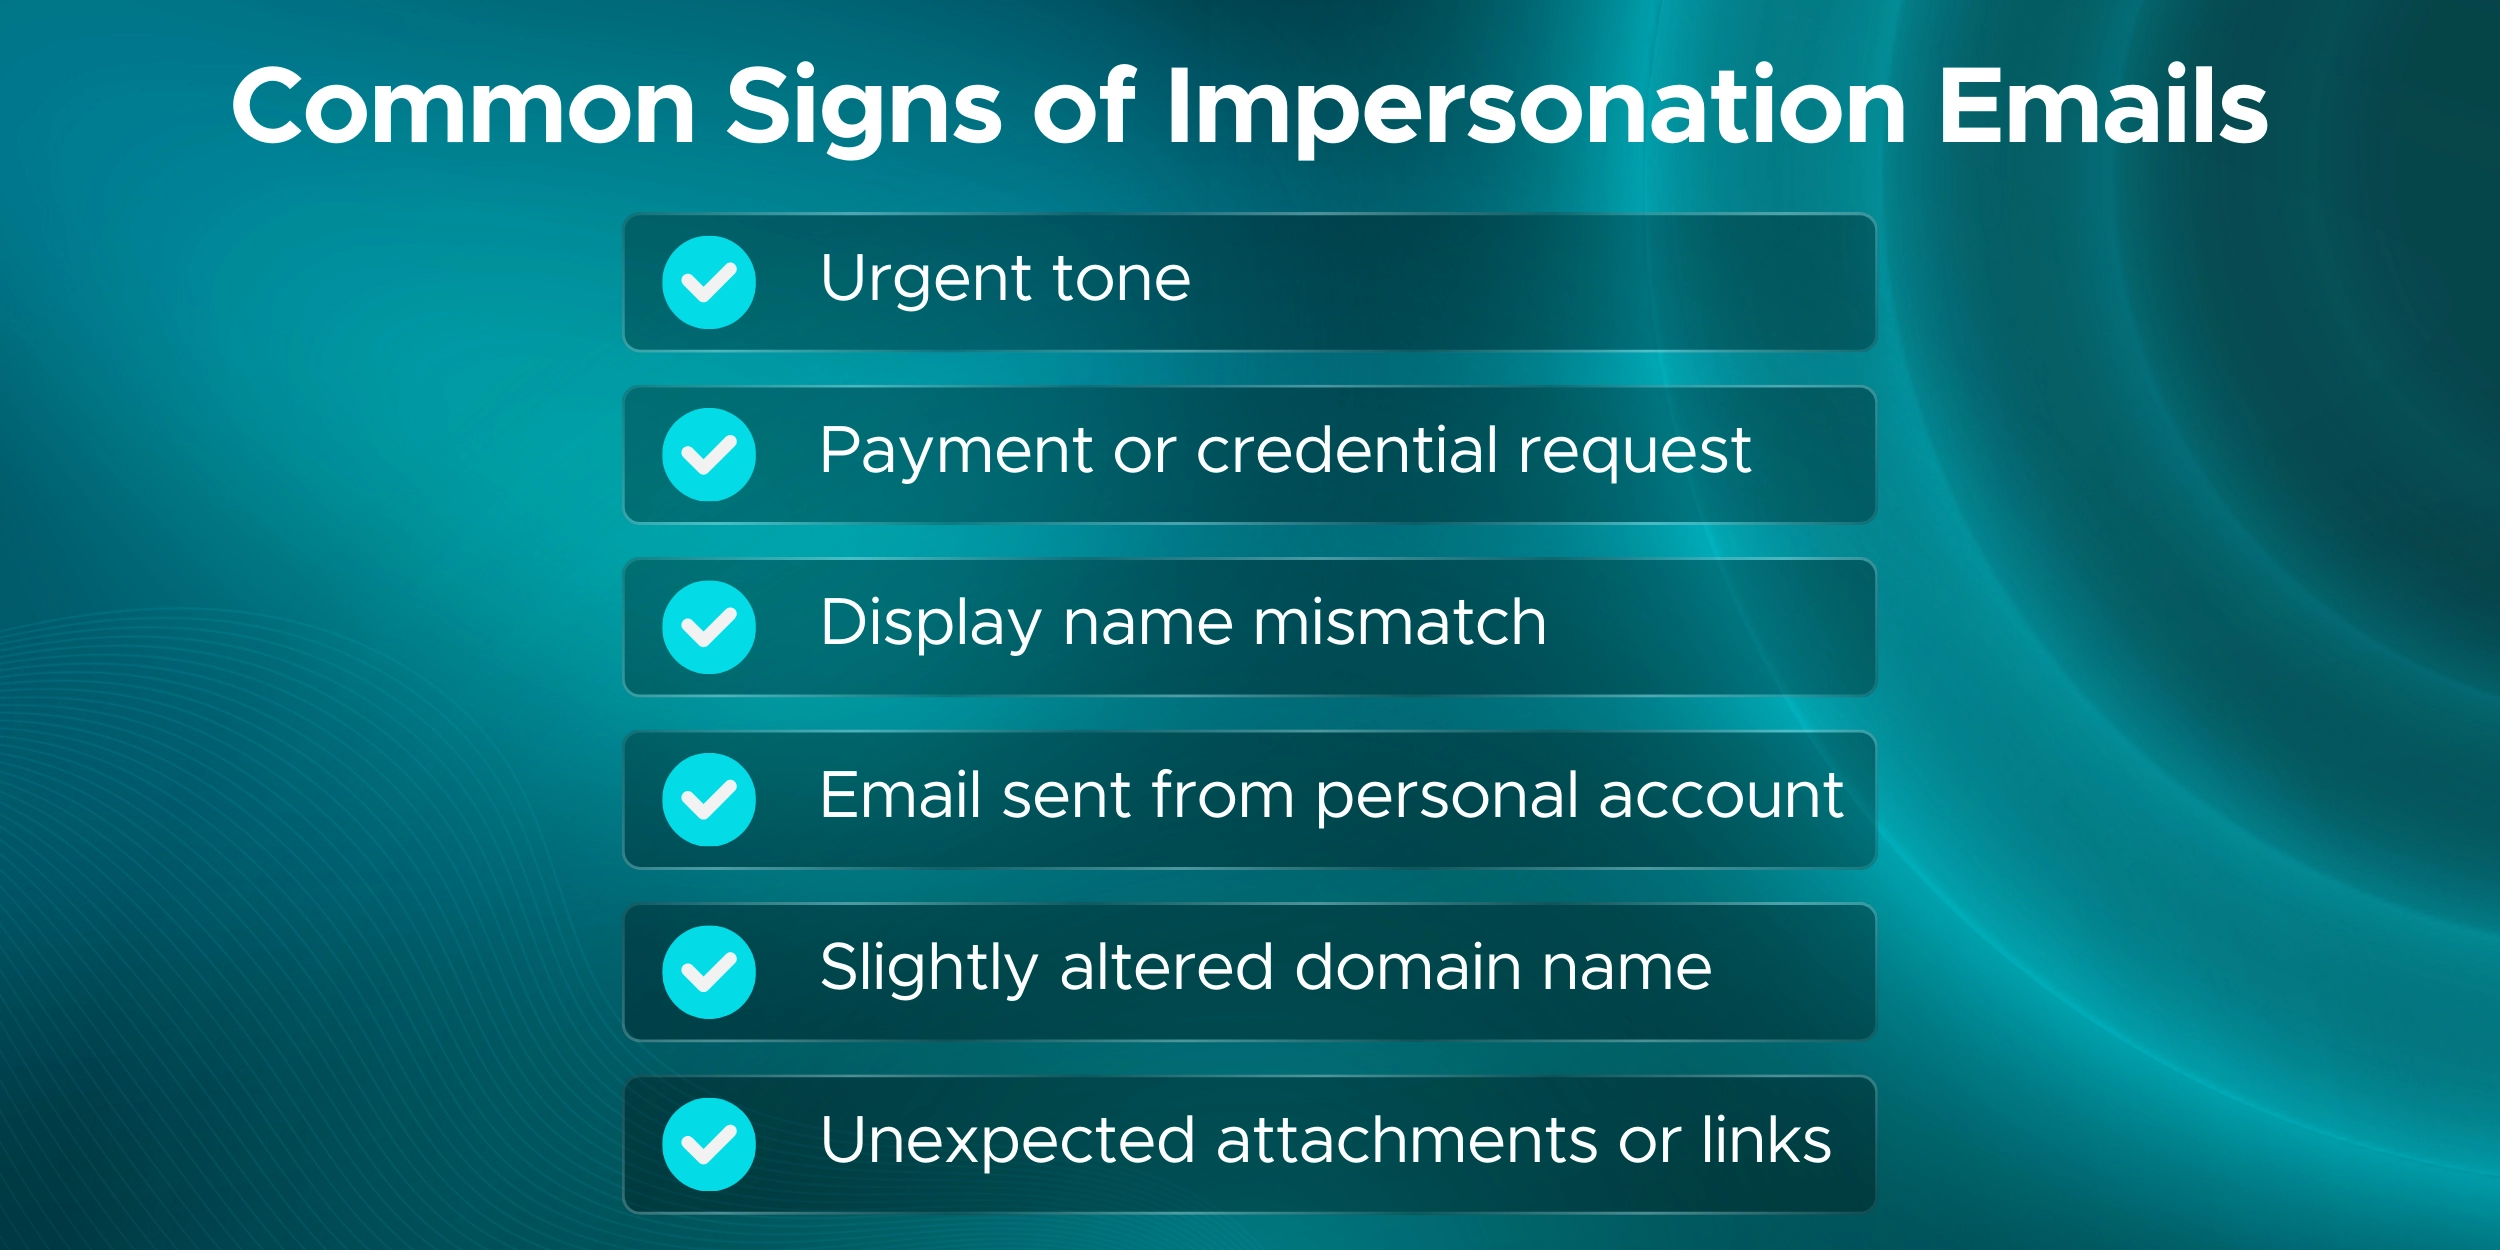
Attackers no longer rely on obvious fake links or messy spelling mistakes. Instead, they copy real domains, logos, and writing styles to look trusted and familiar.
Many of these attacks pretend to be someone important, like a CEO, HR manager, bank, or vendor. And because they look real, they slip past basic email filters and convince people to act fast.
Studies show that around 89% of phishing attacks now involve impersonation. With AI tools, these messages are even harder to tell apart from genuine communication.
Why does this matter?
Because a single successful impersonation email can lead to:
This guide will help you build strong phishing protection in Microsoft 365.
To stop impersonation attacks in Microsoft 365, the best place to start is with anti-phishing policies in Microsoft Defender. This is where Microsoft 365 phishing protection becomes active, and where you configure how emails are scanned, flagged, or blocked.
Go to Microsoft Defender portal (security.microsoft.com) and sign in with an admin account.
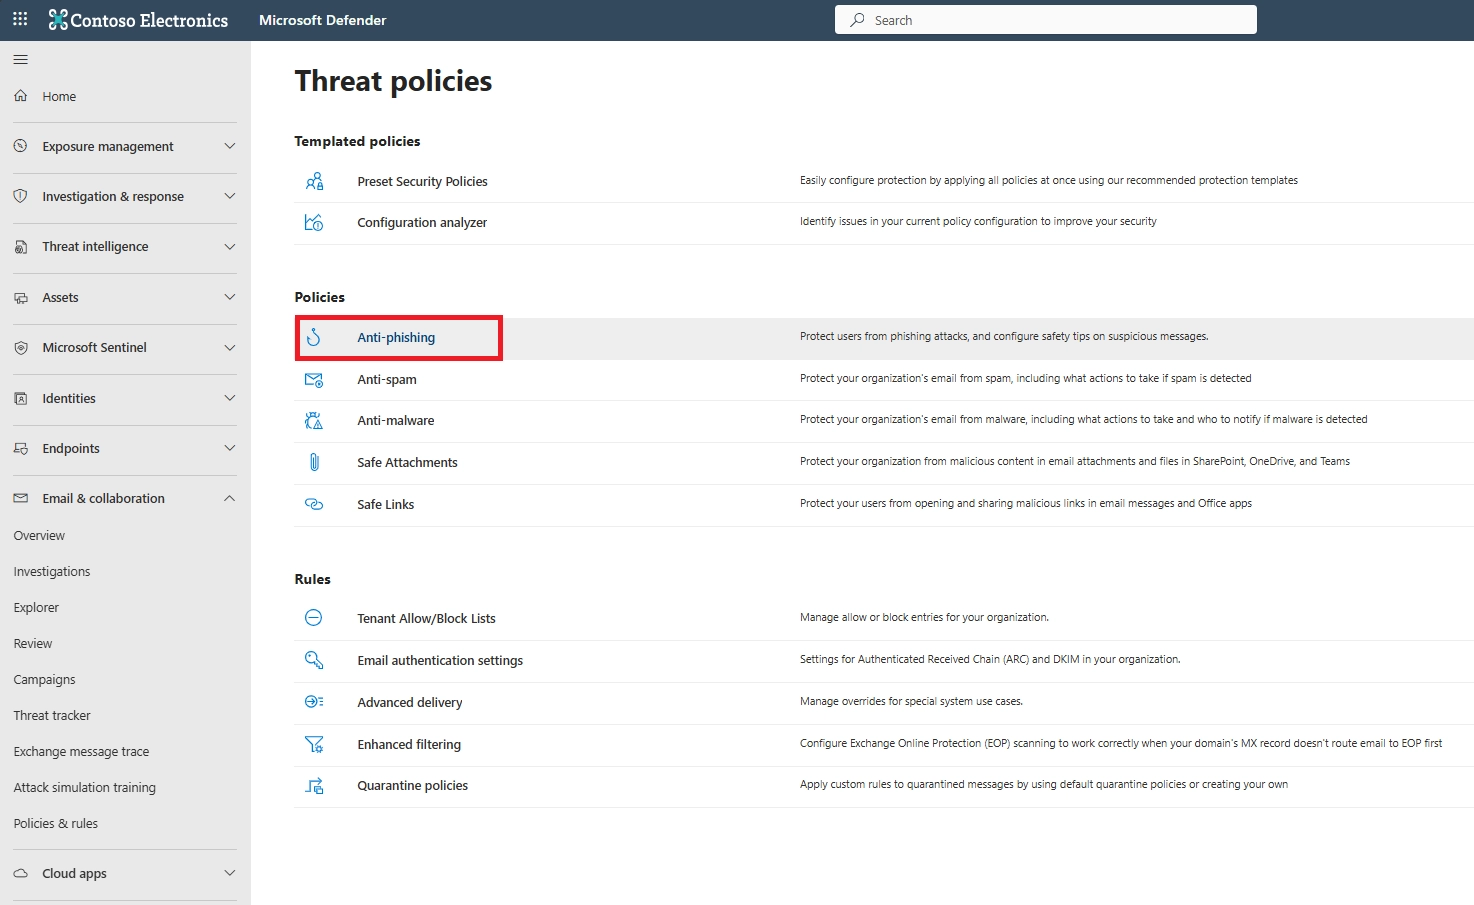
Once you’re in the Microsoft Defender portal, go to:
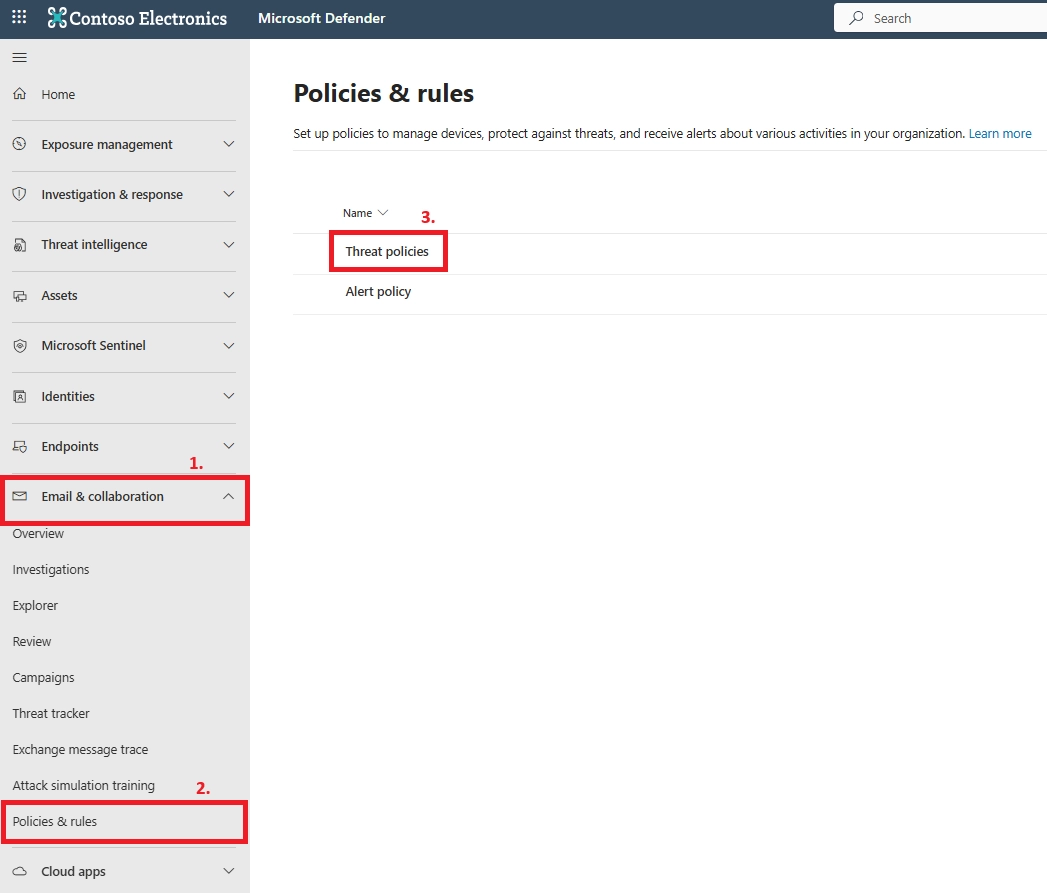
Email & Collaboration → Policies & Rules → Threat Policies → Anti-phishing in the Policies section.
Before continuing, check your plan.
Impersonation protection and advanced anti-phishing policies require:
If you only have basic EOP (Exchange Online Protection), you’ll still get some spam and spoofing protection, but not full impersonation targeting. In that case, you can still use SPF, DKIM, and DMARC for baseline protection.
In the Anti-Phishing policies page, you’ll see a list of existing policies.
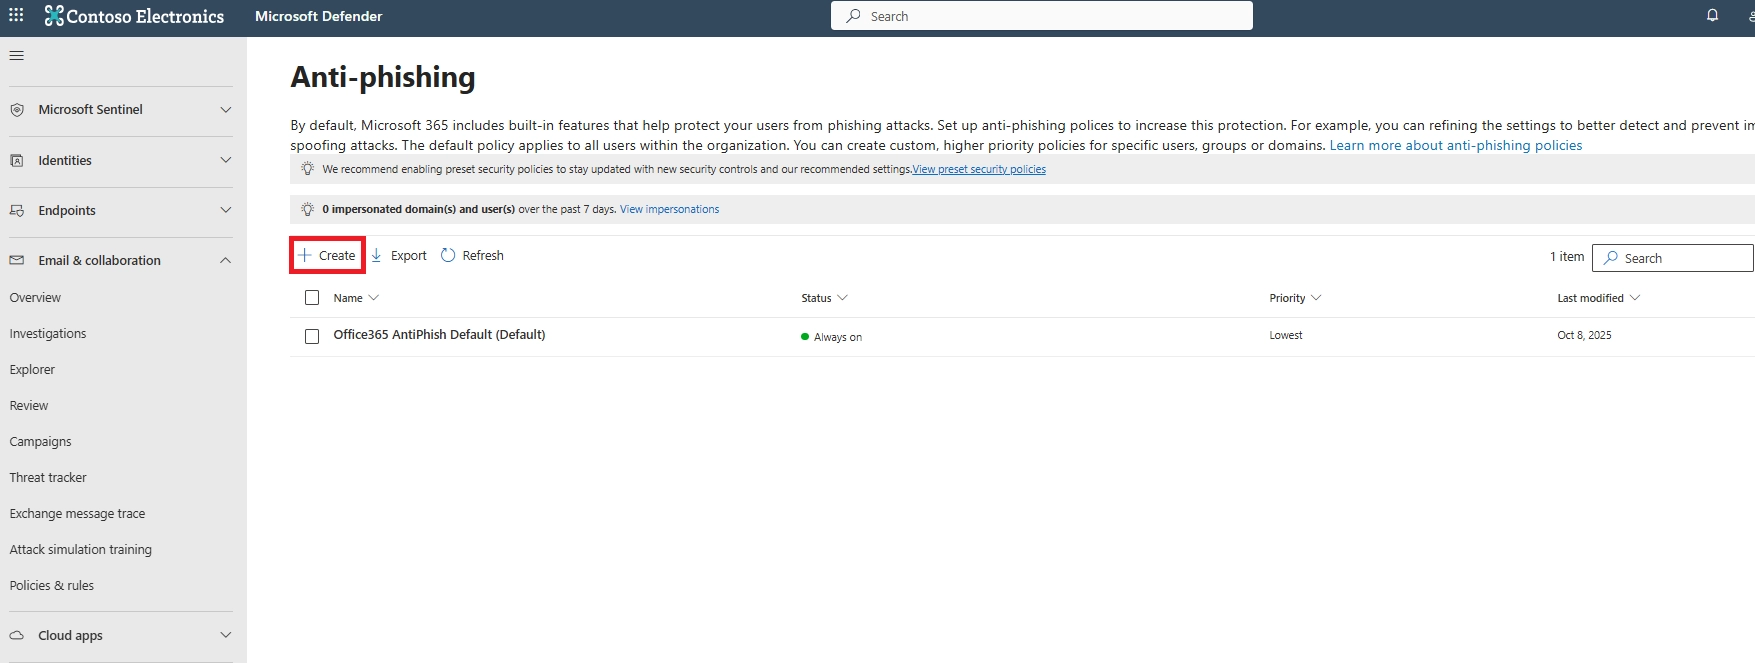
You can:
Creating a custom policy is usually better.
It lets you protect specific email groups, VIP users, and high-risk accounts without affecting everyone at once.
On the Policy name page, configure these settings:
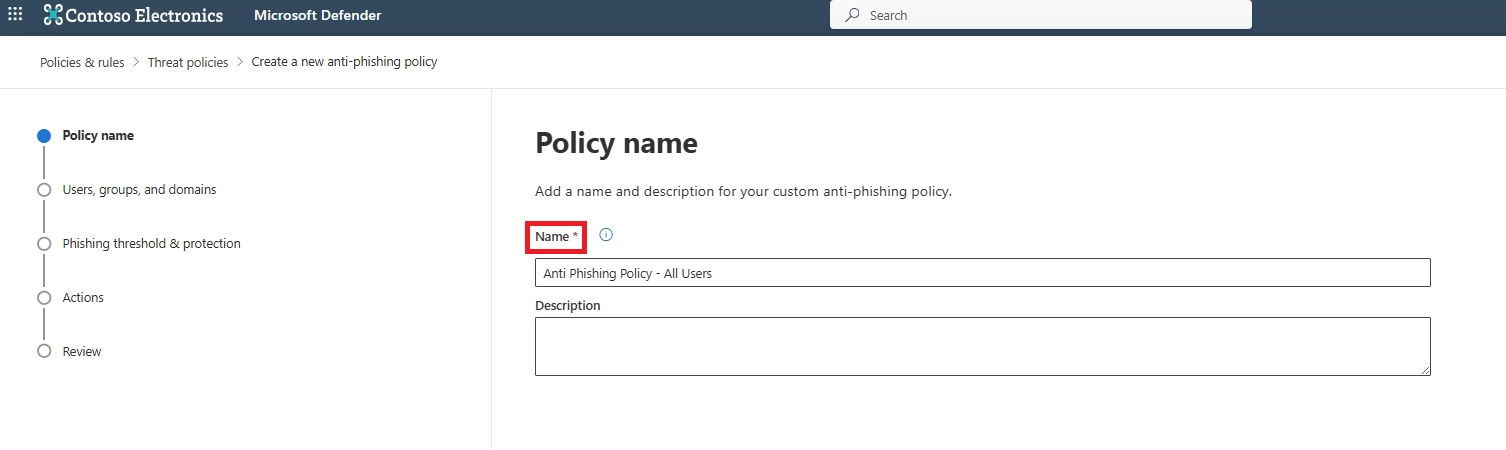
When you're finished on the Policy name page, select Next.
On the Users, groups, and domains page, identify the internal recipients that the policy applies to (recipient conditions):
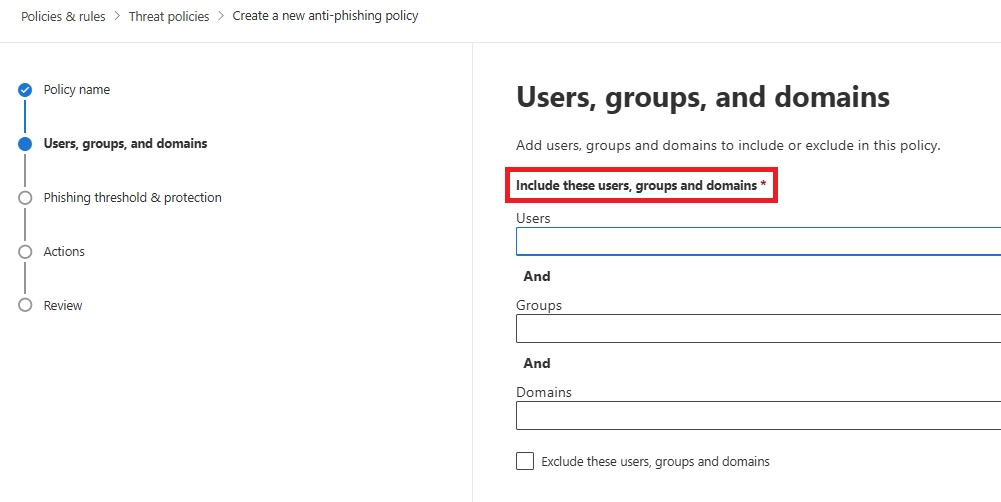
Tip:
Next, open the Phishing threshold and protection page.
Phishing email threshold: Use the slider to select one of the following values:
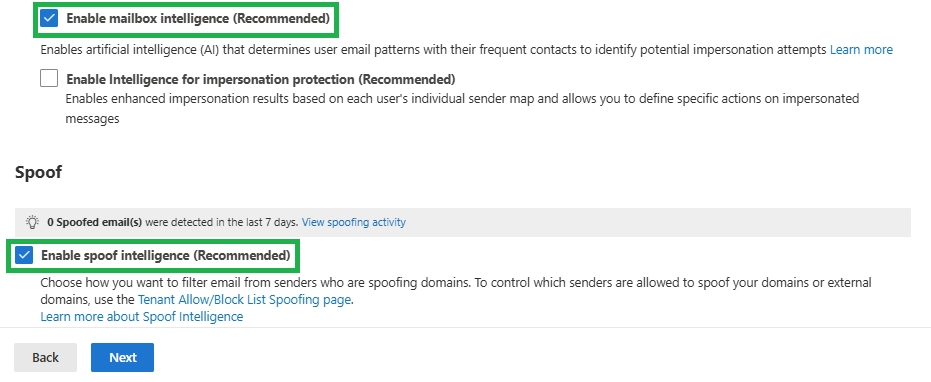
Impersonation: These settings are conditions for the policy that identify specific senders to look for (individually or by domain) in the From address of inbound messages.
You identify the internal and external senders to protect by the combination of their display name and email address.
Select Add user. In the Add user flyout that opens, do the following steps:
TIP:

Select Add domains.
TIP: The maximum number of trusted sender and domain entries is 1024.
On the Actions page, configure the following settings:
Honor DMARC record policy when the message is detected as spoof: This setting is selected by default, and allows you to control what happens to messages where the sender fails explicit DMARC checks and the DMARC policy is set to p=quarantine or p=reject:

Quarantine is recommended because users never see the suspicious message. Junking the email allows the user to access it, which increases risk.
In simple terms, DMARC verifies whether an email claiming to come from a domain is real.
If a message fails DMARC, set it to:
This helps prevent fake domains and spoofed emails from reaching inboxes.
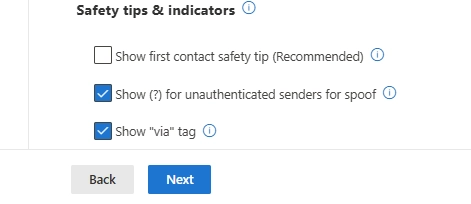
Finally, turn on Safety Tips & Indicators.
These warnings show up inside Outlook and tell users when something looks suspicious, such as:
This small step gives users an extra layer of awareness and reduces accidental clicks.
On the Review page, review your settings. You can select Edit in each section to modify the settings within the section. Or you can select Back or the specific page in the wizard.
When you're finished on the Review page, select Submit.
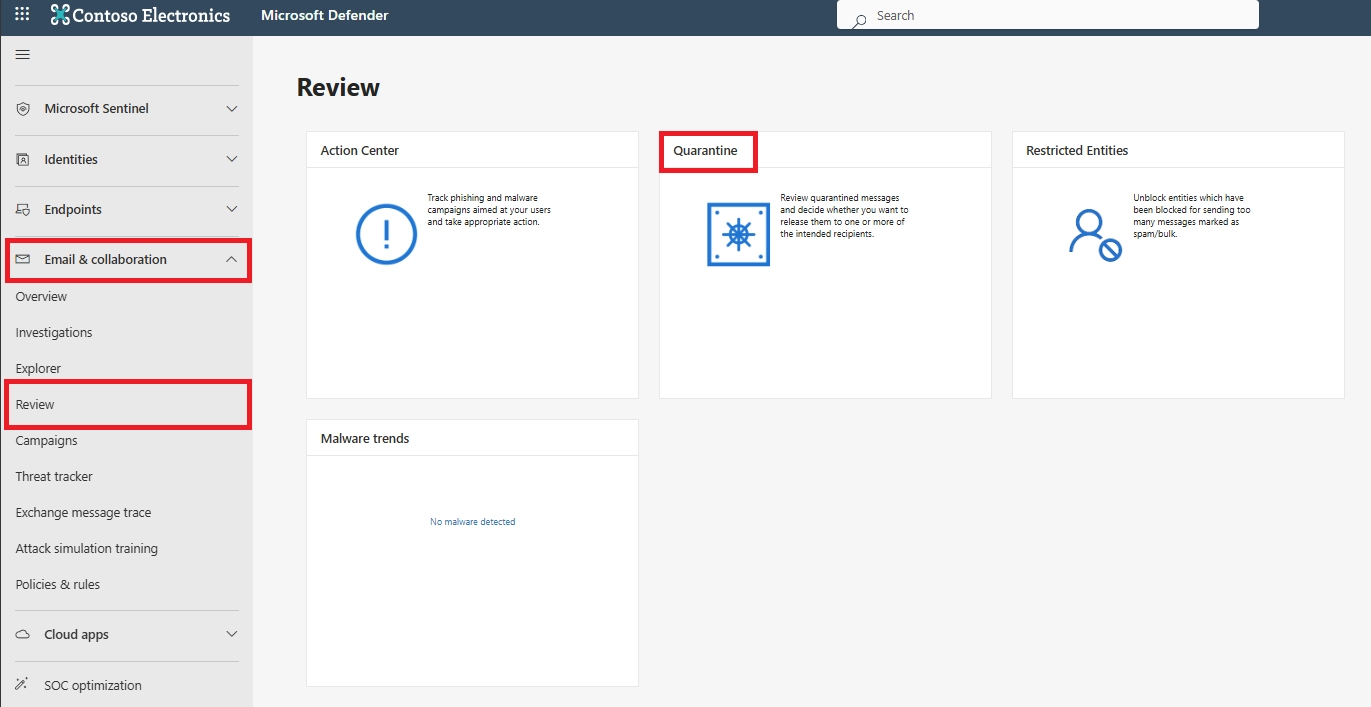
In the Microsoft Defender portal (security.microsoft.com) → Email & collaboration:
Once your impersonation policies are in place, the next step is to strengthen your overall Microsoft 365 phishing protection. Impersonation attacks rarely happen alone. They often come with dangerous links, fake login pages, or malicious attachments.
This part acts as a quick checklist. Each tool below works with your anti-phish policies to give stronger, complete protection across your organization.
Safe Links and Safe Attachments help block two common elements in impersonation attacks: unsafe URLs and malware-loaded files.
Safe Links scans every URL at the moment a user clicks and blocks it if it leads to a phishing site.
Safe Attachments opens suspicious files in a secure sandbox and stops harmful behavior before the file reaches the inbox.
You can enable both in Microsoft 365 Defender → Threat Policies and apply them across your organization.
Recommended settings include Replace URLs for Safe Links and Dynamic Delivery for Safe Attachments to avoid email delays.
These tools work alongside your anti-phishing policies and add real-time protection against the malicious links and files attackers often pair with impersonation.
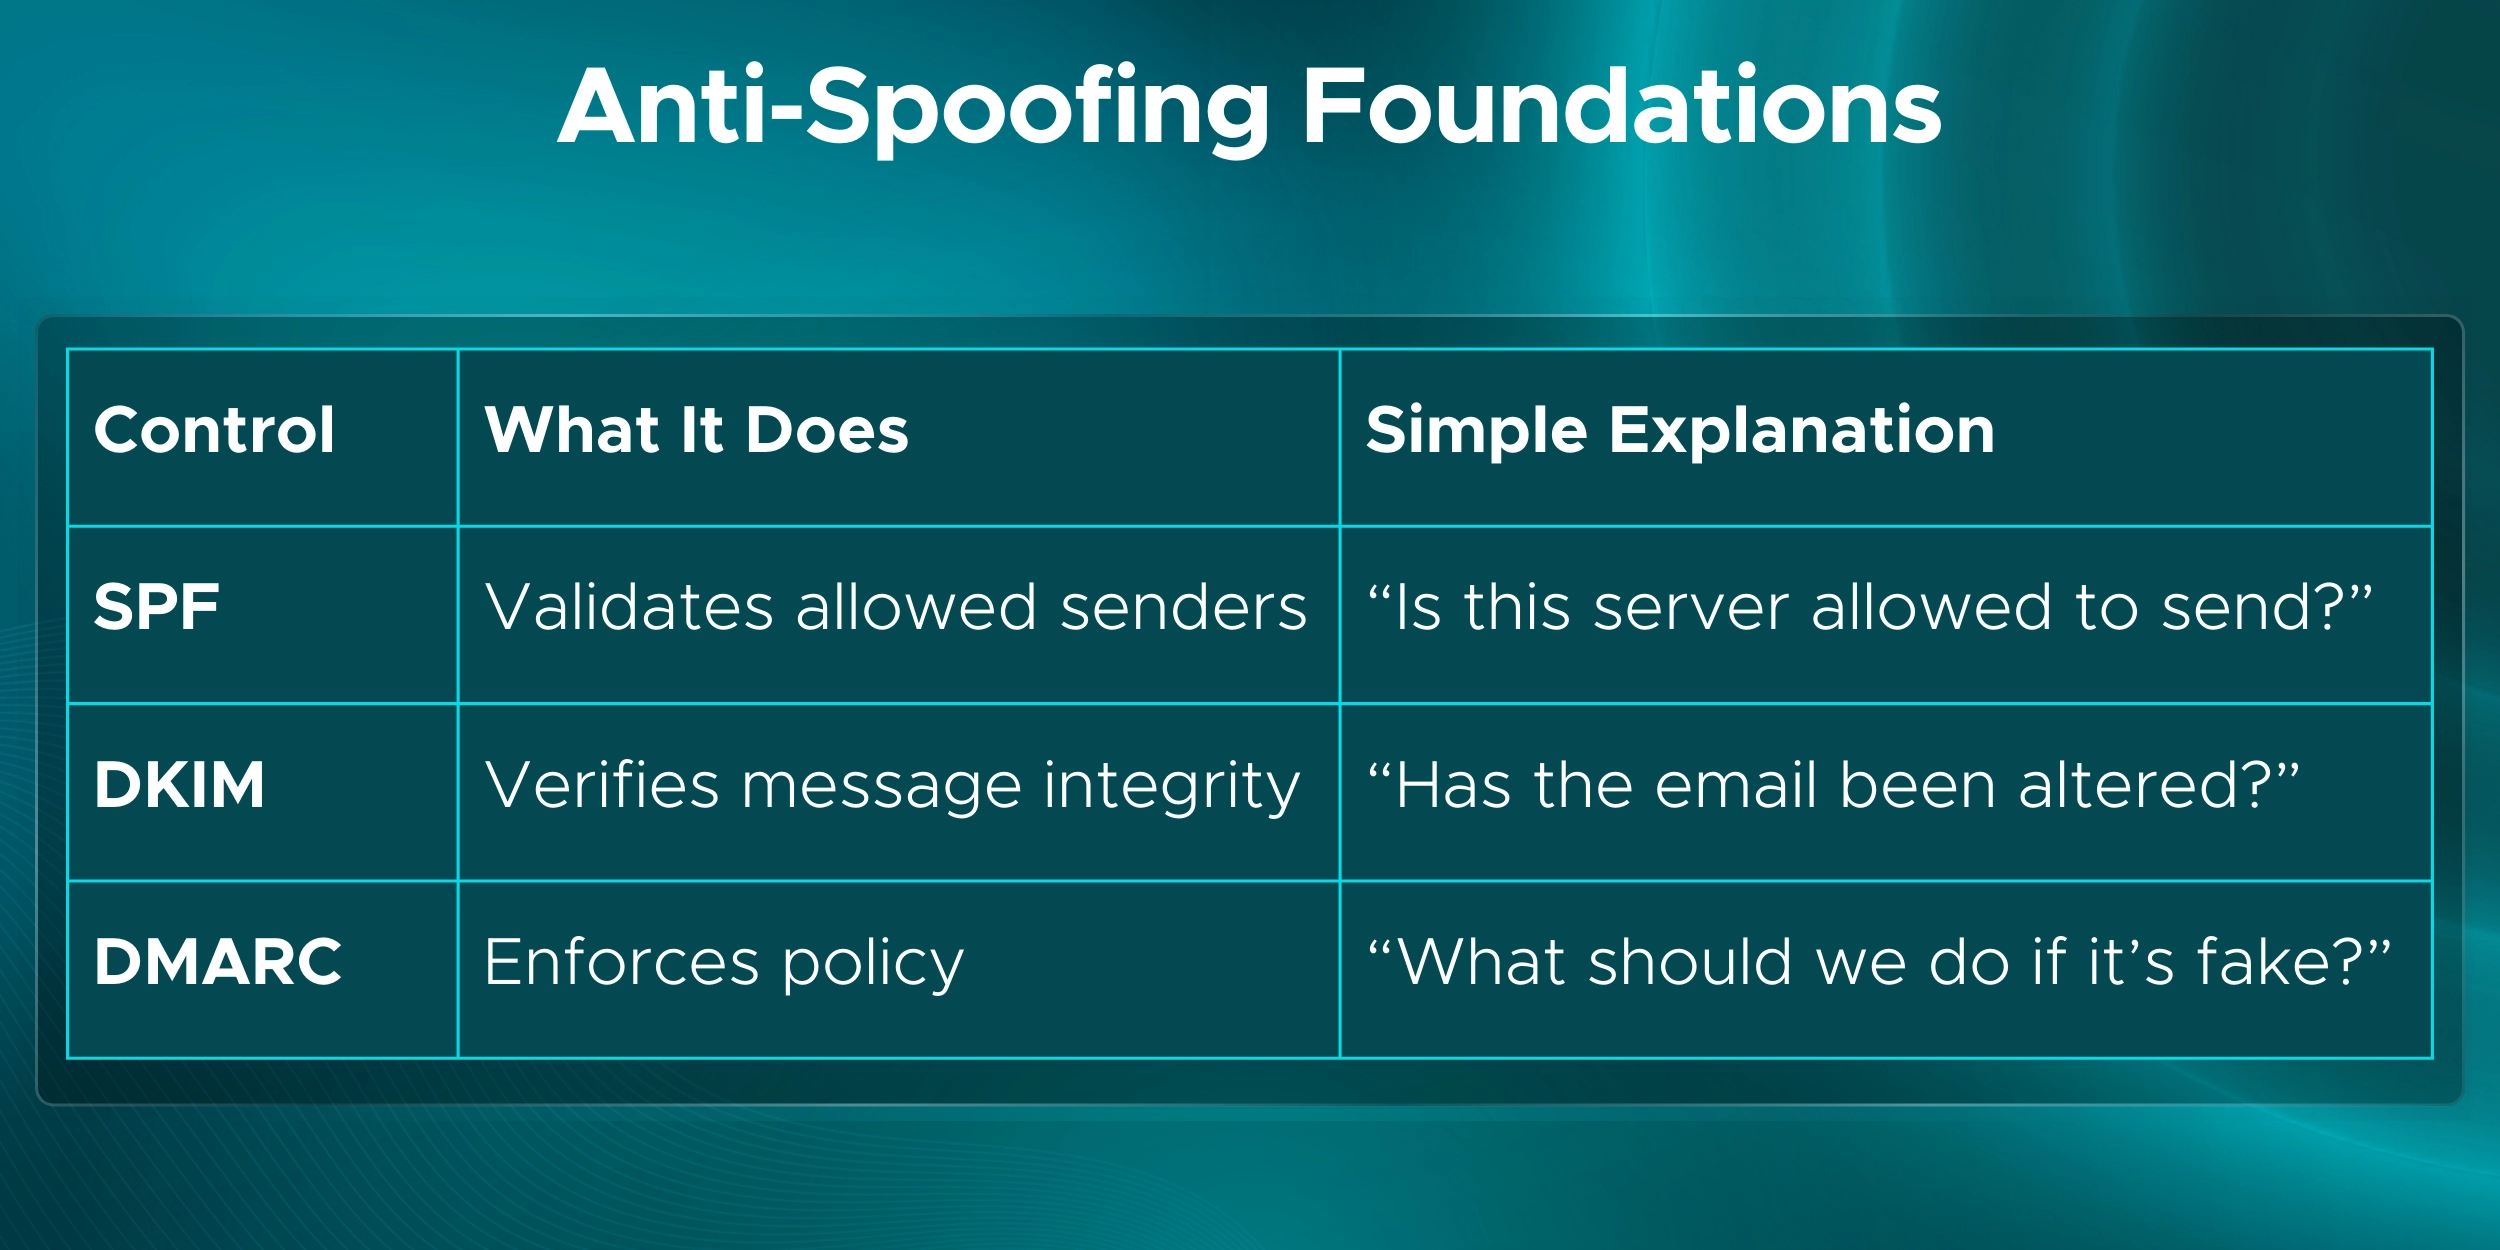
SPF, DKIM, and DMARC are simple but powerful tools that help prevent attackers from spoofing your real domain.
Here is what each one does in plain language:
To set this up:
These steps stop attackers from sending emails that look like they’re coming from your company.
It protects your brand, your customers, and your internal users from domain spoofing.
Phishing protection works best when you monitor what attackers are attempting and adjust your policies as patterns change. Microsoft 365 gives you a dedicated view that makes this easy.
You can open the Impersonation Insight dashboard directly at:
https://security.microsoft.com/impersonationinsight
This dashboard highlights how attackers are trying to imitate your users, domains, or brands, and whether Defender successfully blocked those attempts. It pulls together signals from mailbox intelligence, impersonation detection, and spoofing analysis to show you exactly what’s happening in your environment.
Key benefits you’ll see on this page:
Microsoft uses modeling techniques that look for unusual sender behavior, display-name mismatches, and patterns that resemble known impersonation attacks. This makes the dashboard especially useful when attackers use subtle domain changes or AI-generated messages to appear legitimate.
By reviewing Impersonation Insight regularly, you can:
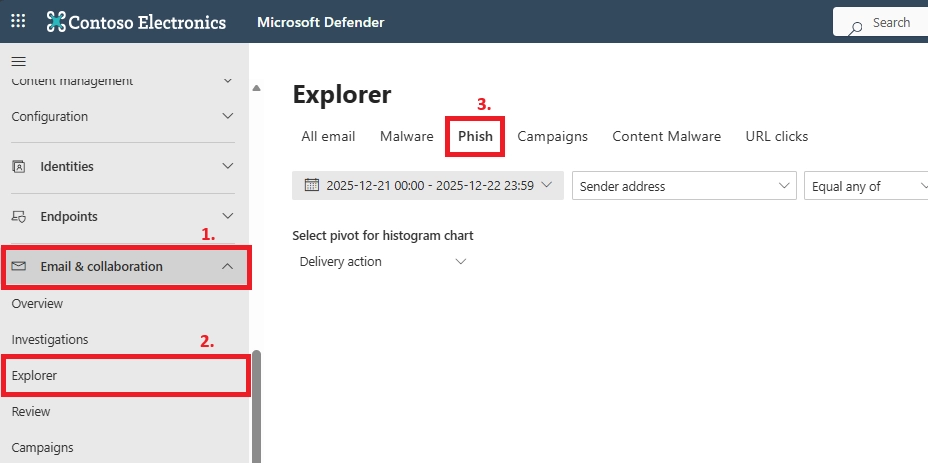
If deeper investigation is needed, tools like Threat Explorer or Real-Time Detections let you drill into specific emails and trace how Defender handled them.
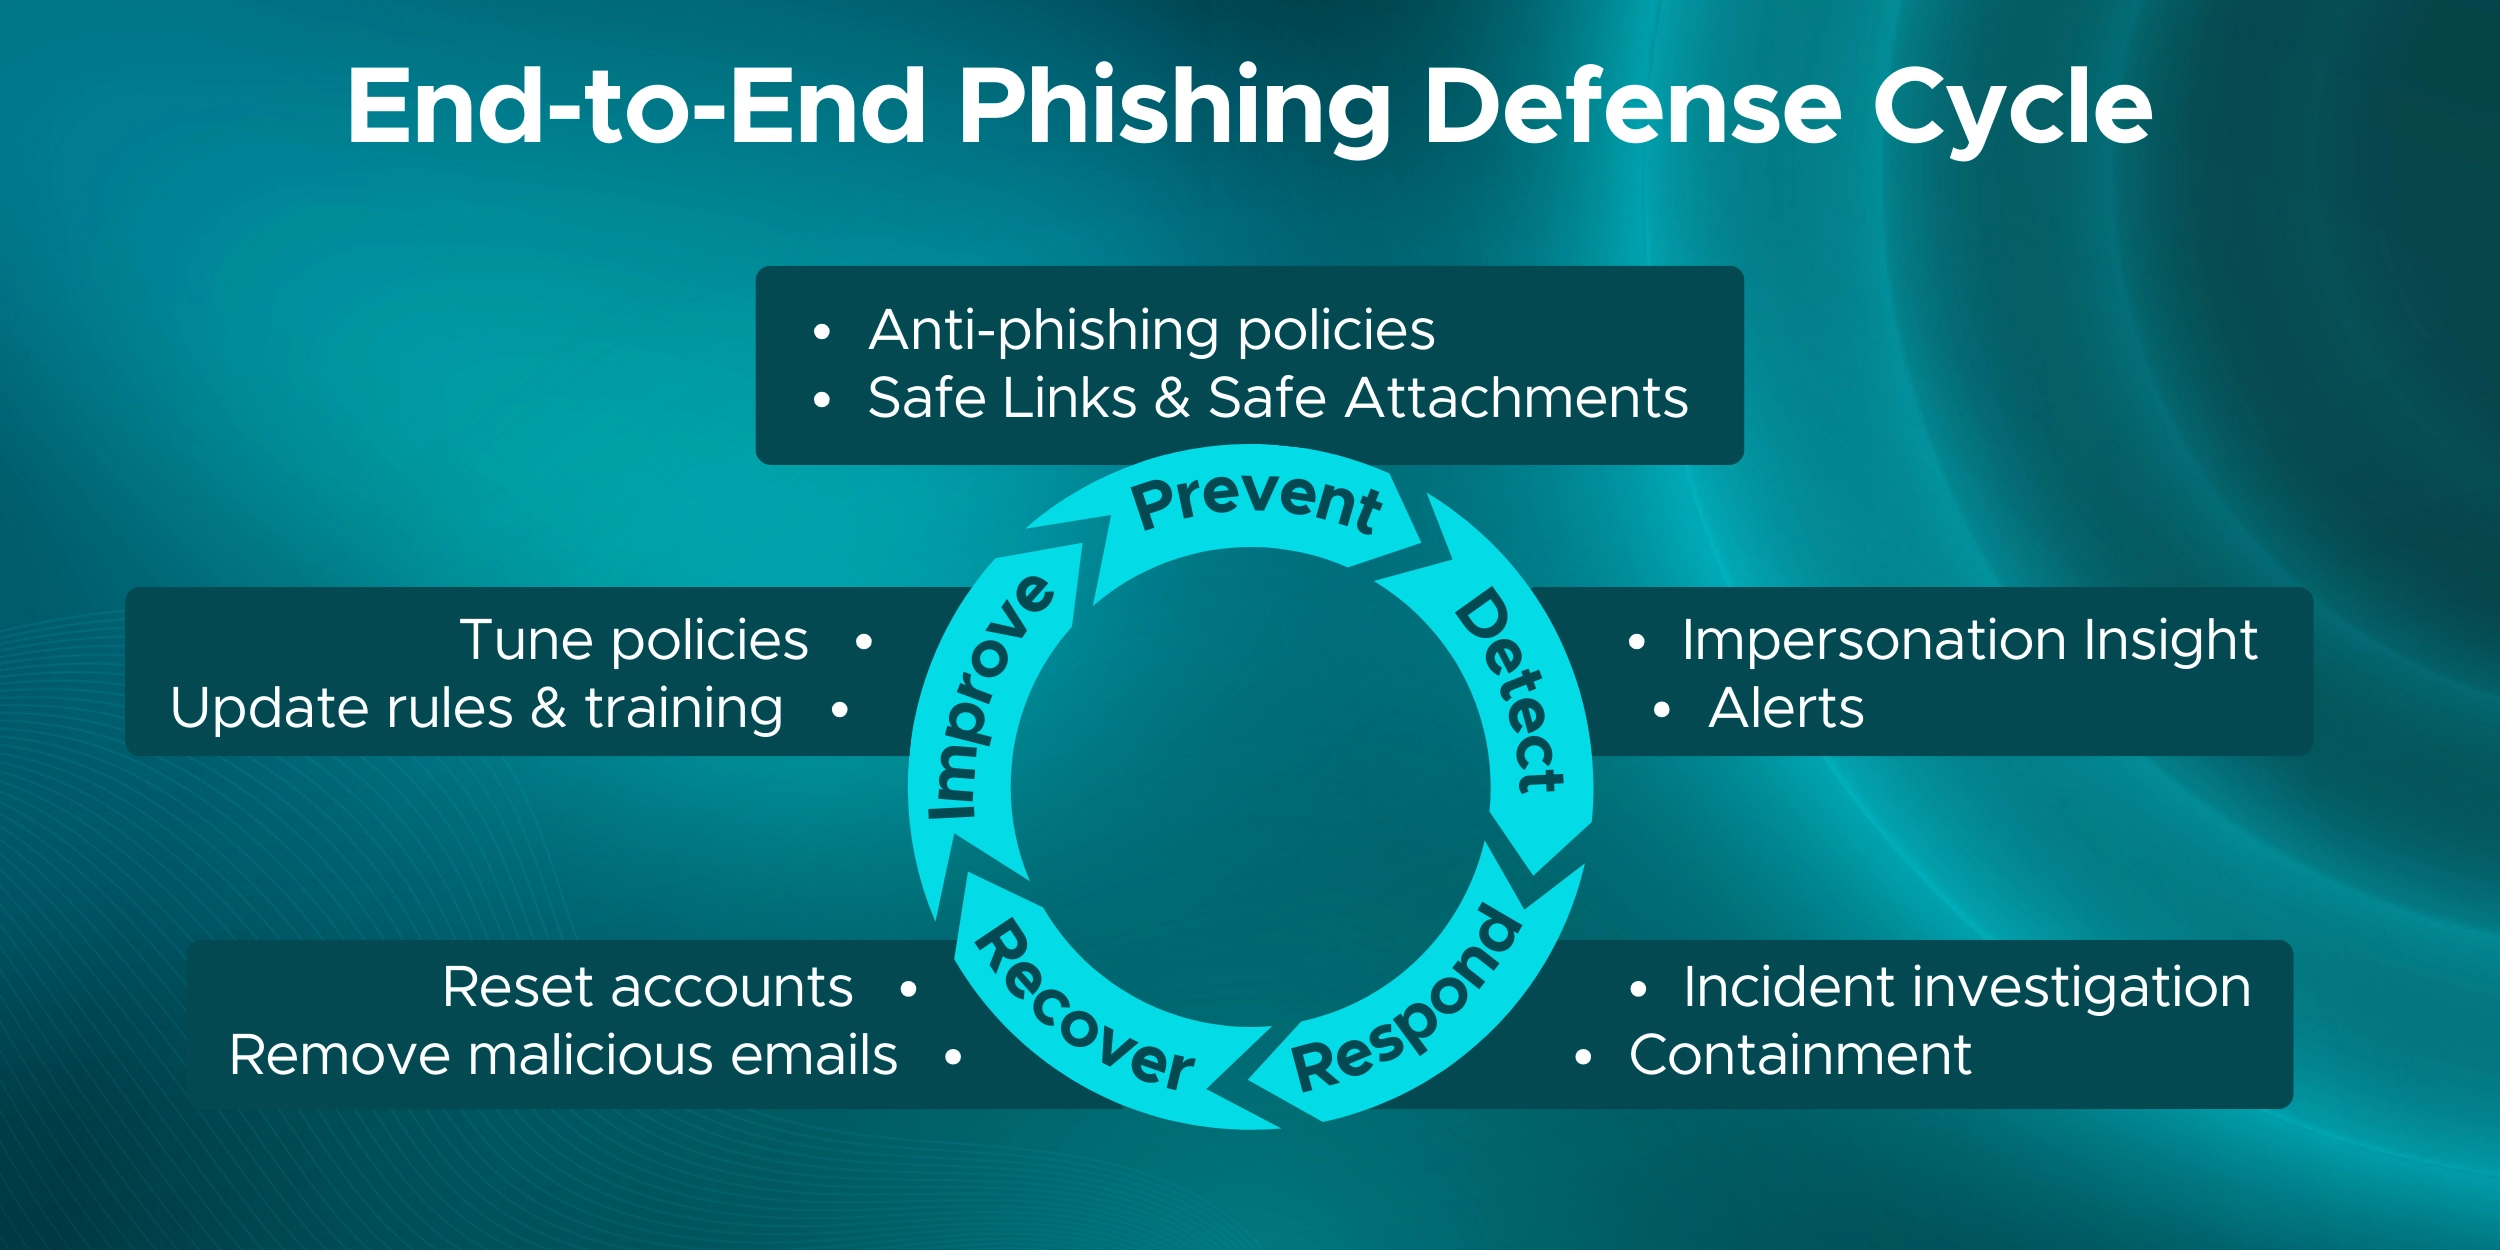
Technology blocks most phishing attempts, but well-trained users and a clear response plan close the gaps. These two areas turn your Microsoft 365 phishing protection into a complete defense: users spot what systems may miss, and admins know exactly what to do when an incident occurs.
Users are your last line of defense, so awareness training should be continuous, not occasional.
A simple and effective approach:
If your tenant includes Defender for Office 365 Plan 2, enable Attack Simulation Training and run quarterly campaigns. Include impersonation scenarios such as fake CEO or finance emails – the same tricks attackers use.
Encourage everyone to use the Report Phishing button in Outlook. These reports feed back into Defender and help you identify attempts early. Reinforce the simple warning signs: unusual requests, tone mismatches, strange links, or safety tips shown in Outlook.
As users improve, you’ll see click rates drop on simulations and reporting rates rise. This is the “human firewall” effect: simulate, educate, repeat.
Even with strong policies and trained users, a phishing email may still slip through. Having a clear, calm response process prevents a small mistake from becoming a major incident.
A simple playbook:
This gives admins a structured path during what is often a stressful moment. Over time, you can refine the playbook into a quick internal SOP tailored to your environment.
A few extra steps help close remaining gaps and strengthen your overall phishing protection.
Executives and high-visibility roles are often targeted first.
If you use Priority Accounts, make sure these users are:
This gives them stronger monitoring and faster alerting.

If your email goes through a gateway (Proofpoint, Mimecast, etc.), enable Enhanced Filtering for Connectors.
Without it, Microsoft 365 may not see the real sender and impersonation checks can fail.
This single setting restores proper SPF, DKIM, DMARC, and impersonation detection.
Attackers often register lookalike domains that appear legitimate at first glance. These domains rely on small character swaps that are easy to miss, especially on mobile devices.
Examples of commonly impersonated domains:
These domains are designed to pass quick visual checks and trick users into trusting the sender. Domain impersonation protection and mailbox intelligence help detect and block these lookalike patterns before they reach inboxes.
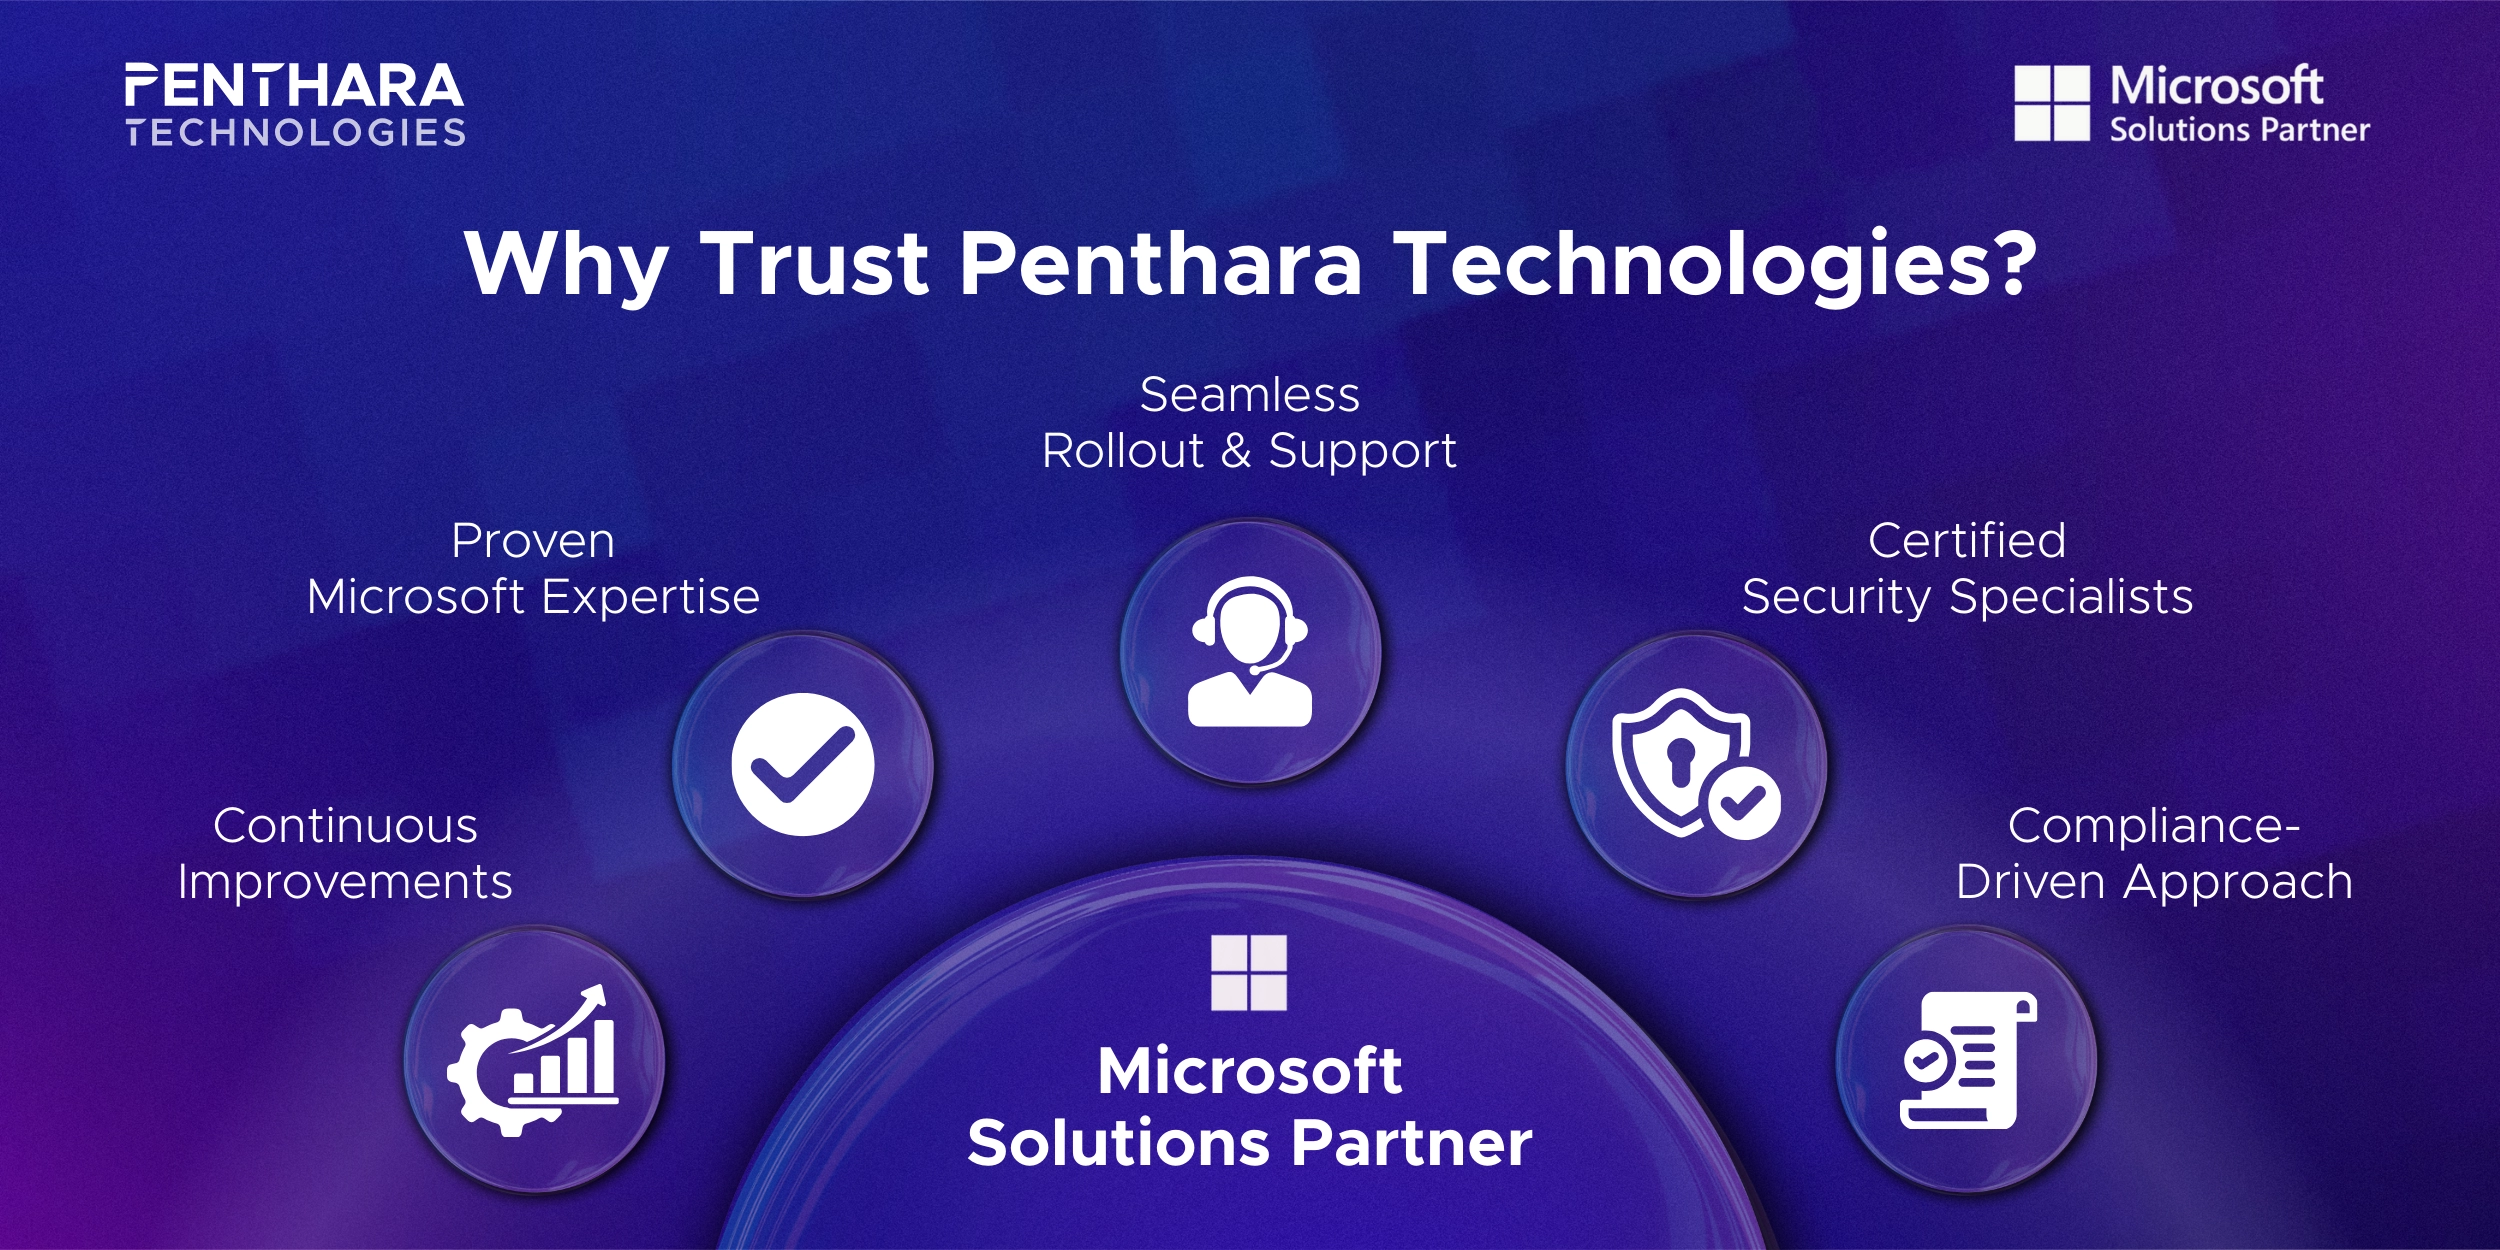
Microsoft Security Specialists
We design and deploy advanced phishing and impersonation defenses across Microsoft 365, including Microsoft Defender for Office 365, Exchange Online Protection, and domain authentication controls.
Certified & Experienced Team
Our consultants hold advanced Microsoft security certifications and bring hands-on experience with Safe Links, Safe Attachments, anti-phishing policies, impersonation protection, SPF/DKIM/DMARC, and threat hunting in Microsoft 365 Defender.
End-to-End Protection Strategy
We help organizations build a complete defense - from technical configuration to user training, mailbox hardening, incident response planning, and monitoring routines.
Seamless Deployment & Tuning
From assessment to rollout, we guide you through every step: configuring policies, securing VIPs, optimizing gateways, enabling mailbox intelligence, and tuning settings to reduce false positives while keeping security tight.
Compliance-Focused Security
Our approach aligns with ISO, SOC 2, HIPAA, and GDPR requirements by enforcing strong authentication, verified sender controls, logging, and reporting needed for secure and auditable email workflows.
Continuous Monitoring & Improvement
We don’t just set up phishing protection - we help you monitor impersonation attempts, analyze insights, adjust policies, and strengthen defenses as attackers evolve.
Microsoft Solutions Partner Advantage
As a certified Microsoft Solutions Partner, we combine official Microsoft guidance with real-world experience to deliver reliable, enterprise-grade phishing protection for organizations of any size.
Strengthen your Microsoft 365 environment with proven phishing and impersonation defenses.
Schedule a consultation today and let our team build a secure, resilient protection strategy for your organization.
Not every phishing protection feature discussed in this guide is available in all Microsoft 365 plans. Some capabilities require Microsoft Defender for Office 365.
Core Requirements
To use:
You need Microsoft Defender for Office 365 (Plan 1 or Plan 2).
Basic Exchange Online Protection (EOP) only provides limited phishing and spoof protection.
What Plan 1 vs Plan 2 Adds
Defender for Office 365 Plan 1 includes:
Defender for Office 365 Plan 2 adds:
Microsoft 365 Plans and Availability
Quick Note
If Defender for Office 365 is not present in your tenant, impersonation protection settings may appear in the portal but will not function as expected. Keep these license considerations in mind before implementing the phishing protection in Microsoft 365.
Phishing and impersonation threats demand a layered defense. By setting up impersonation protection, enabling Safe Links and Safe Attachments, using SPF/DKIM/DMARC, training users, and reviewing insights regularly, you build strong Microsoft 365 threat protection against evolving attacks.
These steps work best together. Policies block suspicious senders, Safe Links and Safe Attachments catch hidden threats, user awareness adds human judgment, and ongoing monitoring helps you adjust as tactics change.
Phishing protection is one layer of what should be a multi-layered defense - if you want the broader view, see the full set of strategies to optimize your Microsoft 365 security posture across identity, devices, and email.
All guidance in this article follows Microsoft’s latest recommendations and real-world experience. Continue reviewing your insights, tuning your policies, and educating users. With steady attention, your organization can stay secure and ahead of modern phishing risks.
Q1. What is the anti-phishing policy in Office 365?
The anti-phishing policy in Office 365 is a security control that helps detect and block phishing emails, including impersonation, spoofed domains, and credential-stealing messages.
Q2. How does Microsoft 365 phishing protection work?
Microsoft 365 phishing protection uses multiple signals such as sender behavior, domain reputation, mailbox intelligence, and message content to identify and stop phishing and impersonation attacks.
Q3. How to prevent phishing emails in Office 365?
To prevent phishing emails in Office 365, configure anti-phishing policies, enable impersonation protection, turn on Safe Links and Safe Attachments, enforce SPF/DKIM/DMARC, and train users to report suspicious messages.
Q4. What is anti-phishing protection in Microsoft 365?
Anti-phishing protection in Microsoft 365 focuses on stopping emails that pretend to be trusted users, brands, or domains. It helps prevent credential theft, payment fraud, and account compromise.
Q5. How do I set anti-phishing in Microsoft Defender?
You can set anti-phishing in Microsoft Defender by creating or editing an anti-phishing policy, selecting protected users and domains, and defining actions such as quarantine for detected impersonation attempts.
Q6. How to enable anti-phishing protection in Microsoft 365?
Basic anti-phishing is enabled by default, but advanced protection requires configuring custom anti-phishing policies in Microsoft Defender for Office 365 and enabling impersonation protection settings.
Q7. Which policy helps stop impersonation attacks in Microsoft 365?
The anti-phishing policy is the main policy used to stop impersonation attacks in Microsoft 365. It works with mailbox intelligence and spoof protection to detect lookalike senders and domains.
Q8. How to check phishing emails in Office 365?
Phishing emails can be reviewed using quarantine, impersonation insights, threat investigation tools, and user-reported phishing submissions inside the security portal.
Q9. What is the difference between antispam and anti-phishing policies?
Antispam policies focus on bulk and unwanted email, while anti-phishing policies specifically protect against impersonation, spoofing, and credential-harvesting attacks.
Q10. What is the phishing policy in Microsoft 365?
The phishing policy defines how Microsoft 365 detects phishing attempts and what action is taken when a message is identified as suspicious or malicious.
Q11. Does Safe Links and Safe Attachments help with phishing protection?
Yes. Safe Links protects against malicious URLs, and Safe Attachments blocks harmful files. Together, they strengthen phishing protection when attackers include links or attachments in impersonation emails.
Q12. Can phishing protection block CEO fraud and vendor impersonation?
Yes. Properly configured impersonation protection can detect and block emails pretending to be executives, finance teams, or trusted vendors.
Q13. What is spoofing protection in Microsoft 365?
Spoofing protection helps stop emails that fake a sender’s domain or identity. It works with SPF, DKIM, and DMARC to prevent unauthorized senders from impersonating your organization.
Q14. How do priority accounts improve phishing defense?
Priority accounts receive additional monitoring and visibility, helping admins respond faster when executives or high-risk users are targeted by phishing or impersonation attacks.
Q15. Is user training still needed with Microsoft 365 phishing protection?
Yes. Even with strong technical controls, trained users help identify suspicious emails early and reduce the risk of successful phishing attacks.
Monthly updates, news & events from Microsoft to help your business grow.

CEO at Penthara Technologies


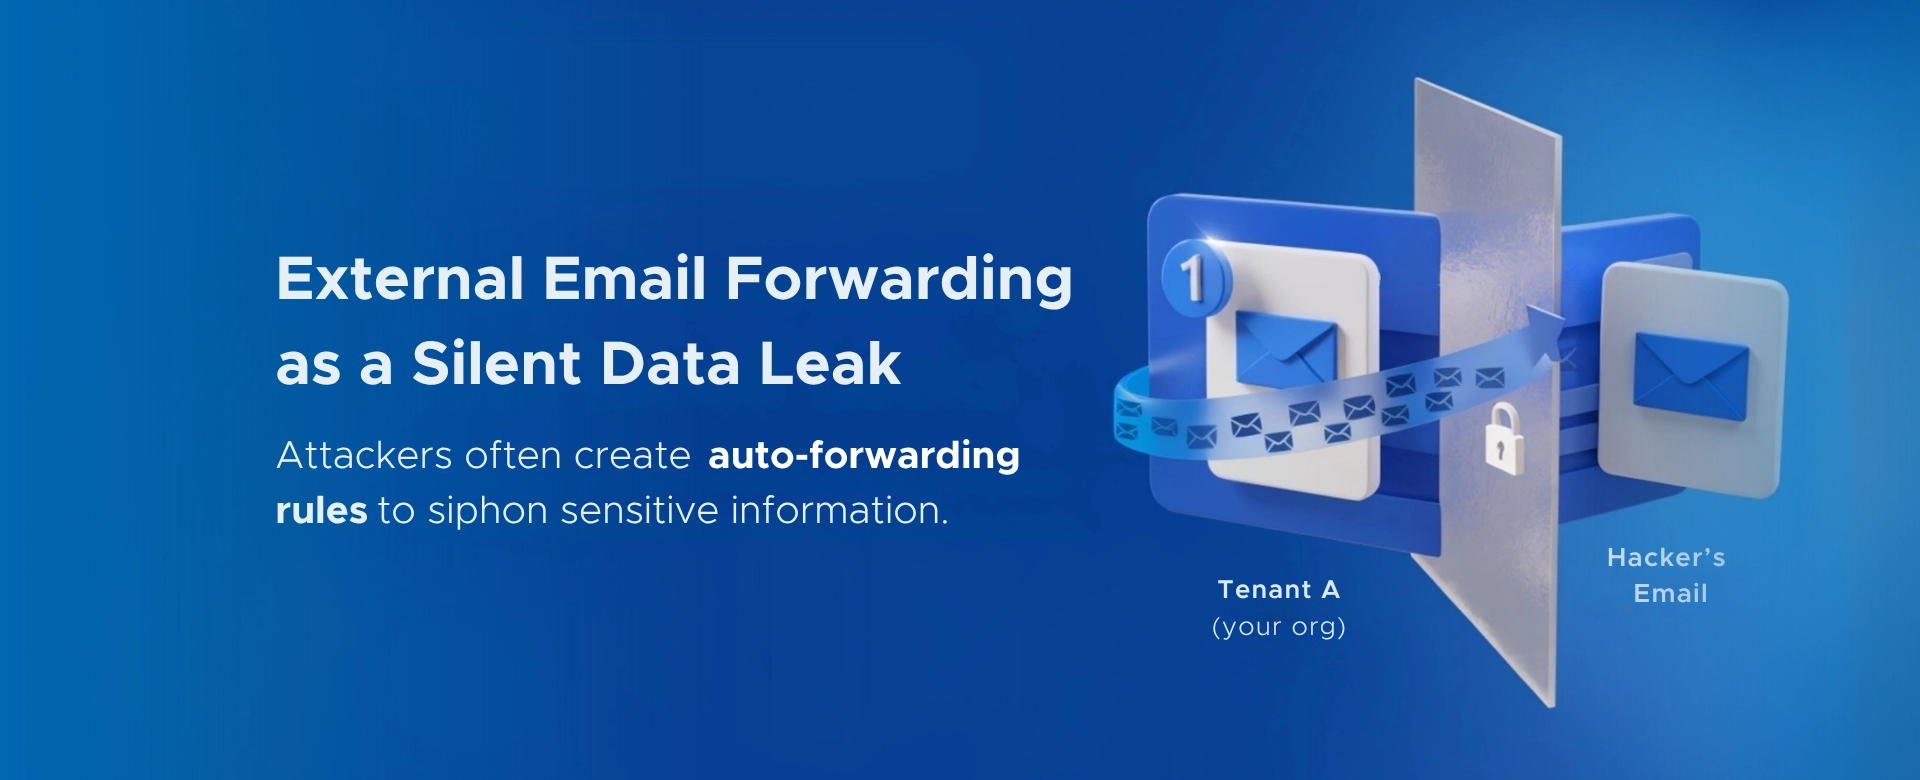 Your Microsoft 365 Tenant Has a Silent Data Leak. It Requires No Malware.
Your Microsoft 365 tenant can leak data silently - no malware, no alerts. Learn how simple misconfigurations enable ongoing email and data exfiltration.
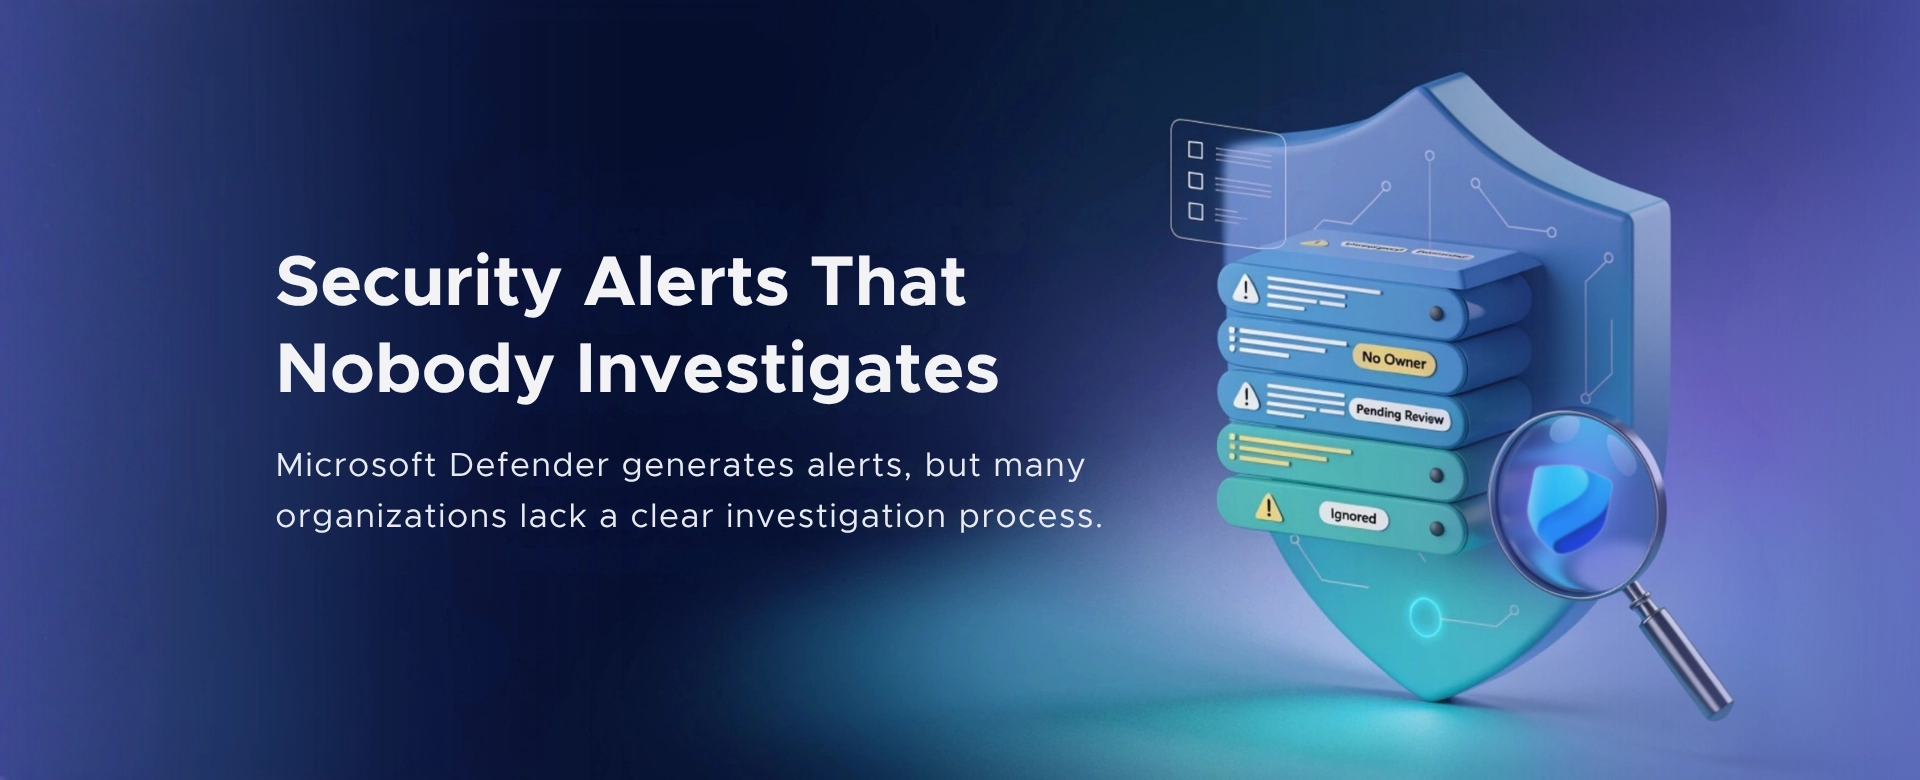 Security Alerts That Nobody Investigates - And Why That’s More Dangerous Than Having None
Security alerts mean nothing if no one investigates them. Ignored alerts create false confidence - and give attackers the time they need to cause real damage.
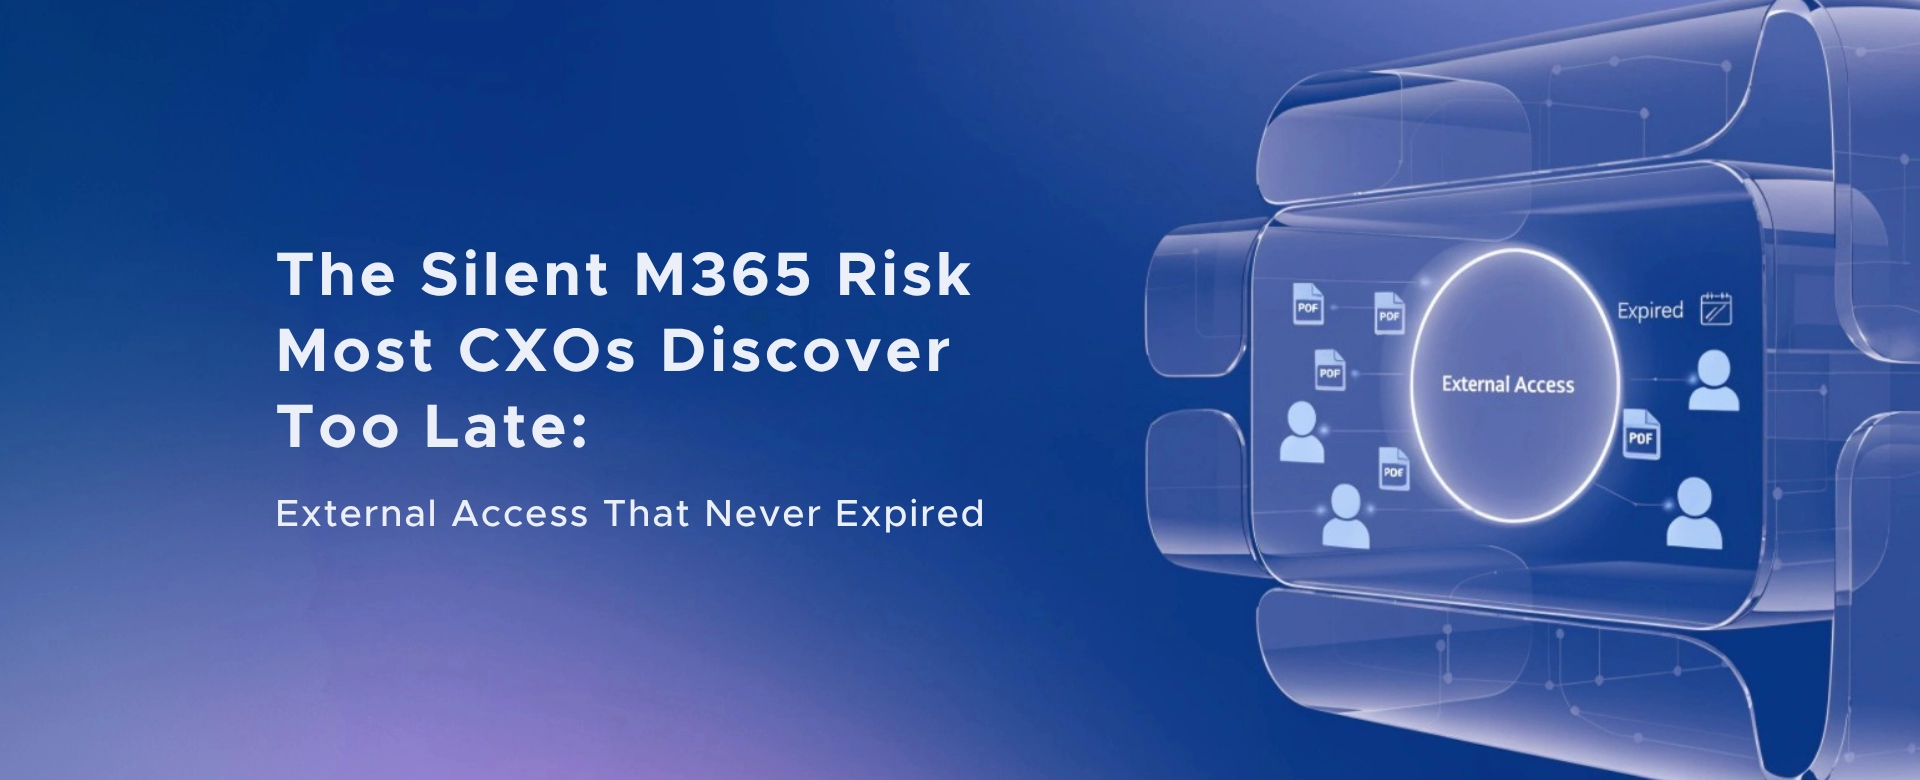 The Silent M365 Risk Most CXOs Discover Too Late: External Access That Never Expired
A hidden Microsoft 365 risk many CXOs overlook - expired external access that quietly breaks Zero Trust and exposes organizations to serious security gaps.