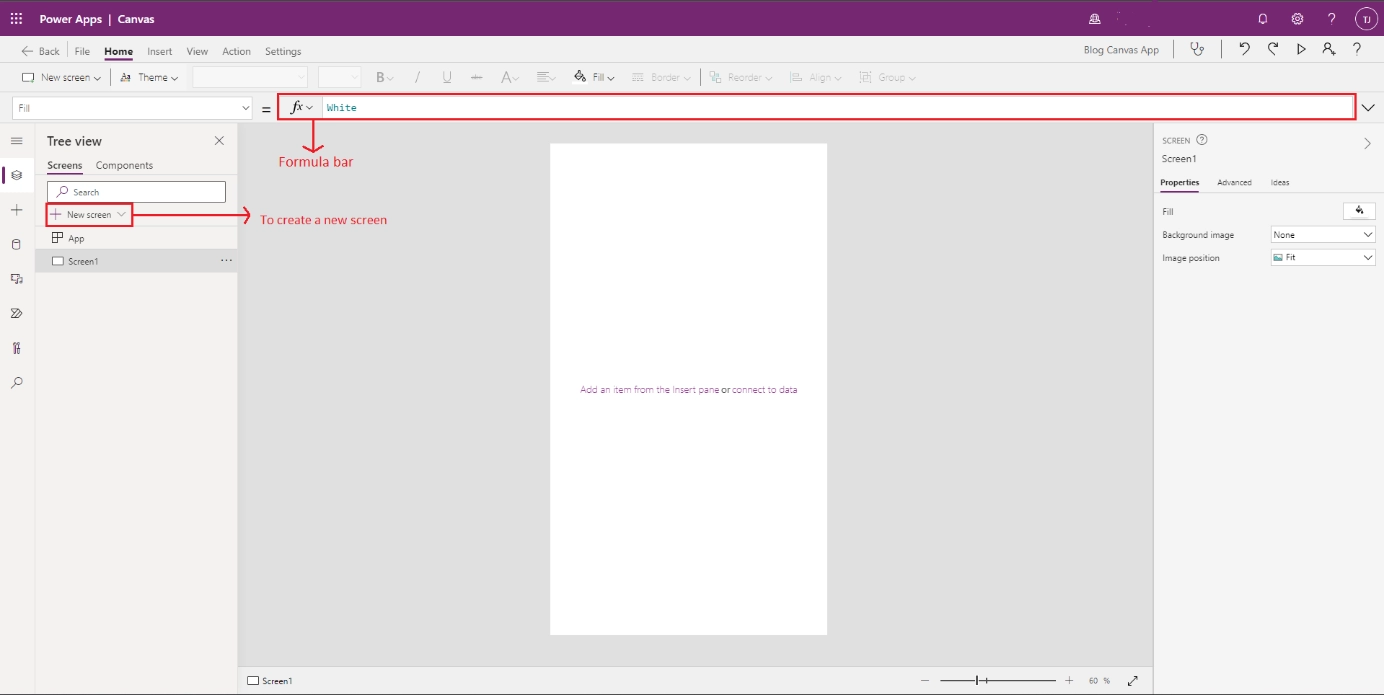
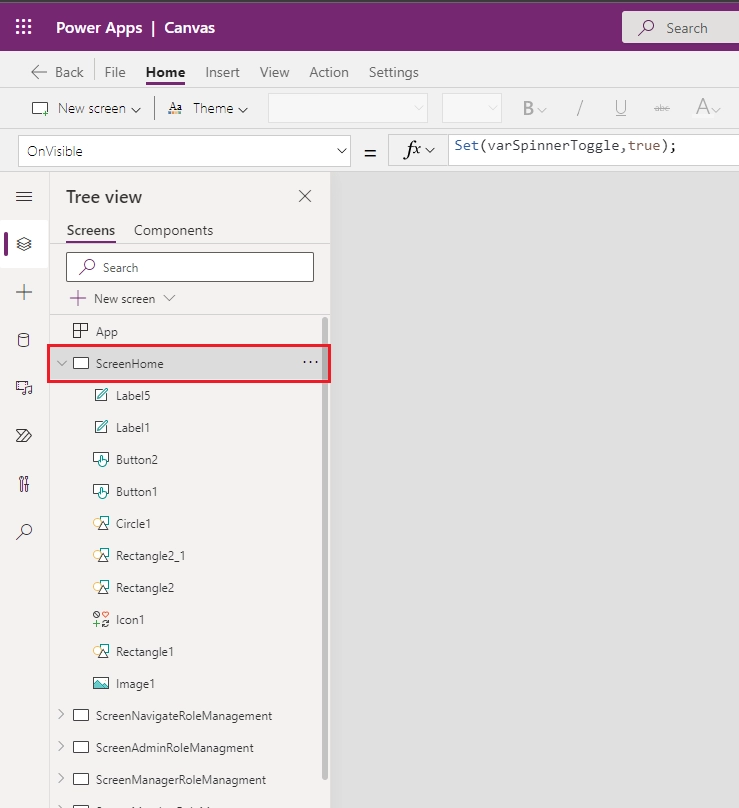
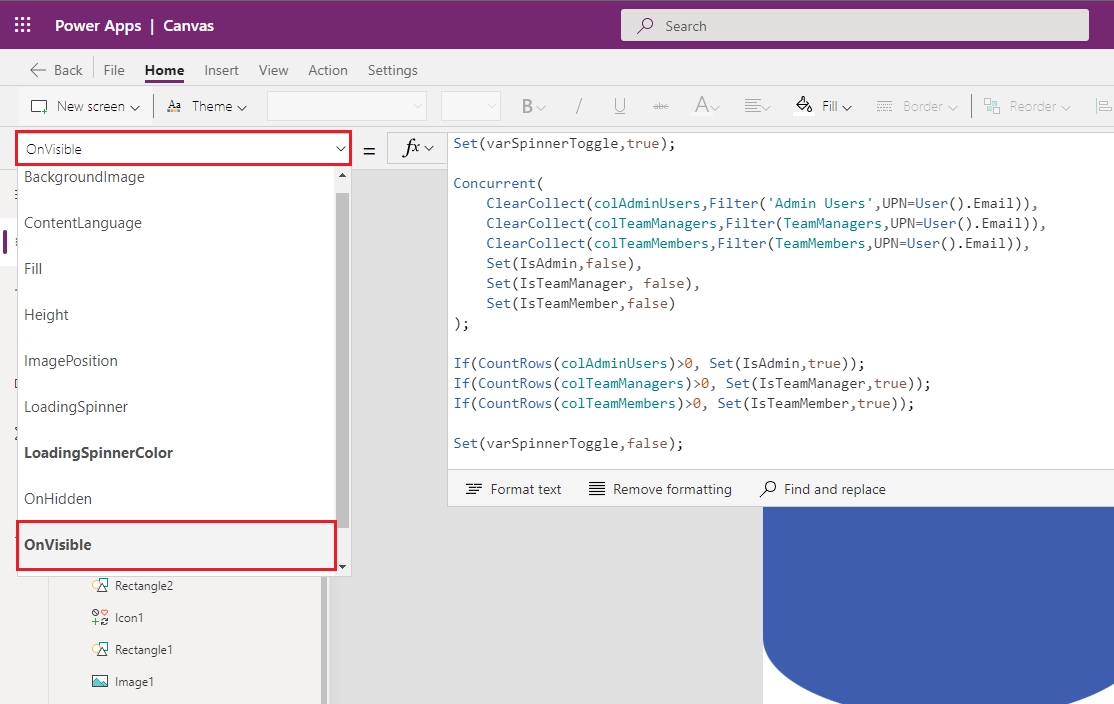
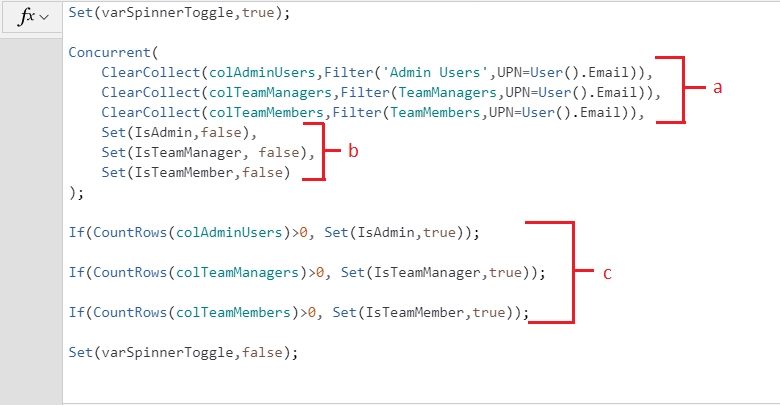
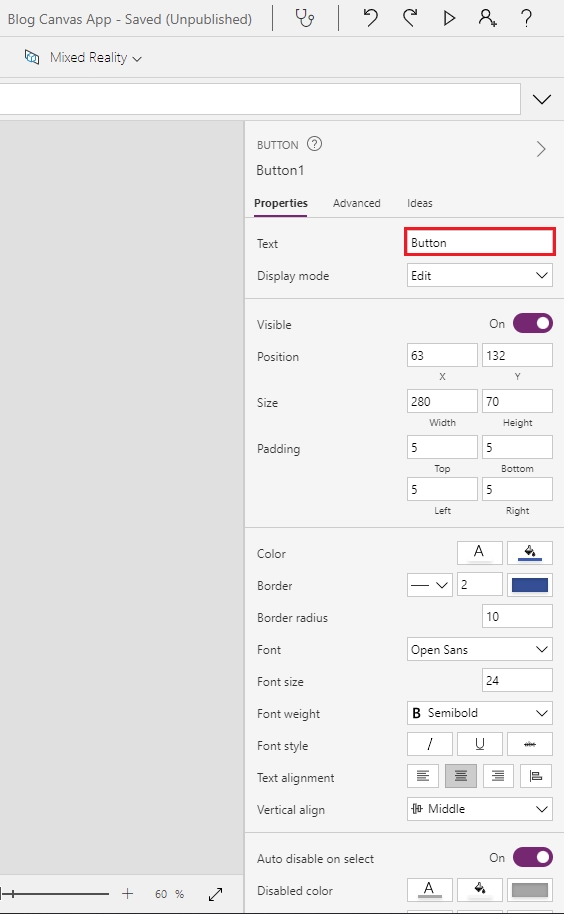
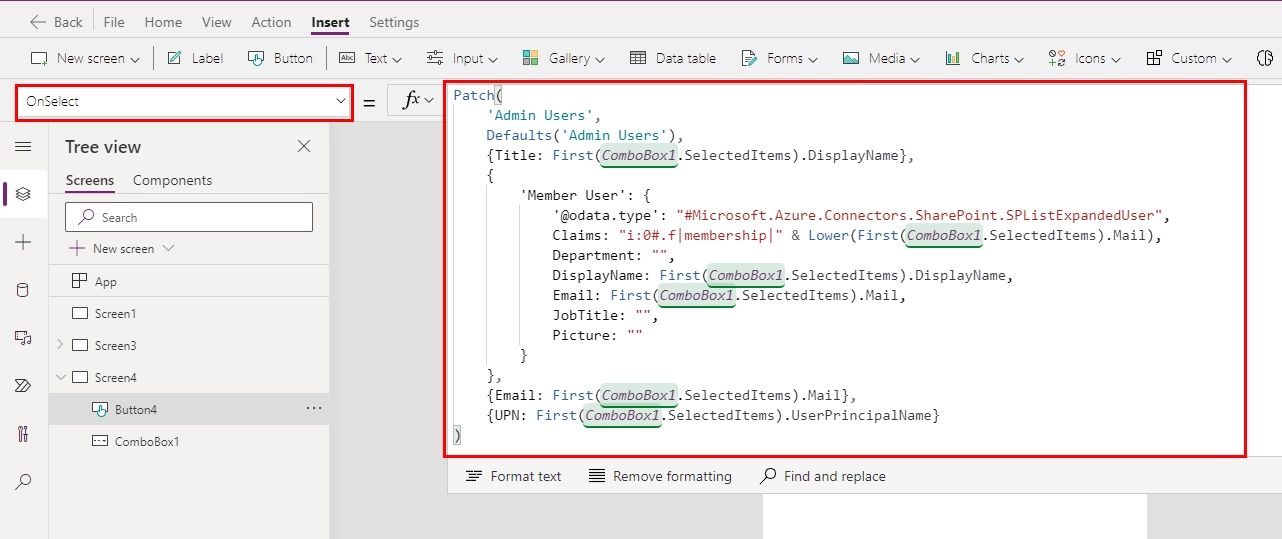
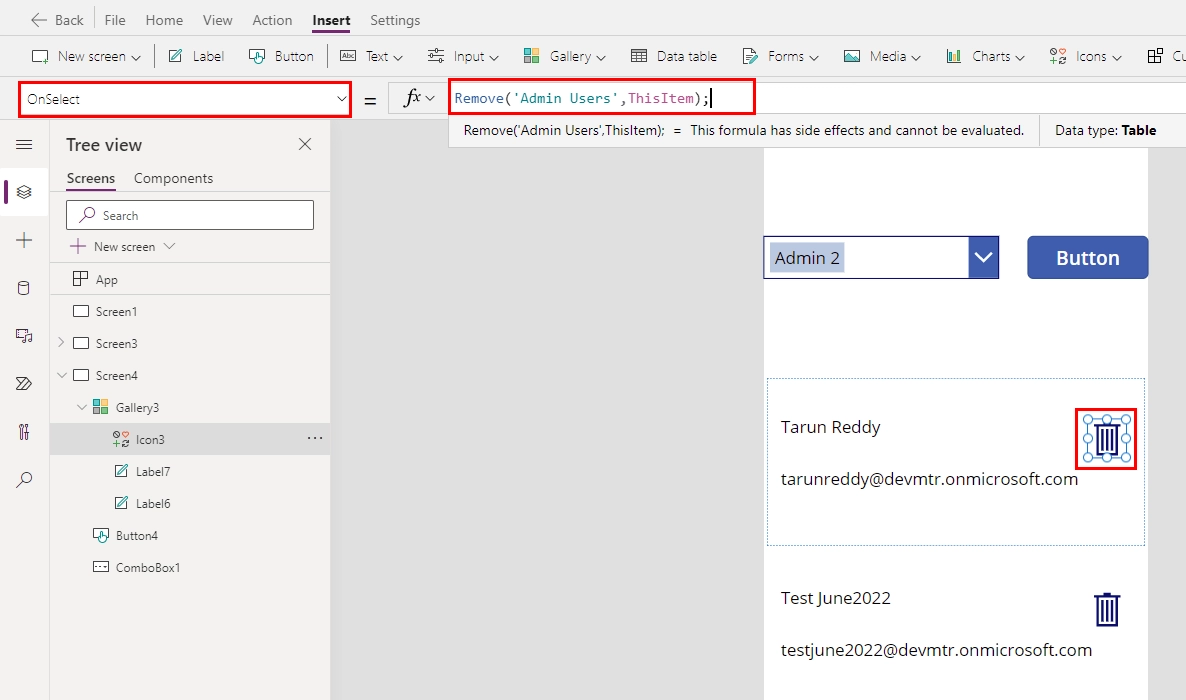
- Select ‘OnSelect’ property for the button and add the following formula
Patch(
'Admin Users',
Defaults(‘Role SharePoint List'),
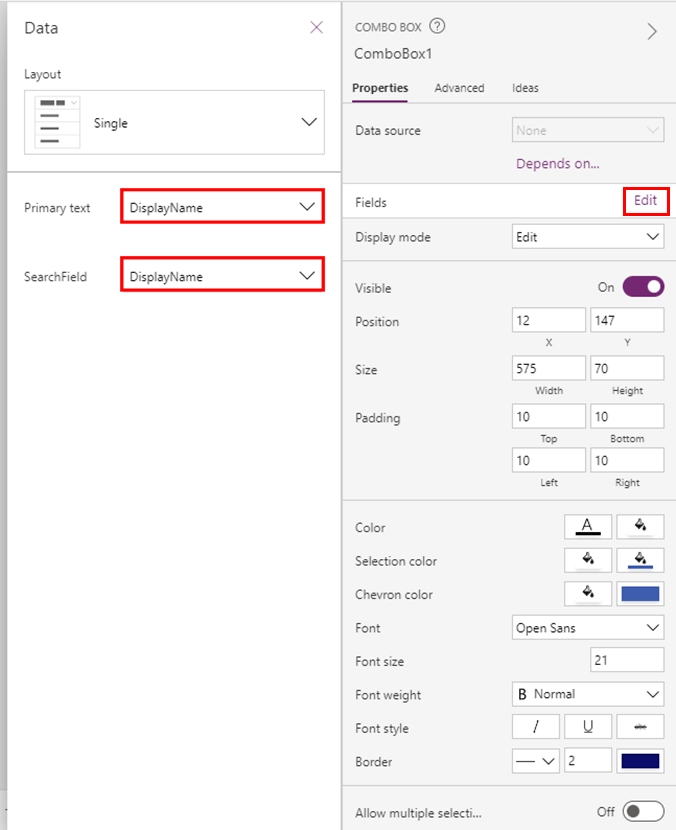
{Title: First(‘Your Combo box’. SelectedItems).DisplayName},
{
'Member User': {
'@odata.type': "#Microsoft.Azure.Connectors .SharePoint.SPListExpandedUser",
Claims: "i:0#.f|membership|" & Lower(First(ComboBox1. SelectedItems).Mail),
Department: "",
DisplayName: First(‘Your Combo box’. SelectedItems).DisplayName,
Email: First(‘Your Combo box’. SelectedItems).Mail,
JobTitle: "",
Picture: ""
}
},
{Email: First(‘Your Combo box’. SelectedItems).Mail},
{UPN: First(‘Your Combo box’. SelectedItems).UserPrincipalName}
)
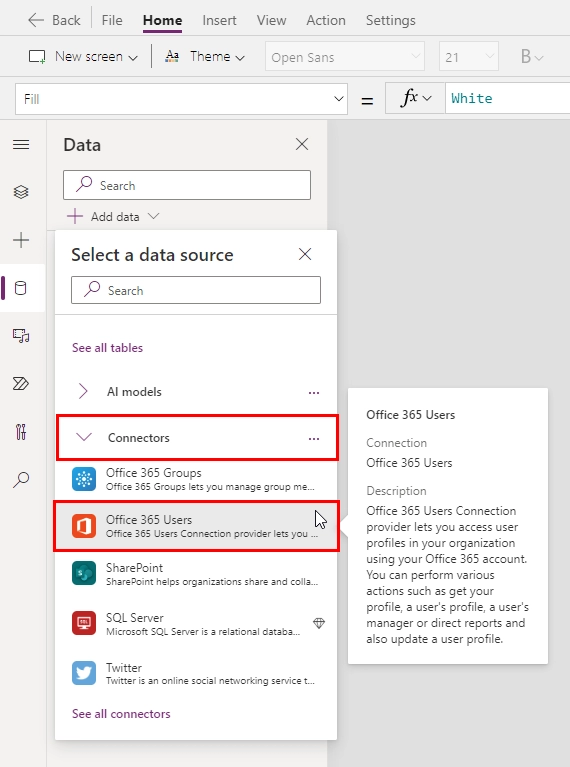
The above code contains a patch function that creates a new record by taking the data from the Combo box that we created.
- Select ‘OnSelect’ property for the button and add the following formula
Patch(
'Admin Users',
Defaults(‘Role SharePoint List'),
{Title: First(‘Your Combo box’.SelectedItems).DisplayName},
{
'Member User': {
'@odata.type': "#Microsoft.Azure.Connectors.SharePoint.SPListExpandedUser",
Claims: "i:0#.f|membership|" & Lower(First(ComboBox1.SelectedItems).Mail),
Department: "",
DisplayName: First(‘Your Combo box’.SelectedItems).DisplayName,
Email: First(‘Your Combo box’.SelectedItems).Mail,
JobTitle: "",
Picture: ""
}
},
{Email: First(‘Your Combo box’.SelectedItems).Mail},
{UPN: First(‘Your Combo box’.SelectedItems).UserPrincipalName}
)
The above code contains a patch function that creates a new record by taking the data from the Combo box that we created.