
A hidden SharePoint permission - “Everyone Except External Users” - quietly breaks Zero Trust, exposing internal data and amplifying risk in the age of Copilot.

SharePoint APIs are used in various platforms to perform basic as well as complex actions.
Two places where these APIs are used vigorously are:
The challenge faced while developing these solutions is that, there is no easy and quick way to test or execute these API calls in a time saving manner.
There is another alternative to do the API calls from POSTMAN, but it requires you to register an app in AZURE APP DIRECTORY and then use client IDs and Client Secrets to generate the Bearer Access Token and then use it to authenticate your API calls.
But today we will discuss another simple way which is very quick to implement and saves a lot of time.
In this blog, we will leverage the existing authorization tokens that you have in your browser from visiting an existing SharePoint list. This will save us tremendous amount of time and effort and will not require any additional admin rights to use Postman calls.
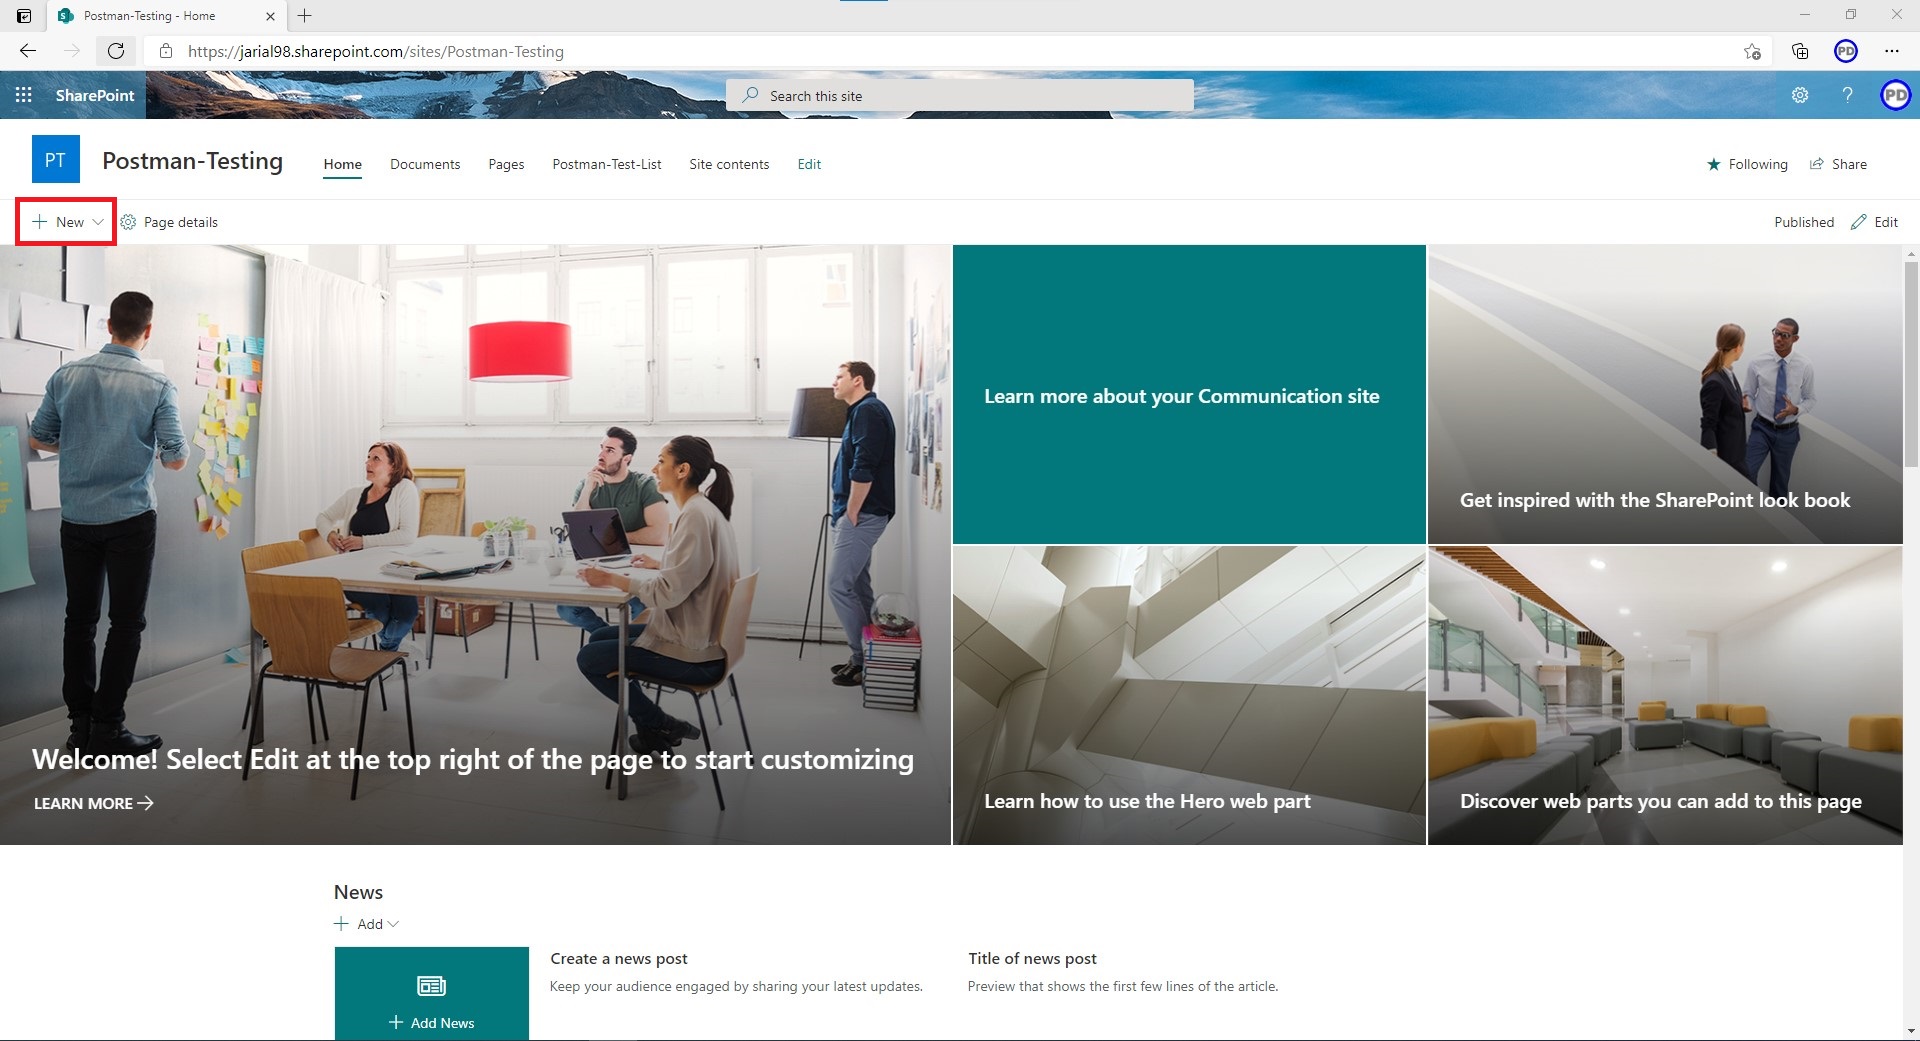
First, we will be having a SharePoint List on which we are going to do all these API calls from Postman.
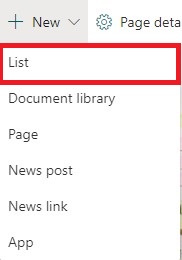
2. Click on the “List” option in the dropdown menu.
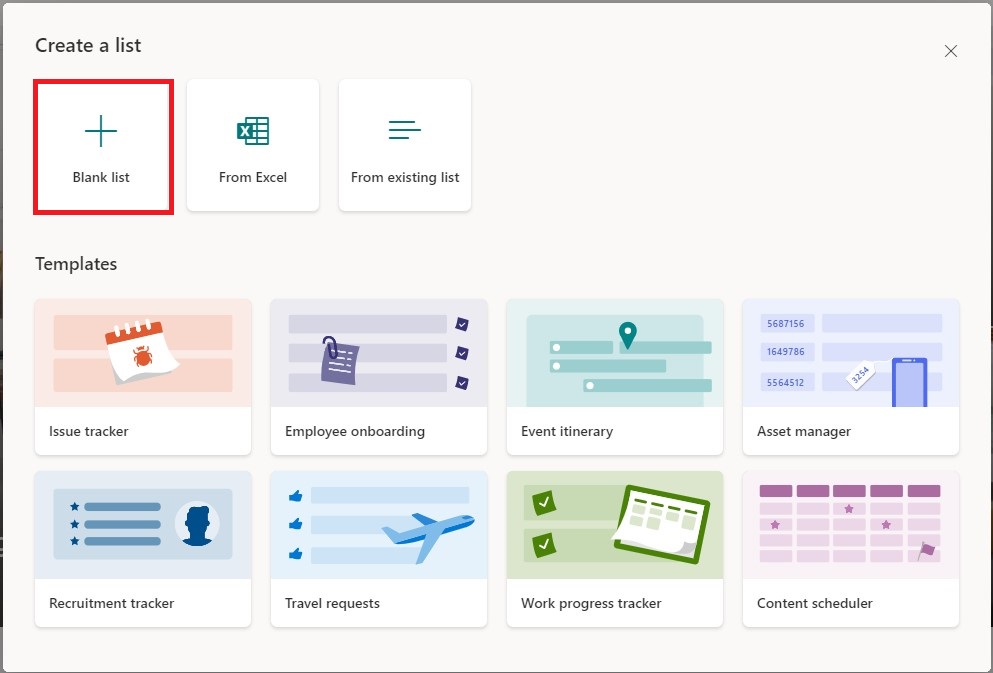
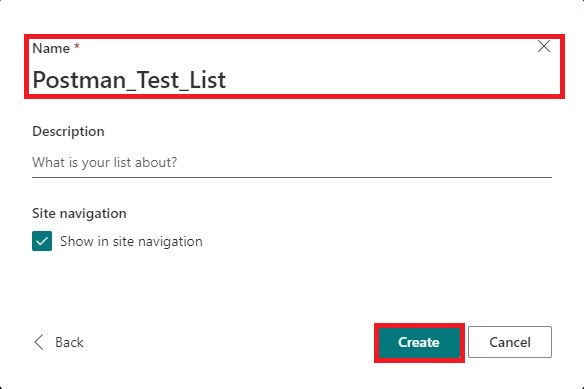
3. A new “Create a list” window will open. We will create a “Blank list”.
4. We will provide the Title as “Postman_Test_List” for our new list and click on “Create”.
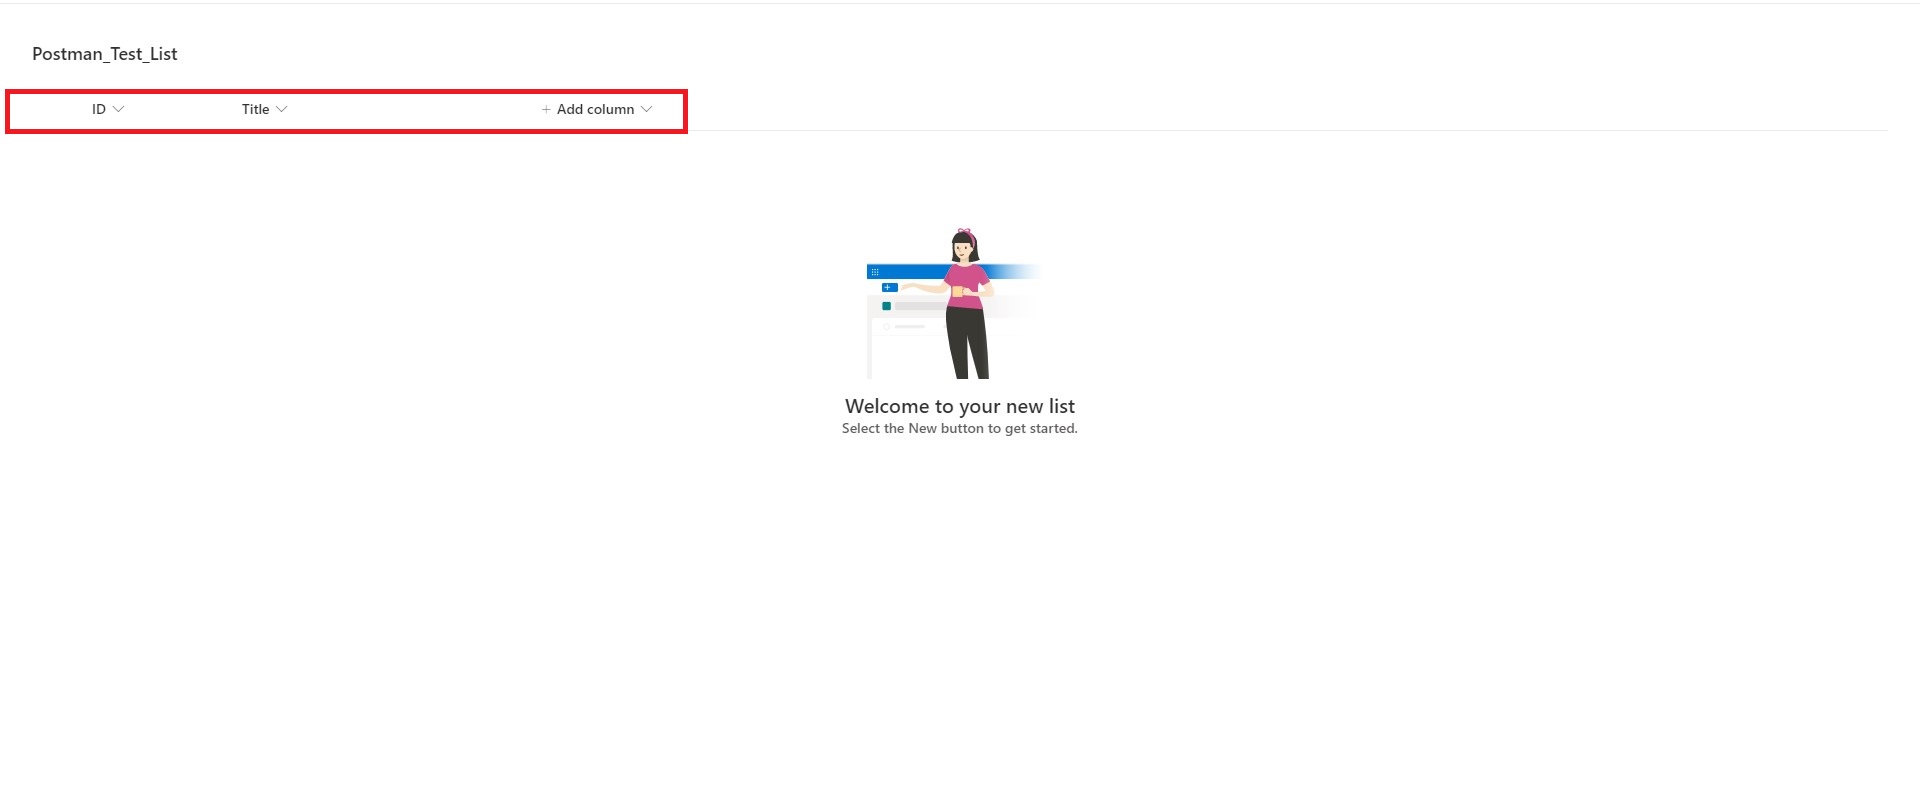
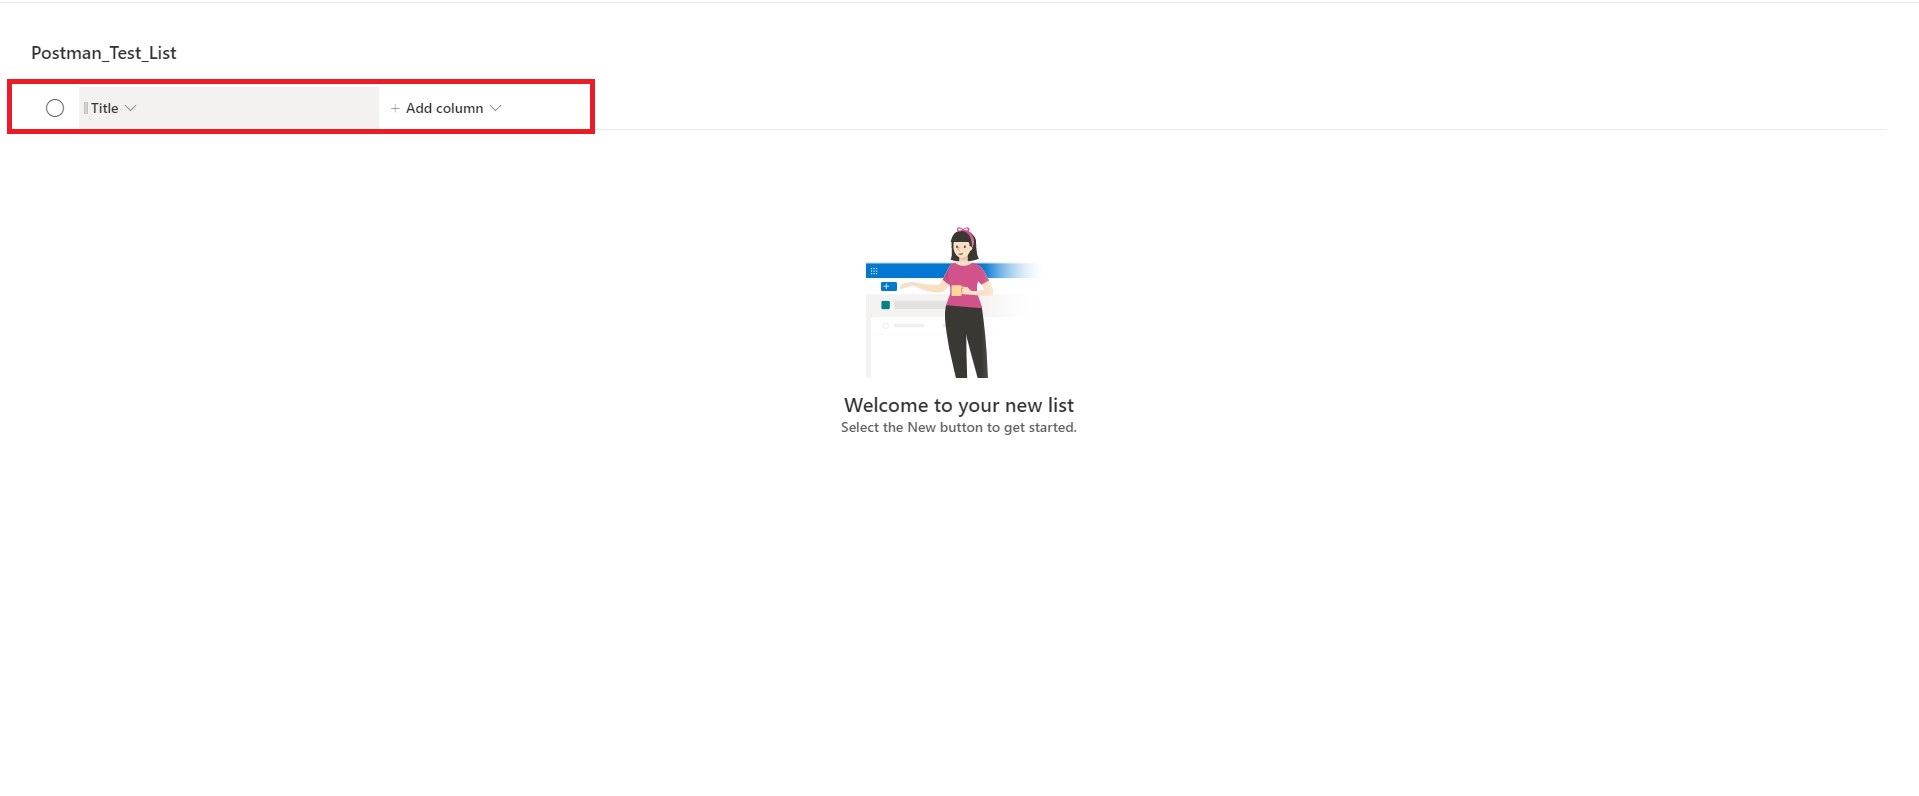
5. We can see, there is only one column “Title”. We will change the view of this list and show another column “ID” in this view.
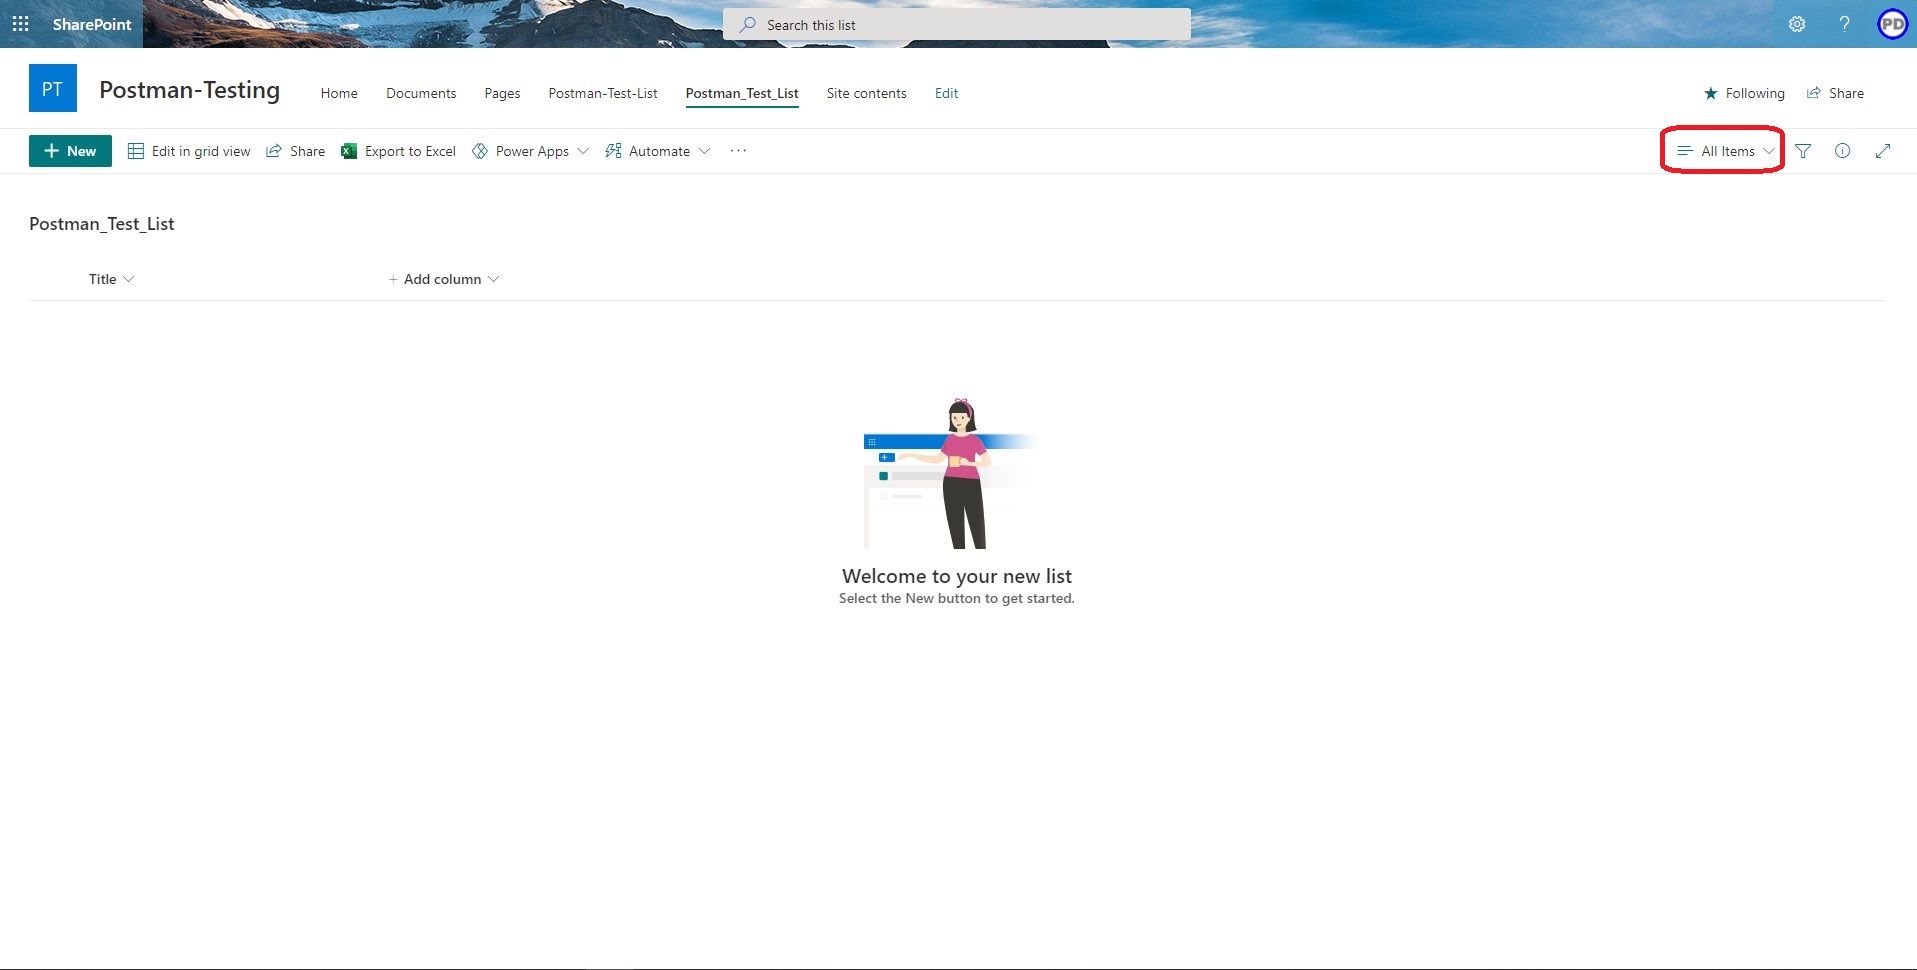
6. To Change View, we will click on the “All Items” dropdown on Action bar.
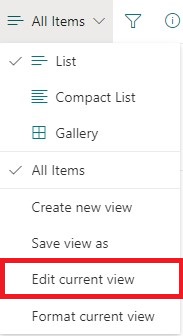
7. From the dropdown menu we will select “Edit Current View”
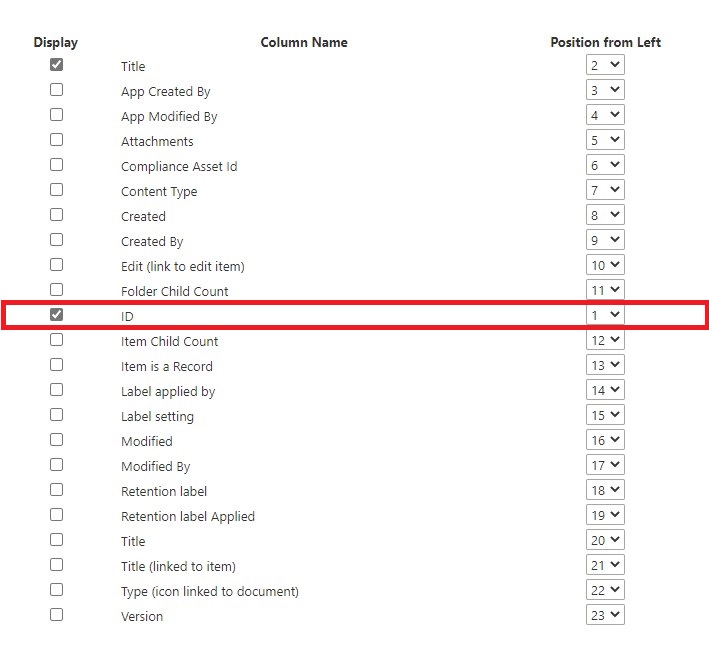
8. Here we will select the column we want to show. We will check the “ID” column and change its “Position from Left” to 1.
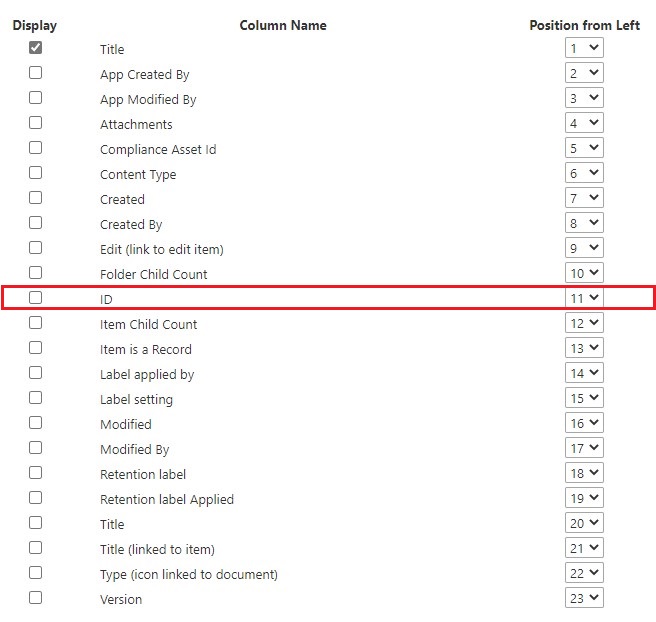
After checking and changing position of “ID” your settings should look like this:
9. Now Click on “OK” button on the top right corner of the Page.
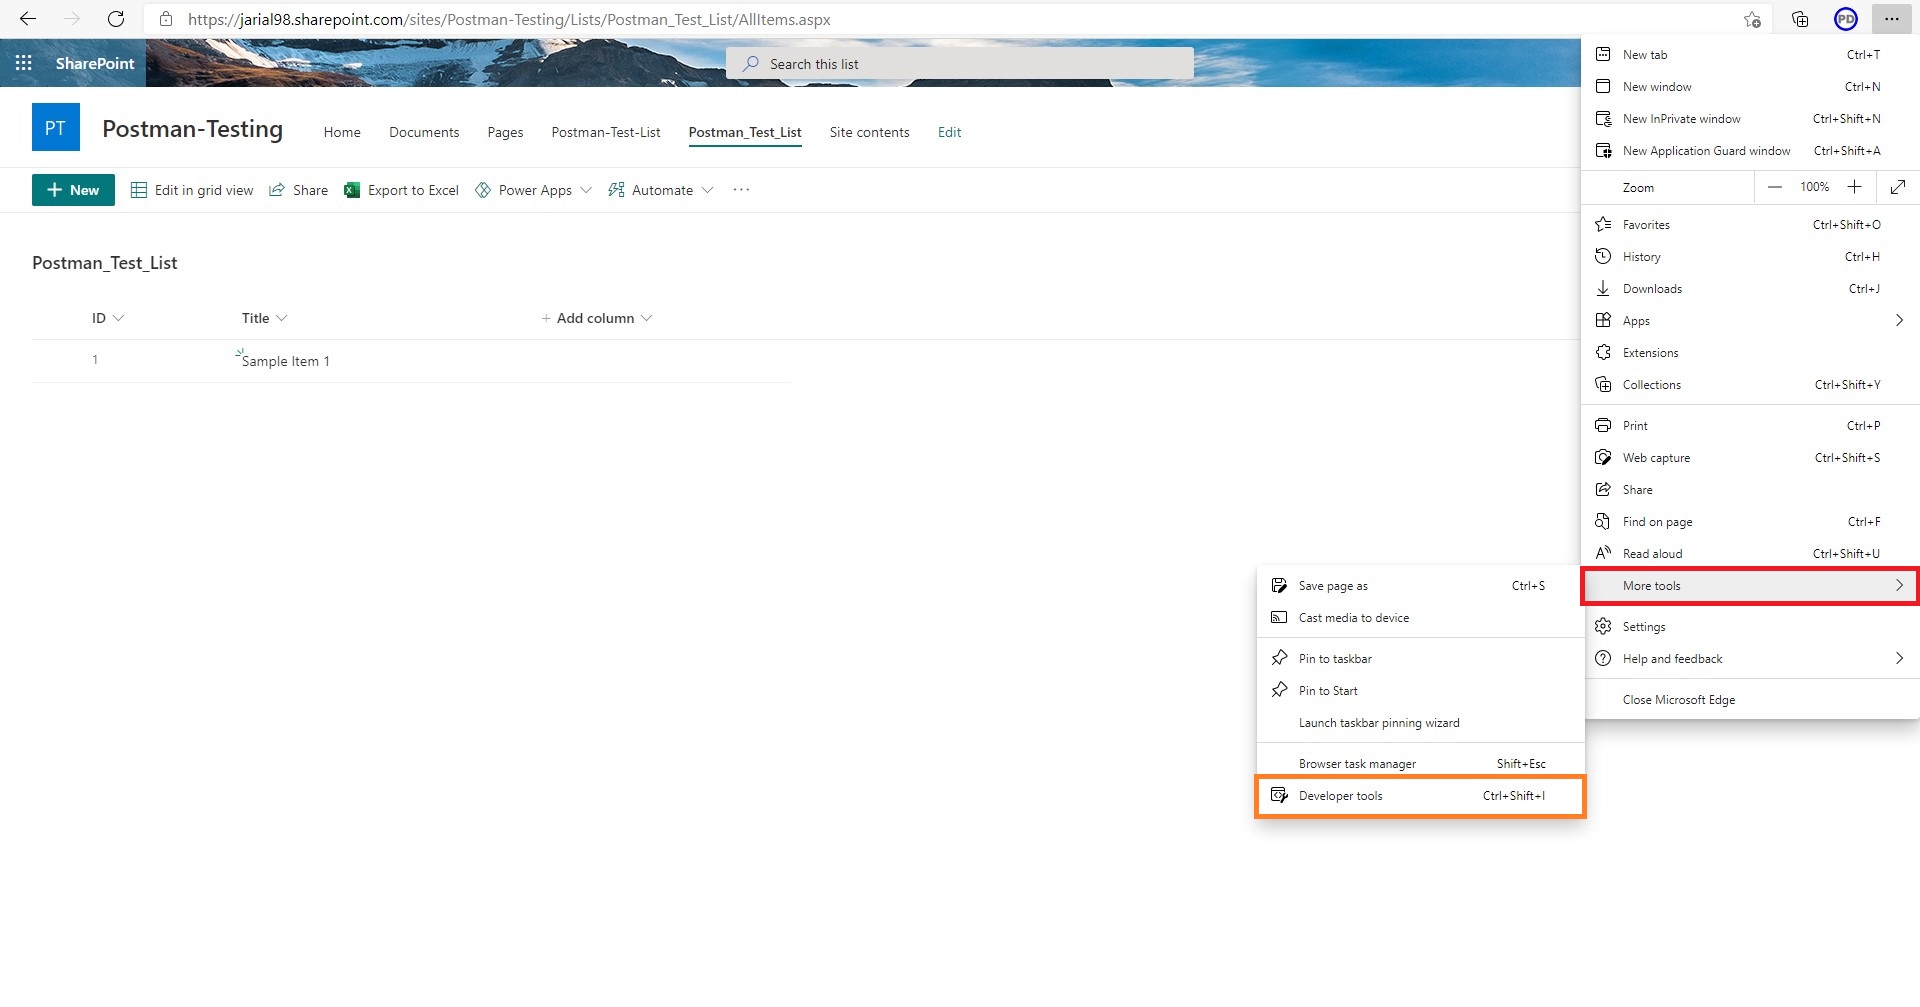
10. After Clicking on “OK”, we will see the “ID” column has been added to the left.
We are ready with our list called “Postman_Test_List” for further experimenting.
We will focus on getting the cookies that we need for our API calls. Follow the below steps:

2. Next select “More Tools” and then “Developer Tools”. Prefer using Microsoft Edge or Chrome browser for this activity.
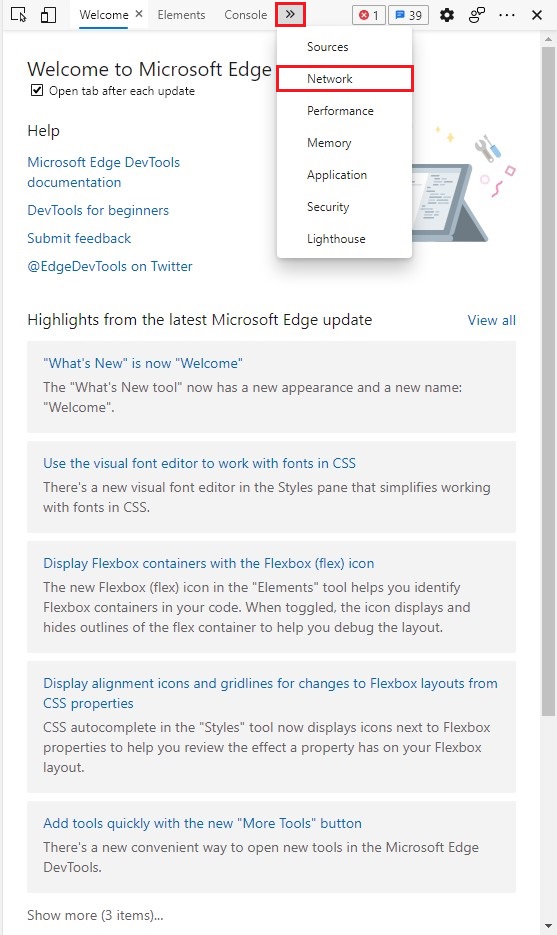
3. We need to see network calls in order to get our cookie details. Click on the double right arrow chevron “>>” and then click on Network as shown below:
4. We need to filter Network calls to get the specific call.
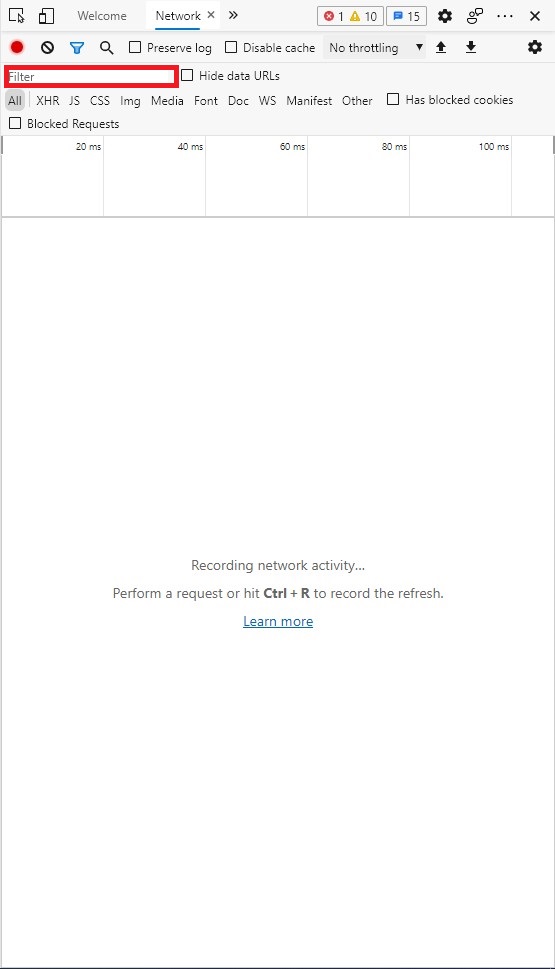
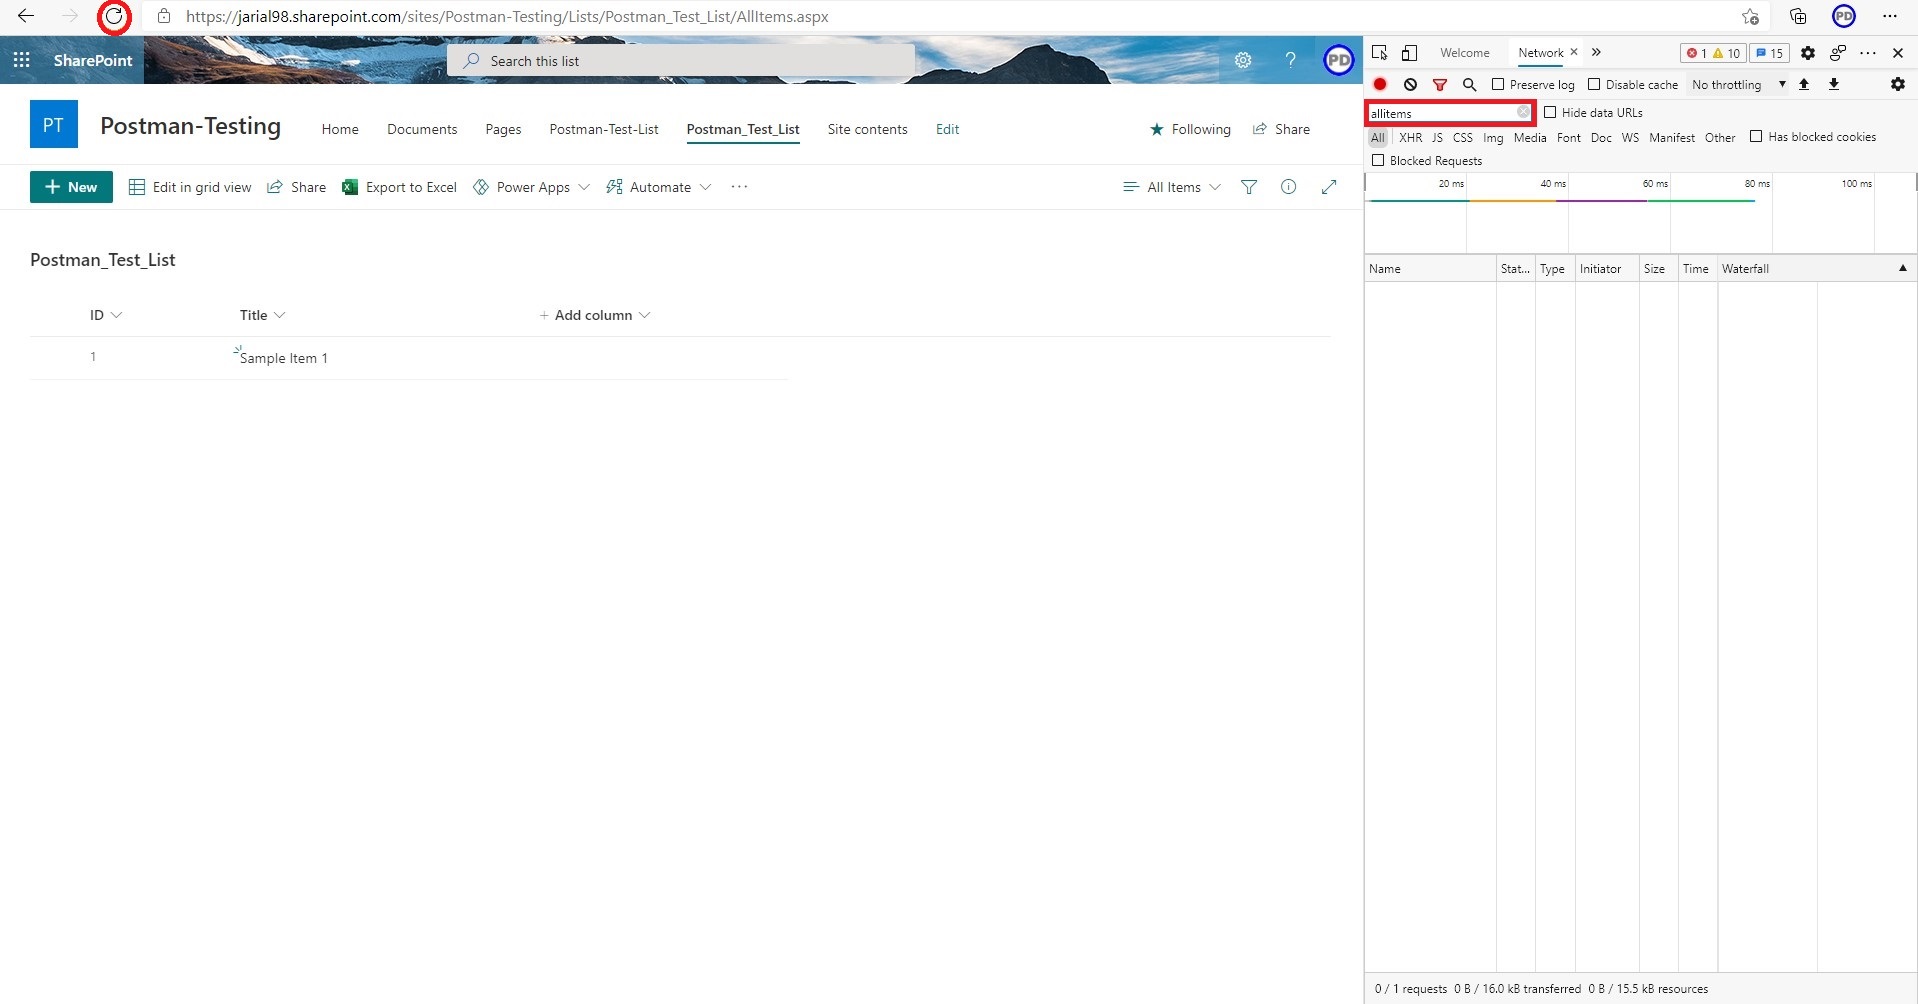
5. We will type “AllItems” in Filter Input Field and then we will refresh the page to get the network calls. Note: This is the name of the view in the url as AllItems.aspx.
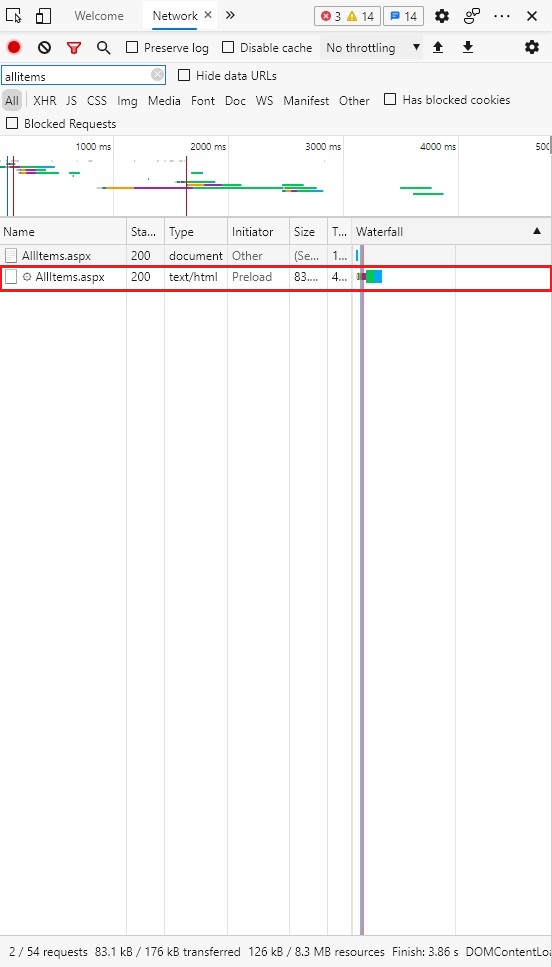
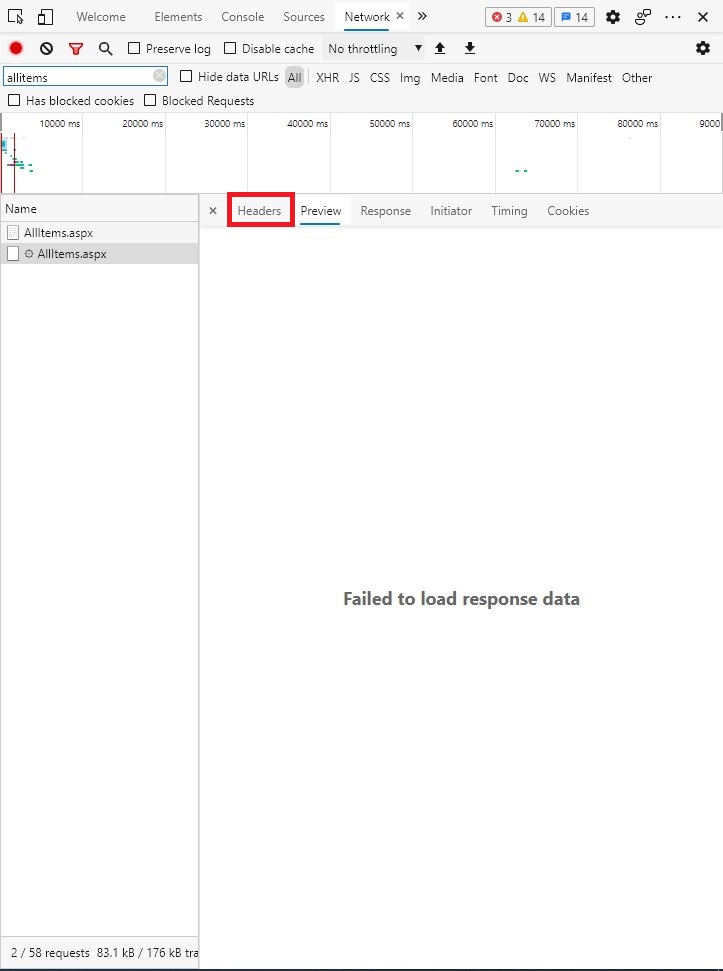
6. After refreshing the page, we will get 2 “AllItems” calls in our network tab. We will select the row by clicking on it once where Type column is “text/html”.
7. By default, we will be in the “Preview” tab. We need to go to the “Headers” tab by clicking on it as shown below:
8. To find cookies, we have to scroll down until we find “Set-Cookie”. We will now try to copy two cookies from here named “rtfa” and “FedAuth”. Copy the values in these cookies and paste it in your notepad for further use. Copy the part which is underlined in green. Do not copy the semi-colon at the last.
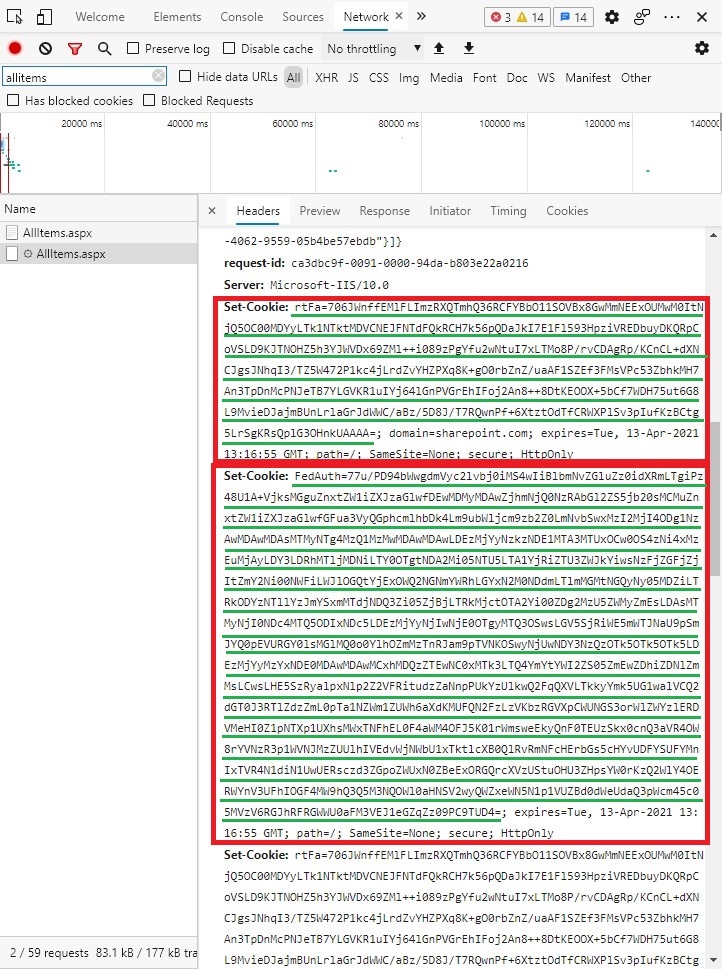
Remember there is an expiration time of these cookies, so keep in mind that if you are testing the API calls after long time you must get these values again.
Note: It is better to copy these values in a notepad, so that if you enter these values in another API call you are not coming to the SharePoint list and doing the same process again and again.
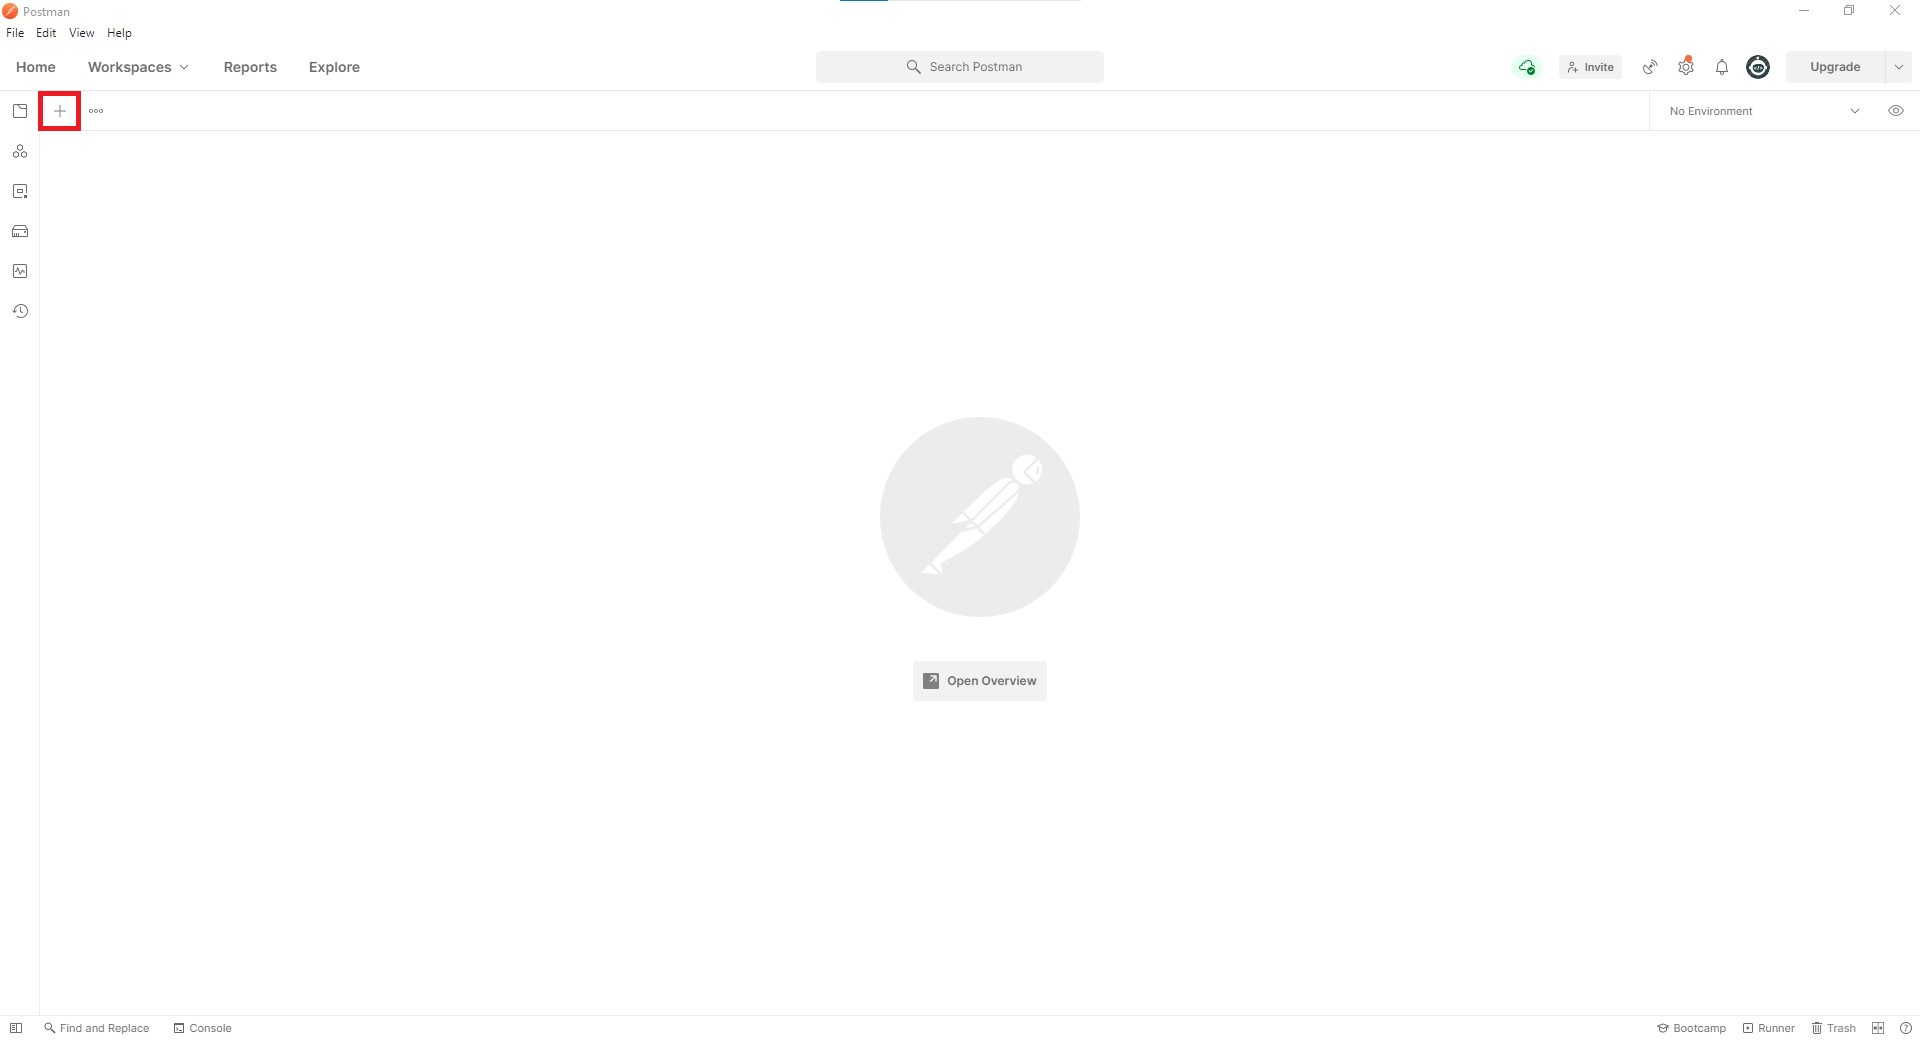
Make sure you have postman installed for your next steps. You can download it from here.
After starting Postman, you will come on this screen and then click on “+” button on top left corner of the window to add a new API request.
We must enter the API request URL, and then in the headers part we must give some headers that will authenticate and validate our API request. We are clearly not going to use the bearer authorization token, instead we are going to use the cookies to authenticate our request.
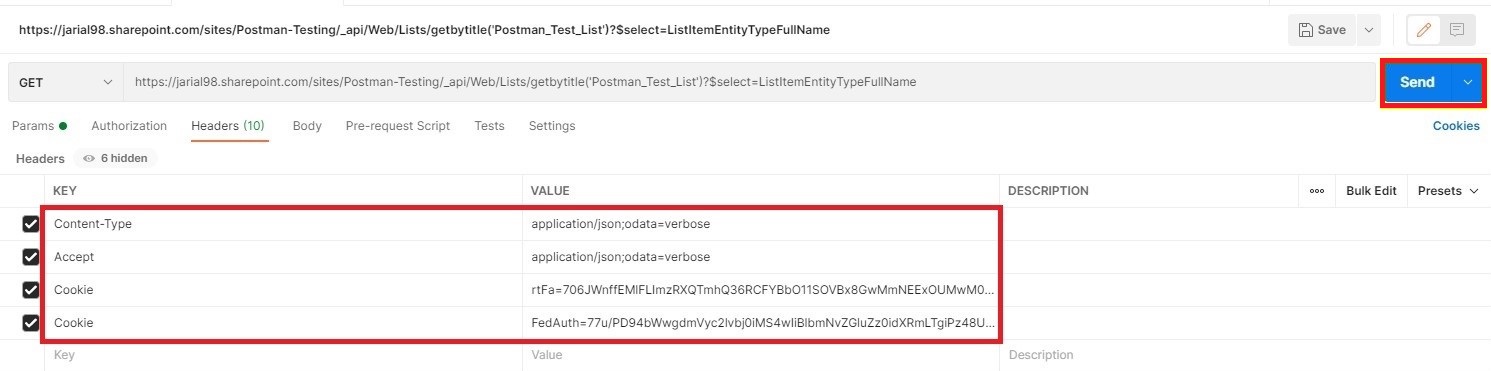
To make the post Request API calls we need “__metadata” of the list. To get the “__metadata” we do a Get request from postman. Which is as below: -

In our scenario above we have used the following request URL:
https://jarial98.sharepoint.com/sites/Postman-Testing/_api/Web/Lists/getbytitle('Postman_Test_List')?$select=ListItemEntityTypeFullName
In your scenario make sure to change the [Sharepoint_Site_Collection_Url] and [List_Name] in your URL as shown below:
https://[Sharepoint_Site_Collection_Url]/ _api/Web/Lists/getbytitle(‘[List_Name ]’)?$select=ListItemEntityTypeFullName
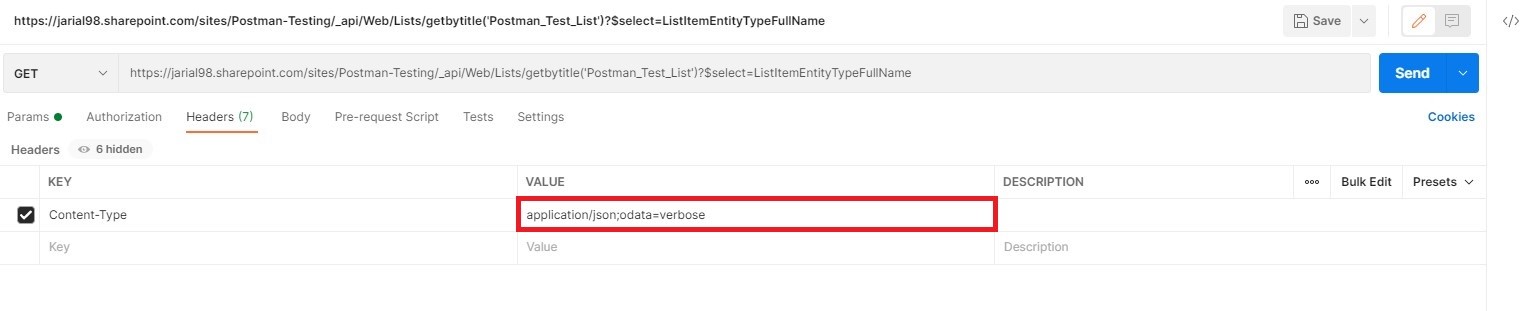
2. We will now set our headers. First, we will configure “Content-Type”. Click on the “Key” field in the Headers and type “Content-Type”.

3. For our “Content-Type” key, we will configure the value as “application/json;odata=verbose” as shown below:
| Key | Value |
| Content-Type | application/json;odata=verbose |
| Accept | application/json;odata=verbose |
| Cookie | rtFa=706JWnffEMlFLImzRXQTmhQ36RCFYBbO11SOVBx8GwMmNEExOUMwM0ItNjQ 5OC00MDYyLTk1NTktMDVCNEJFNTdFQkRCH7k56pQDaJkI7E1Fl593HpziVREDbuyDK QRpCoVSLD9KJTNOHZ5h3YJWVDx69ZMl++i089zPgYfu2wNtuI7xL TMo8P/rvCDAgRp/KCnCL+dXNCJgsJNhqI3/TZ5W472P1kc4jLrdZvYHZPXq8K+gO0rbZn Z/uaAF1SZEf3FMsVPc53ZbhkMH7An3TpDnMcPNJeTB7YLGVKR1uIYj64lGnPVGrEhIF oj2An8++8DtKEOOX+5bCf7WDH75ut6G8L9MvieDJajmBUnLrlaGrJdWWC/aBz/5D8J/ T7RQwnPf+6XtztOdTfCRWXPlSv3pIufKzBCtg5LrSgKRsQplG3OHnkUAAAA= |
| Cookie | FedAuth=77u/PD94bWwgdmVyc2lvbj0iMS4wIiBlbmNvZGluZz0idXRmLTgiPz48U1A +VjksMGguZnxtZW1iZXJzaGlwfDEwMDMyMDAwZjhmNjQ0NzRAbGl2ZS5jb20sMCM uZnxtZW1iZXJzaGlwfGFua3VyQGphcmlhbDk4Lm9ubWljcm9zb2Z0LmNvbSwxMzI2M jI4ODg1NzAwMDAwMDAsMTMyNTg4MzQ1MzMwMDAwMDAwLDEzMjYyNzkzNDE 1MTA3MTUxOCw0OS4zNi4xMzEuMjAyLDY3LDRhMTljMDNiLTY0OTgtNDA2Mi05NT U5LTA1YjRiZTU3ZWJkYiwsNzFjZGFjZjItZmY2Ni00NWFiLWJlOGQtYjExOWQ2NGNmYW RhLGYxN2M0NDdmLTlmMGMtNGQyNy05MDZiLTRkODYzNTllYzJmYSxmMTdjNDQ3 Zi05ZjBjLT RkMjctOTA2Yi00ZDg2MzU5ZWMyZmEsLDAsMTMyNjI0NDc4MTQ5ODIxNDc5LDEzM jYyNjIwNjE0OTgyMTQ3OSwsLGV5SjRiWE5mWTJNaU9pSmJYQ0pEVURGY0lsMGlMQ 0o0YlhOZmMzTnRJam9pTVNKOSwyNjUwNDY3NzQzOTk5OTk5OTk5LDEzMjYyMzYx NDE0MDAwMDAwMCxhMDQzZTEwNC0xMTk3LTQ4YmYtYWI2ZS05ZmEwZDhiZDN lZmMsLCwsLHE5SzRyalpxNlp2Z2VFRitudzZaNnpPUkYzUlkwQ2FqQXVLTkkyYmk5UG1 walVCQ2dGT0J3RTlZdzZmL0pTa1NZWm1ZUWh6aXdKMUFQN2FzLzVKbzRGVXpCWUN GS3orWlZWYzlERDVMeHI0Z1pNTXp1UXhsMWxTNFhEL0F4aWM4OFJ5K01rWmsweE kyQnF0TEUzSkx0cnQ3aVR4OW8rYVNzR3p1WVNJMzZUUlhIVEdvWjNWbU1xTktlcXB 0QlRvRmNFcHErbGs5cHYvUDFYSUFYMnIxTVR4N1diN1UwUERsczd3ZGpoZWUxN0Z BeExORGQrcXVzUStuOHU3ZHpsYW0rKzQ2WlY4OERWYnV3UFhIOGF4MW9hQ3Q5 M3NQOWl0aHNSV2wyQWZxeWN5N1p1VUZBd0dWeUdaQ3pWcm45c05MVzV6R GJhRFRGWWU0aFM3VEJ1eGZqZz09PC9TUD4= |
Let us understand what these headers are for.
Content-Type: This is the header which Tells the SharePoint that the request is coming with JSON data.
Accept: This header tells SharePoint that we need the result in JSON format and odata means we need maximum data to be returned from the result.
Cookie: - These will contain two cookies namely, “rtfa” and “FedAuth”.
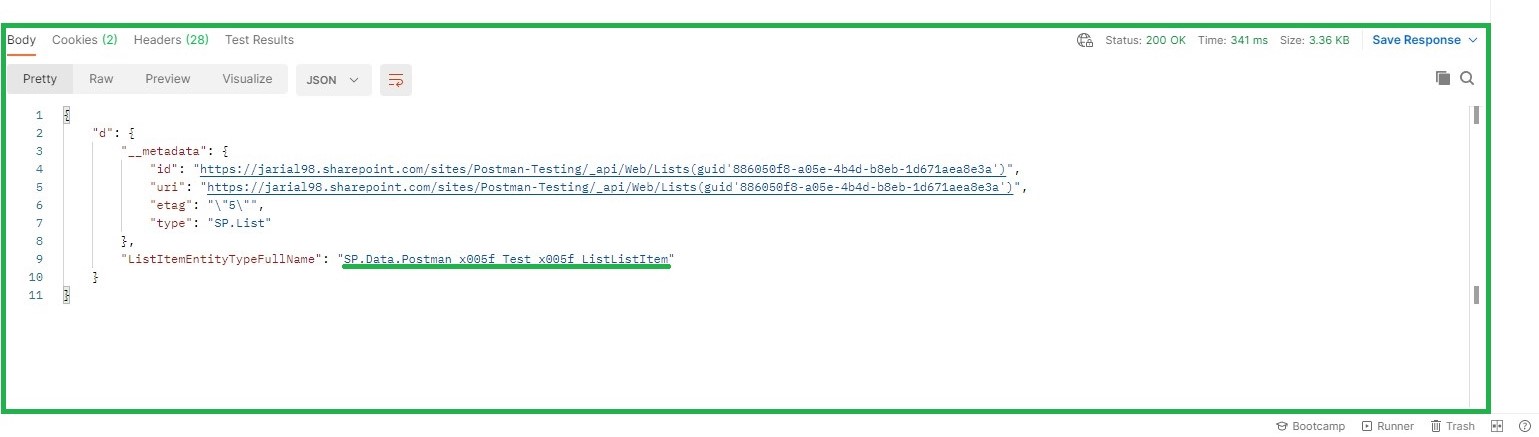
5. Click on “Send” button on the right of the URL Field. We will get a response with status code of “200”. This is our “__metadata”. Copy the part which is underlined in green and paste it in notepad for further use.
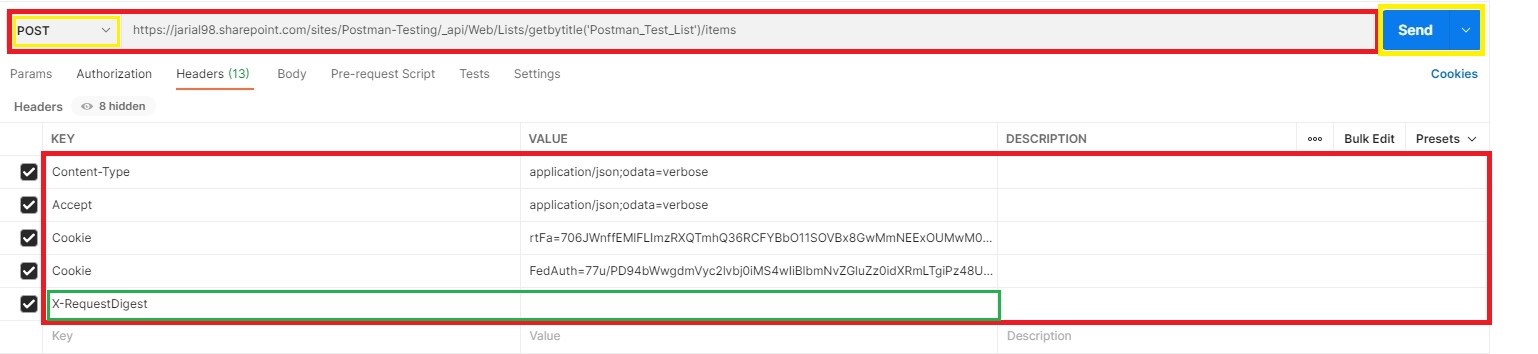
There is one more key that we need to configure in Header. It is called X-RequestDigest.
This header authenticates all the requests that are made to SharePoint except Get requests. The value of X-RequestDigest expires soon, so we need to get the value again and again to do our API calls. It is a good option to save our request so that we can easily go there and get the updated X-RequestDigest values.
Please make sure to keep previous headers as configured in the above steps as is. Follow the next steps as below:
After entering the relevant data click on “Send”.
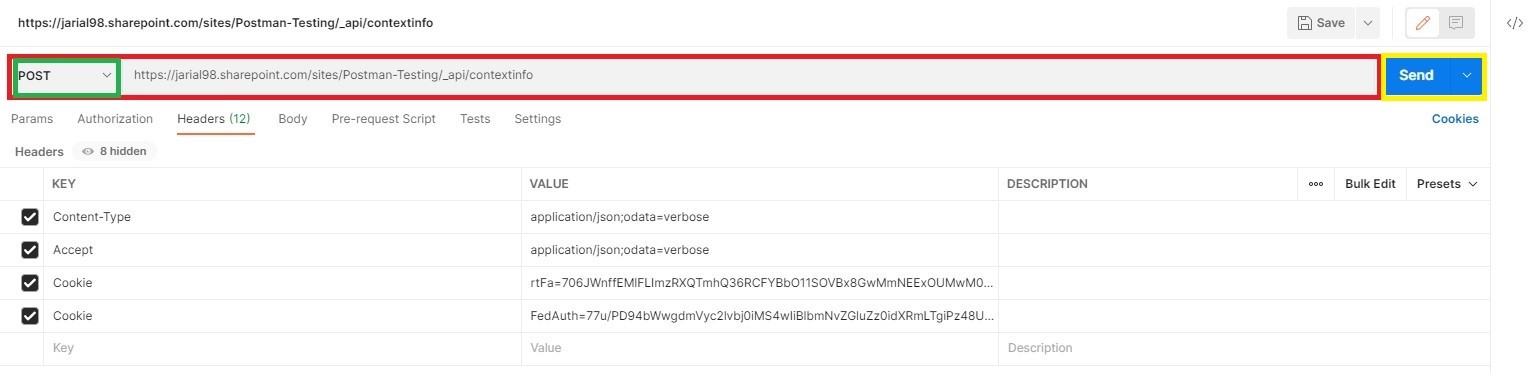
In our scenario above we have used the following request URL:
https://jarial98.sharepoint.com/sites/Postman-Testing/_api/contextinfo
In your scenario make sure to change the [Sharepoint_Site_Collection_Url] in your URL as shown below:
https://[Sharepoint_Site_Collection_Url]/_api/contextinfo
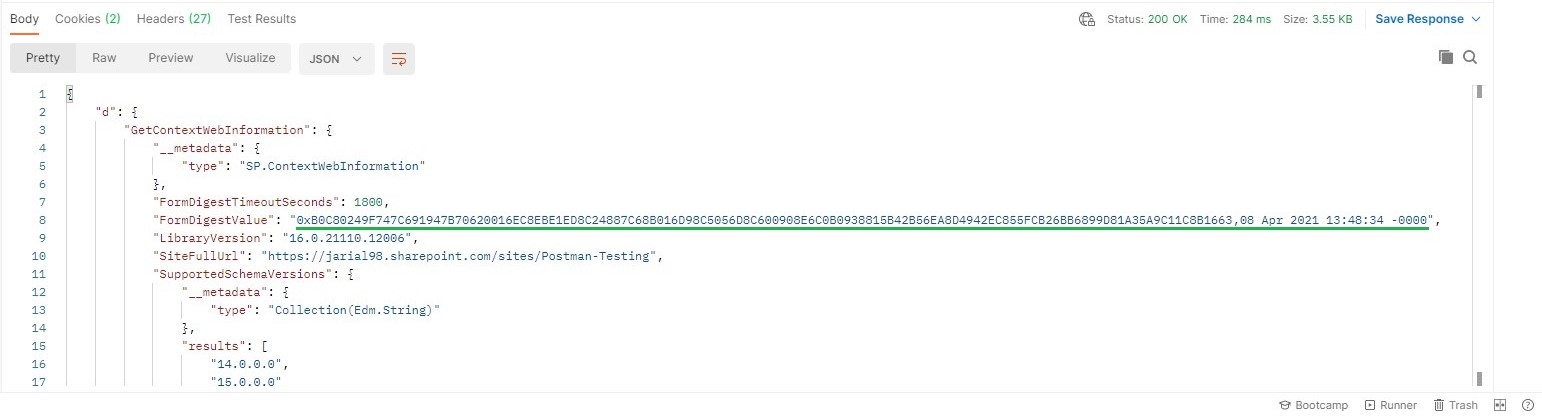
2. We will get a response and will copy the “FormDigestValue”. This is our “X-RequestDigest” header. Copy the value which is underlined in green and save this in notepad.
Note: - Form Digest Value has an expiration time of 1800 seconds. So, we have to do this request again when this value is expired.
Now, we have all the headers we need to make API requests.
Now we will make our first API call to get the items from the SharePoint List. We will use the getbytitle API option available in the Lists API from SharePoint. For more details refer to the documentation here.
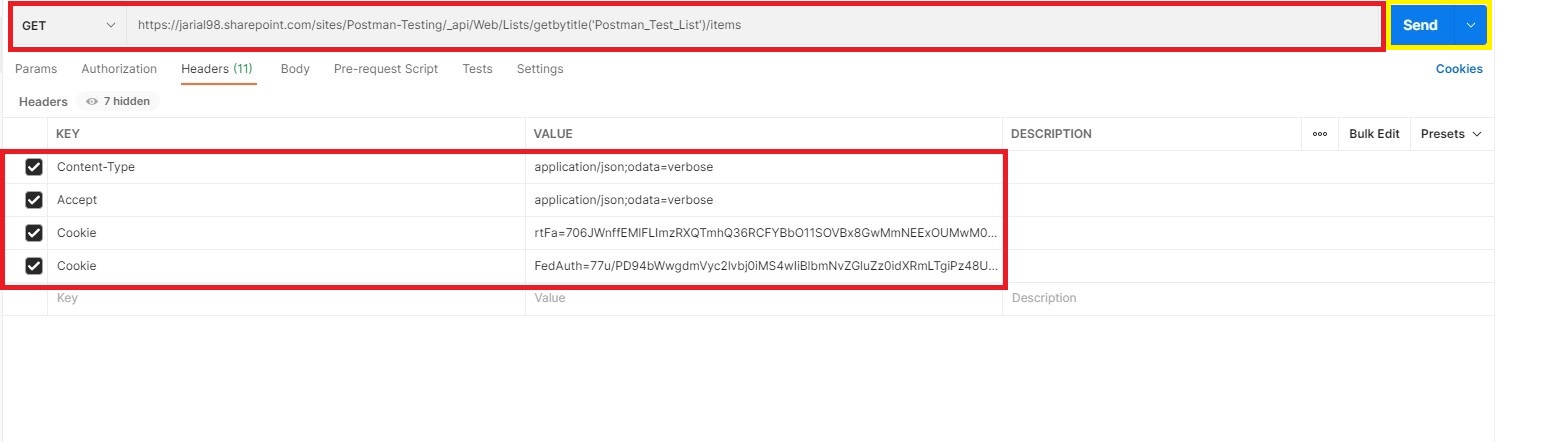
In our scenario above we have used the following request URL:
https://jarial98.sharepoint.com/sites/Postman-Testing/_api/Web/Lists/getbytitle('Postman_Test_List')/items
In your scenario make sure to change the [Sharepoint_Site_Collection_Url] and [List_Name] in your URL as shown below:
https://[ Sharepoint_Site_Collection_Url]/_api/Web/Lists/getbytitle(‘[List Name]’)/items
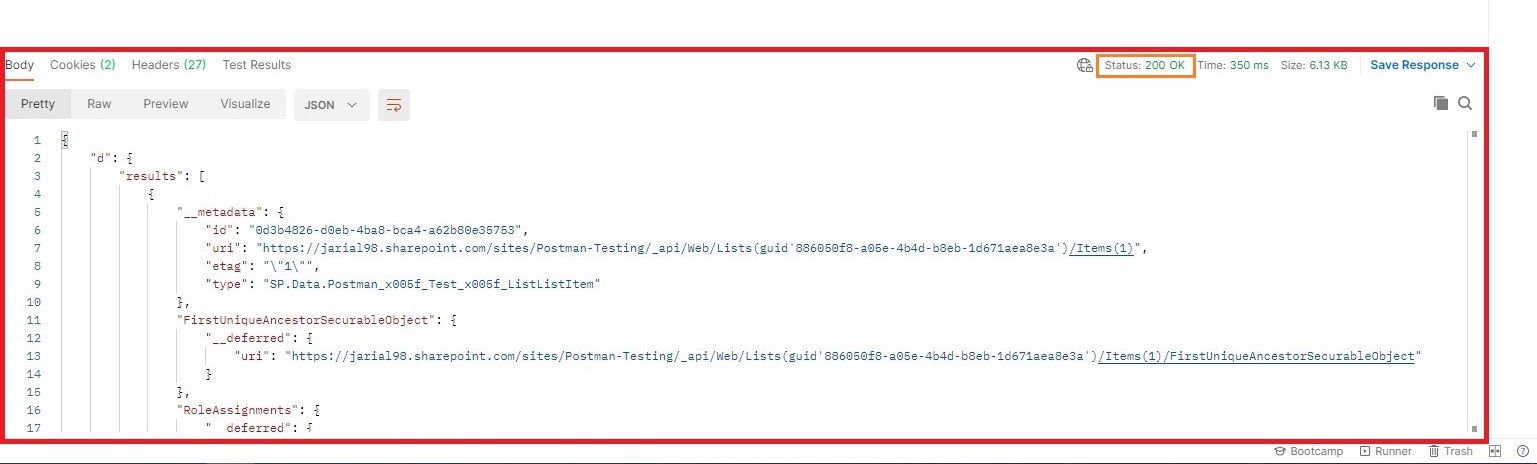
2. We will get response with Status of “200”. Which means our request was successful and the response will contain all the items from our “Postman_Test_List” list.
The URL endpoint from SharePoint REST API for creating an item is the same as it is for reading an item. The difference is in the nature of “request type” and other information that needs to be sent along as a POST request. Follow the below steps to create a single item in SharePoint list:
X-RequestDigest | 0x68636B840B370DEC00213AC2C1A66C14F97C6DACC22815FFD27A0D3804D70793B1EB6B911969BDD03387F81212EA631722E66FD9C8A219755B0C97655BE906D0,08 Apr 2021 14:21:18 -0000 |
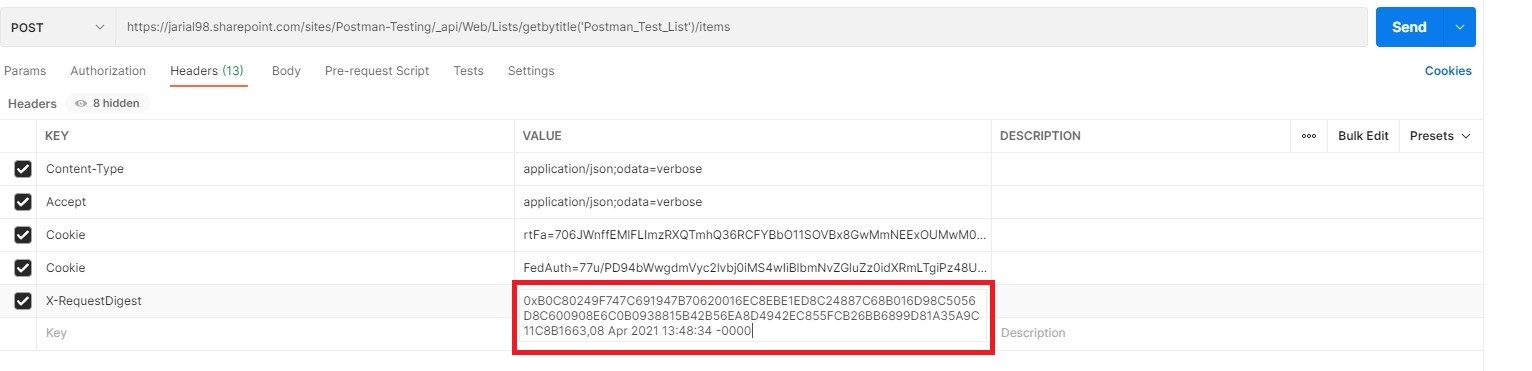
The “X-RequestDigest” header is used here because this is a POST request, and we need to validate this request. Every other header is same as above calls i.e Reading Items.
In our scenario above we have used the following request URL:
https://jarial98.SharePoint.com/sites/Postman-Testing/_api/Web/Lists/getbytitle('Postman_Test_List')/items
In your scenario make sure to change the [Sharepoint_Site_Collection_Url] and [List_Name] in your URL as shown below:
https://[Sharepoint_Site_Collection_Url]/ _api/Web/Lists/getbytitle([List Name])/items
This is a POST request, so we need to send our Sharepoint list item data in the body of the request.
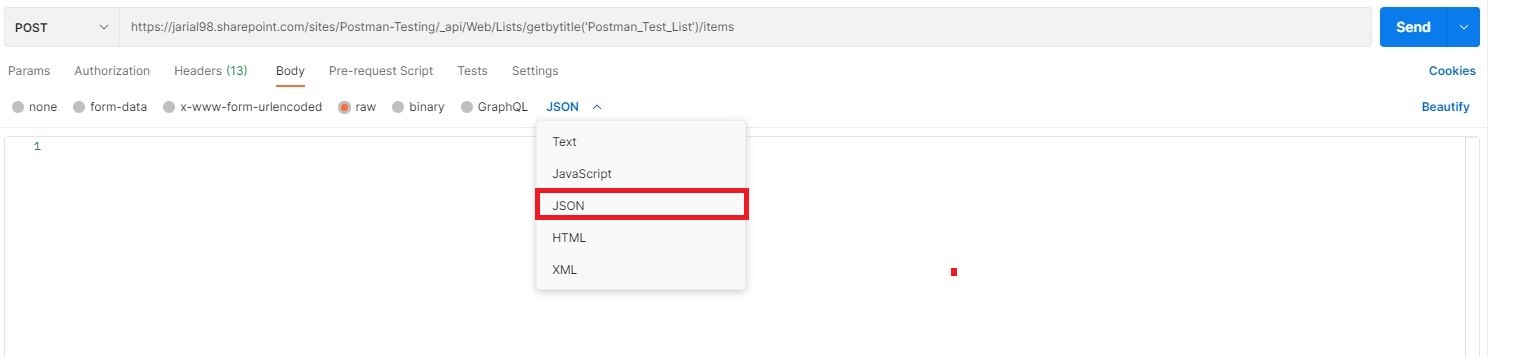
2. Just below the URL field, we are having various options. We will select “body” and then select “Raw” radio button.

3. After Clicking on “Raw” radio button, we will select on what format we want to send the data. Select “JSON” from the dropdown list.
4. Now we need to write the body of the Request. Which looks like this.
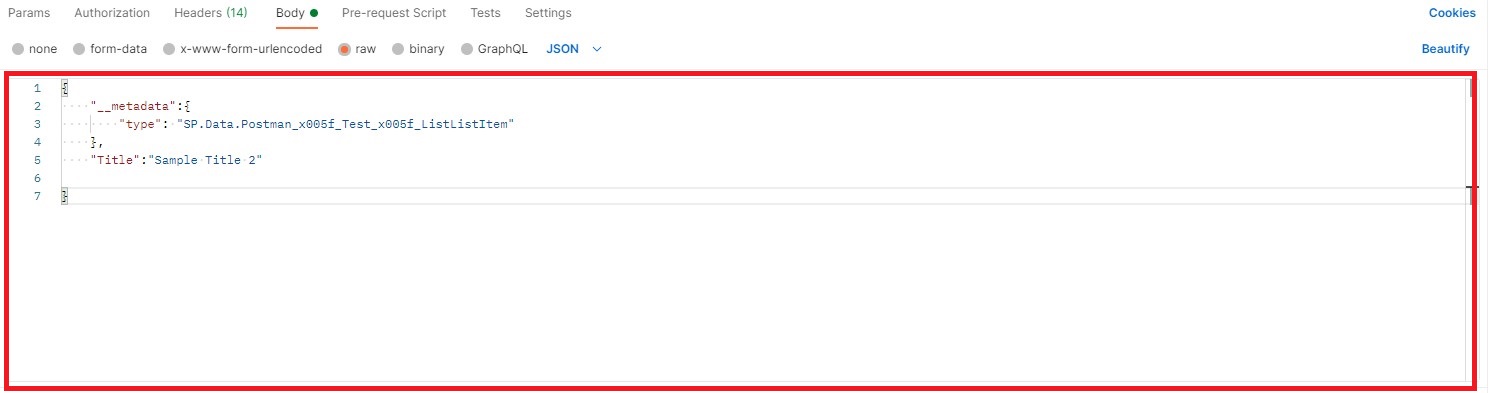
“__metadata”: This is the metadata of the List. We got this by following steps above to get “__metadata”. We will paste the “ListItemEntityTypeFullName” value that we pasted in Notepad earlier.
Title: This is the data that we will send in the “Title” column of our SharePoint list.
{
"__metadata":{
"type": "SP.Data.Postman_x005f_Test_x005f_ListListItem"
},
"Title":"Sample Title 2"
}
Let us hypothetically imagine that your SharePoint list had another single line of text column called “Country”. If we were to send “India” as our value, our body request should look like this:
{
"__metadata":{
"type": "SP.Data.Postman_x005f_Test_x005f_ListListItem"
},
"Title":"Sample Title 2",
“Country”:”India”
}
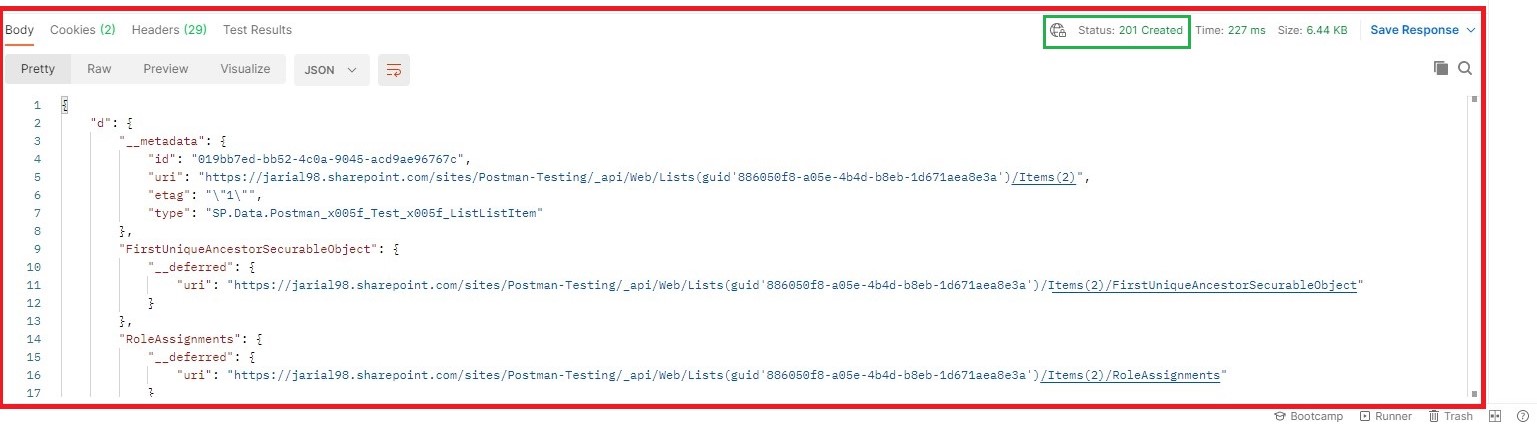
After entering the body, click on “Send” button.
5. We will get a response, with the Status number “201”.
6. To Confirm whether the item has created or not, we will go back and check our list.
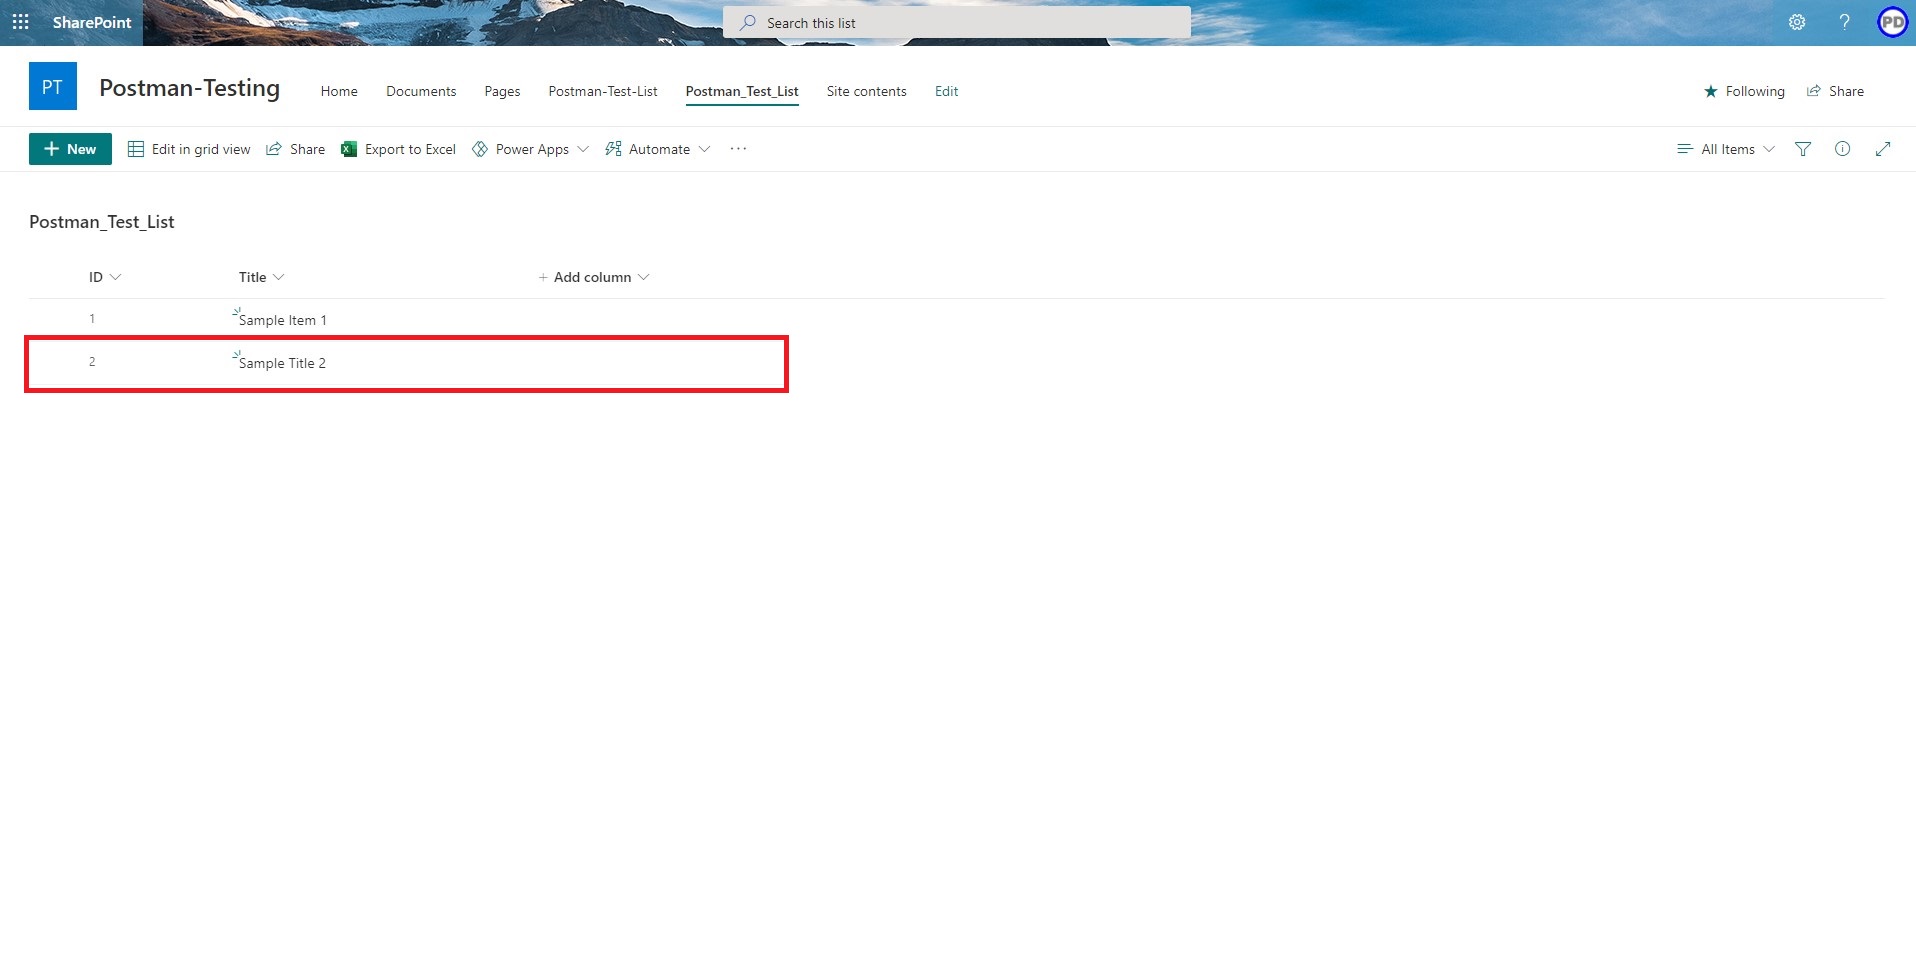
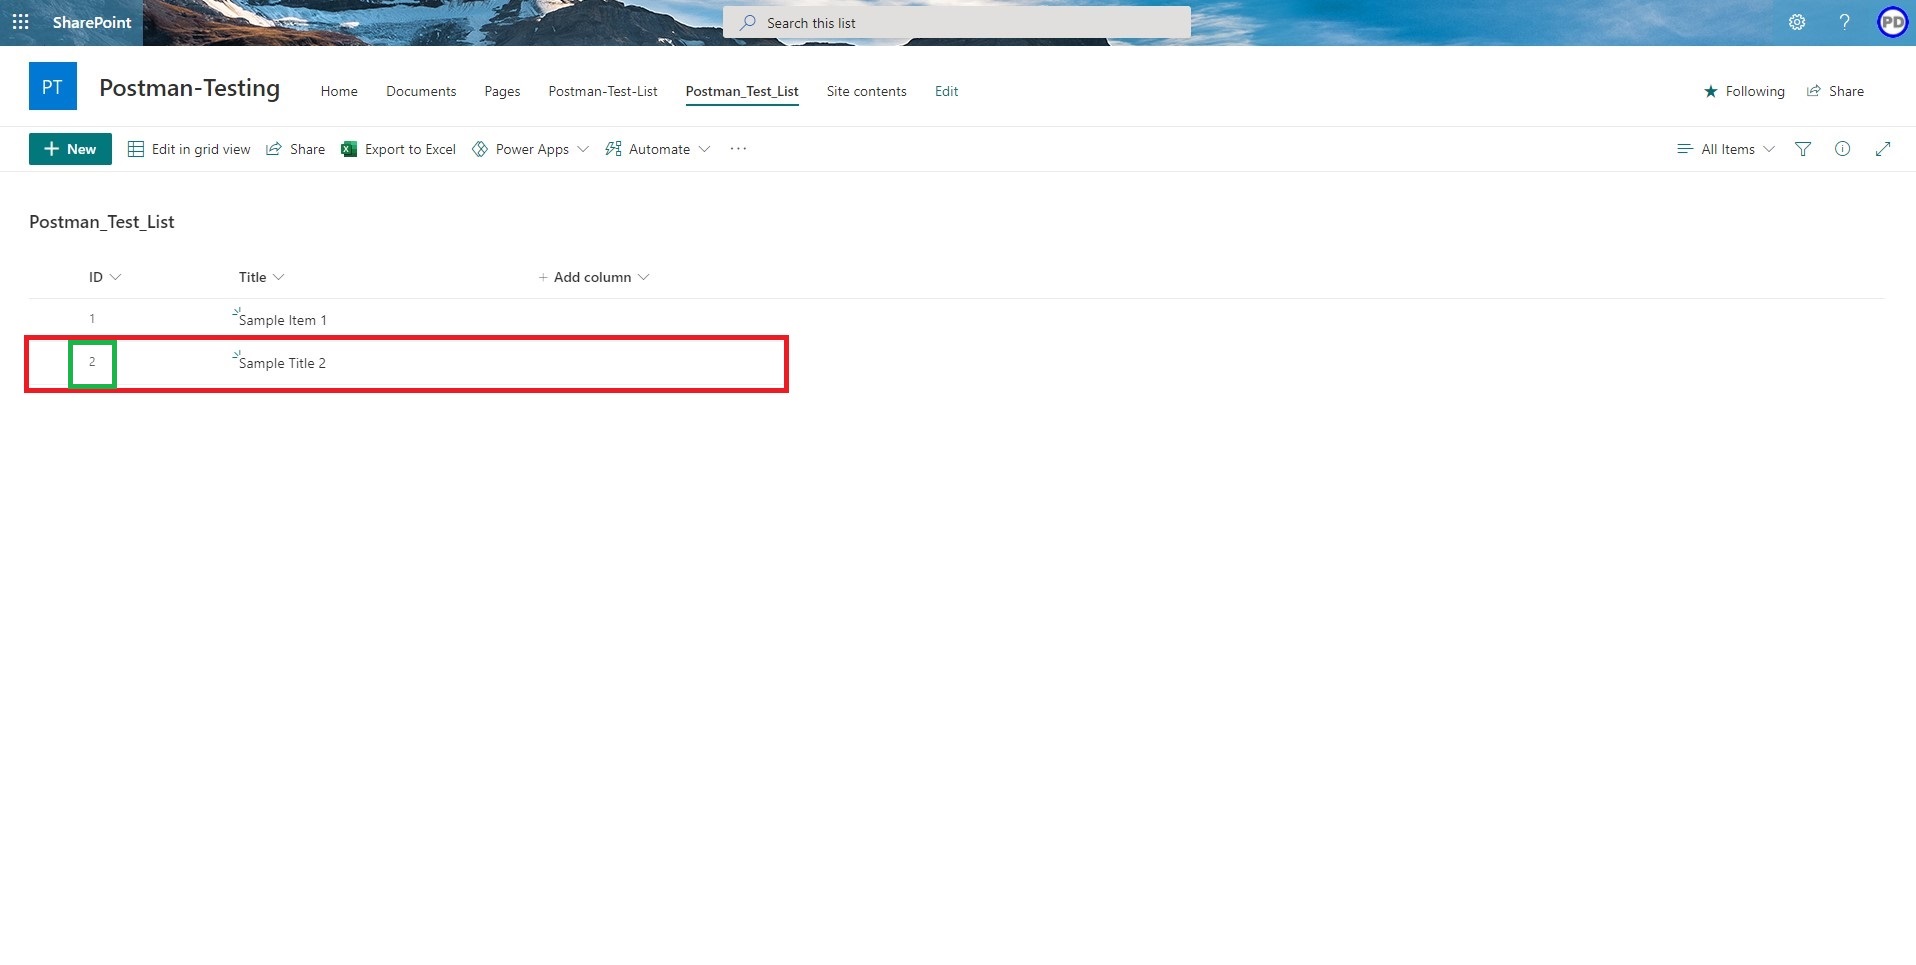
We will update a particular item in our SharePoint list. To get that item, we need to get its ID. So, we will navigate back to our SharePoint List and grab the ID of the item to be updated. In our case we are going to update the item with “ID” 2.
Update request is identical to Create request. There are only two new Headers that will be included, and the body of the request will be same as create item’s body. This is a POST request.
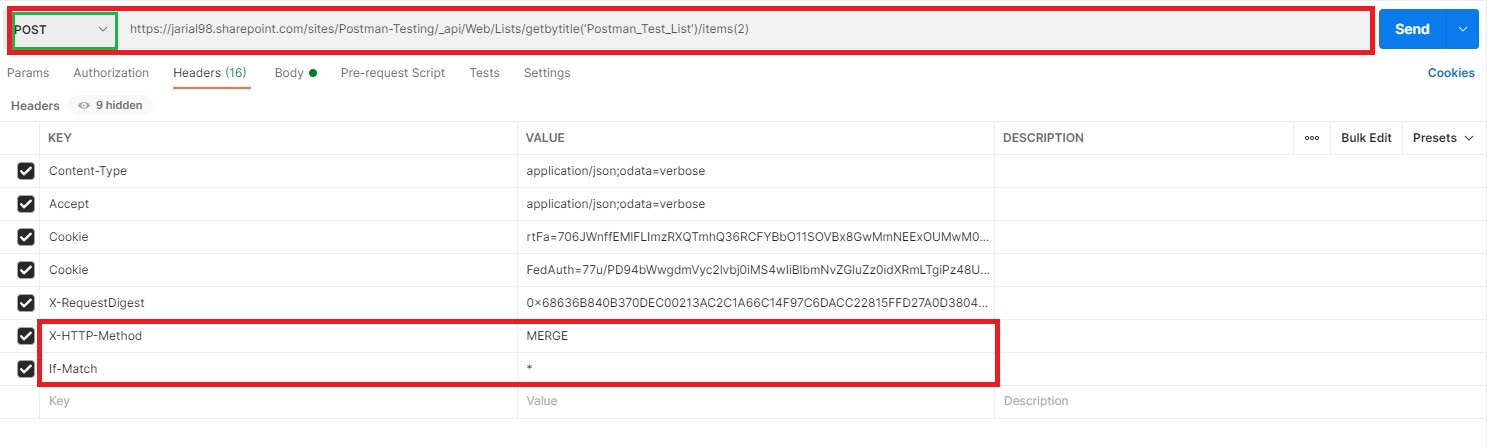
There are two new headers, X-HTTP-Method and If-Match
X-HTTP-Method: This basically means what type of request it is. Why we are not using Patch and Delete is because in some networks at application layer these requests can be blocked but, POST and GET requests are rarely blocked. You can read more about X-Http-Requests from here.
If-Match: This basically matches the eTag value but here we are not giving the e-tag value we are giving “*”.
X-HTTP-Method | MERGE |
If-Match | * |
In our scenario above we have used the following request URL:
https://jarial98.sharepoint.com/sites/Postman-Testing/_api/Web/Lists/getbytitle('Postman_Test_List')/items(2)
In your scenario make sure to change the [Sharepoint_Site_Collection_Url], [List_Name] and [ID] in your URL as shown below:
https://[Sharepoint_Site_Collection_Url]/ _api/Web/Lists/getbytitle([List Name])/items(ID)

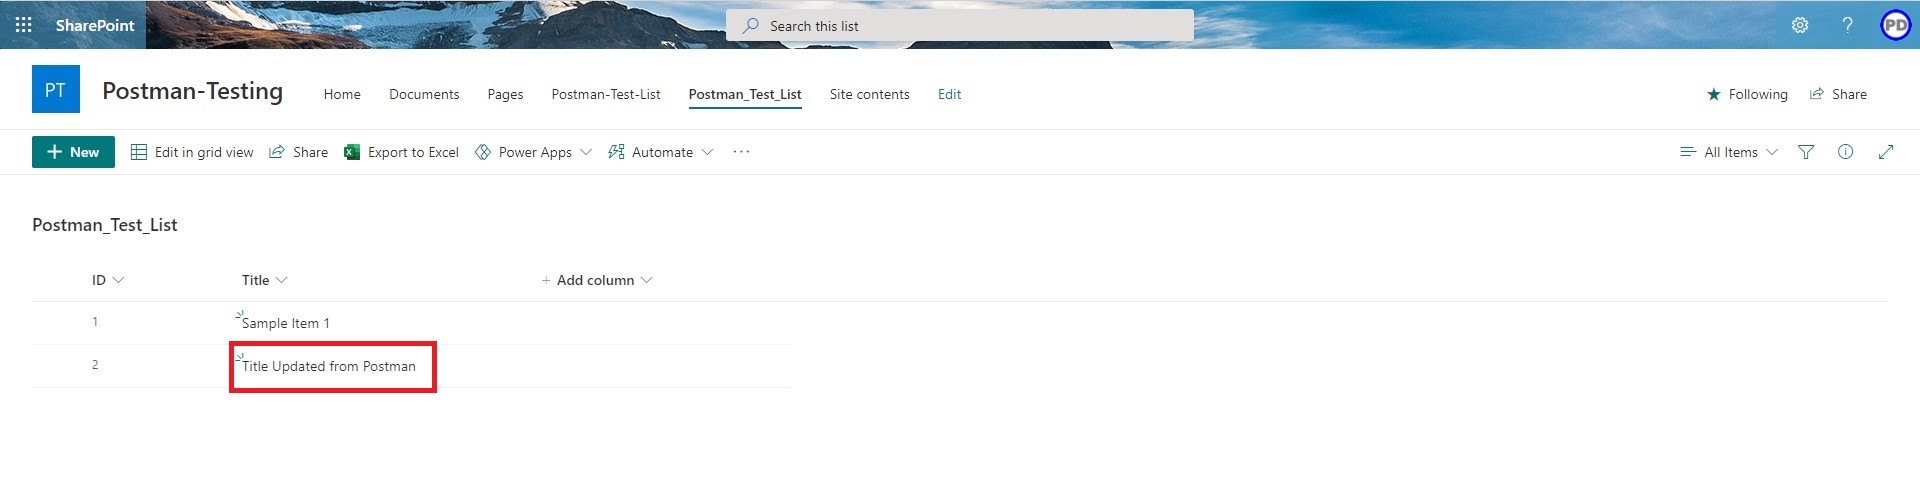
We will get status of “204” because this was an update request, it did not send any data in response.
2. We will go to the SharePoint List to verify the updated item.
We will delete a particular item in our SharePoint list. To get that item, we need to get its ID. So, we will navigate back to our SharePoint List and grab the ID of the item to be deleted. In our case we are going to delete the item with “ID” 2.
All the headers will be same as update request’s Headers. Only the value of “X-HTTP-Method” will be changed to “Delete”.

Key | Value |
X-HTTP-Method | DELETE |
In our scenario above we have used the following request URL:
https://jarial98.sharepoint.com/sites/Postman-Testing/_api/Web/Lists/getbytitle('Postman_Test_List')/items(2)
In your scenario make sure to change the [Sharepoint_Site_Collection_Url], [List_Name] and [ID] in your URL as shown below:
https://[Sharepoint_Site_Collection_Url]/ _api/Web/Lists/getbytitle([List Name])/items(ID)
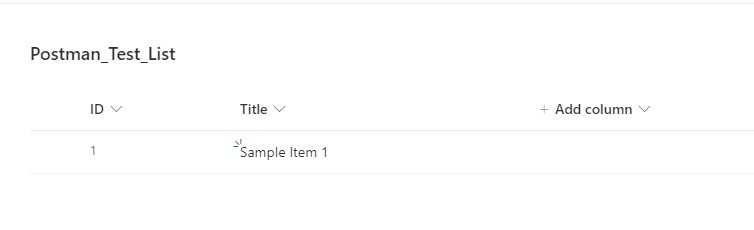
2. After, clicking on “Send” button we will get response with status code of “200”, stating that our request was successful.

3. Now, we will check whether our API call deleted the specified item in SharePoint list.

CEO at Penthara Technologies


Monthly updates, news & events from Microsoft to help your business grow.
 The Most Dangerous Permission in SharePoint Is Hiding in Plain Sight
A hidden SharePoint permission - “Everyone Except External Users” - quietly breaks Zero Trust, exposing internal data and amplifying risk in the age of Copilot.
 What's new in Microsoft | May 2025 Updates
An overview of the latest Microsoft updates for May 2025 covering Microsoft Copilot, Microsoft Teams, SharePoint Online and Microsoft 365 Apps.
 What's new in Microsoft | April 2025 Updates
Monthly updates, news & events from Microsoft to help you & your business grow & get best out the Microsoft services.
excellent work. congratulations
A very informative and detailed explanation. Anybody can easily understand the operations. Kudos to the team. Excellent work
A most excellent tutorial; thorough, precise, and no ambiguity - THANK YOU!